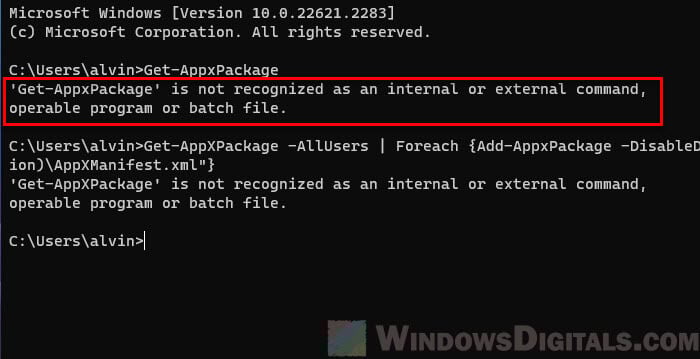
When you need to uninstall, reinstall, or re-register certain system apps on Windows 11 or Windows 10, a lot of people would use the Get-AppxPackage cmdlet. If you are entering a command that involves the Get-AppxPackage cmdlet and you see an error instead: “Get-AppxPackage is not recognized as an internal or external command, operable program or batch file” or “Get-AppxPackage: Access is denied”, this guide will explain why and show you how to sort out these problems.
Also see: Fixing Microsoft Store Error on Windows 11 or 10
Page Contents
Get-AppxPackage is not recognized as an internal or external command
Get-AppxPackage is a PowerShell cmdlet, so you should run it in the PowerShell, not the regular Command Prompt. The error “Get-AppxPackage is not recognized as an internal or external command” usually happens when you try to run it in the Command Prompt by mistake.
PowerShell vs. Command Prompt
PowerShell is a powerful tool for managing systems in Windows, shown in a blue console window, unlike the usual black window of the Command Prompt. The following will show you how they differ.
- PowerShell is often in a blue console window. It has more advanced features for system management. You usually see a
PSat the start of the prompt. Sometimes, it might be in a black window if it’s opened in the new Windows Terminal.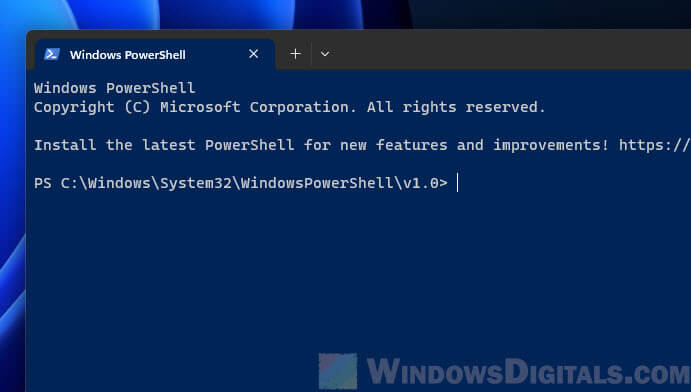
- The Command Prompt is known for its black window. It’s simpler and used for basic Windows commands. The prompt often ends with a
>symbol.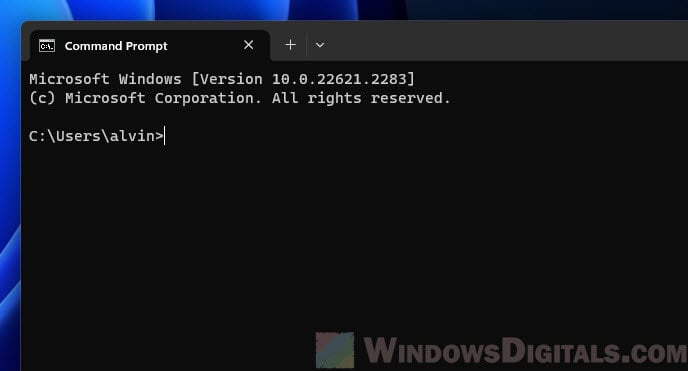
Related resource: Add Folder to Path Environment Variable in Windows 11/10
Open PowerShell correctly
To prevent the “Get-AppxPackage is not recognized” error, make sure you open PowerShell the right way:
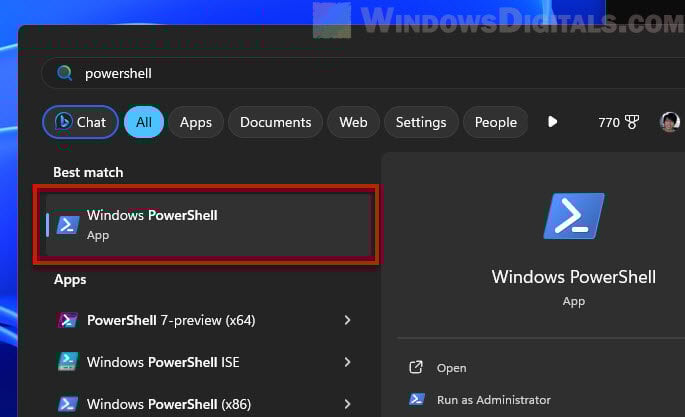
- Click “Start” at the bottom left of your screen.
- Type “PowerShell.” in the search bar.
- Look for options like “Windows PowerShell” or “Windows PowerShell (x86)” and pick the one that fits your system.
- Click the right PowerShell option to open it.
Once you open PowerShell as described, you’ll be set to run the Get-AppxPackage command without the “not recognized” error.
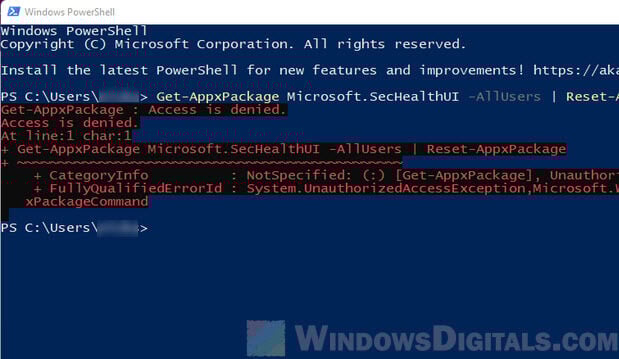
How to fix the “Get-AppxPackage: Access is Denied” error
Even when you’re in PowerShell, you might still see the “Get-Appxpackage: Access is denied” error. This doesn’t happen because you’re in the wrong place, but because you might not have the right permissions to use the command.
Why permissions are sometimes needed in PowerShell
Each command in PowerShell, especially those that change system settings or manage apps, needs certain permissions. These permissions make sure you don’t make changes to your system by accident or on purpose that you shouldn’t.
Useful tip: Run CMD, PowerShell or Regedit as SYSTEM or TrustedInstaller in Windows 11
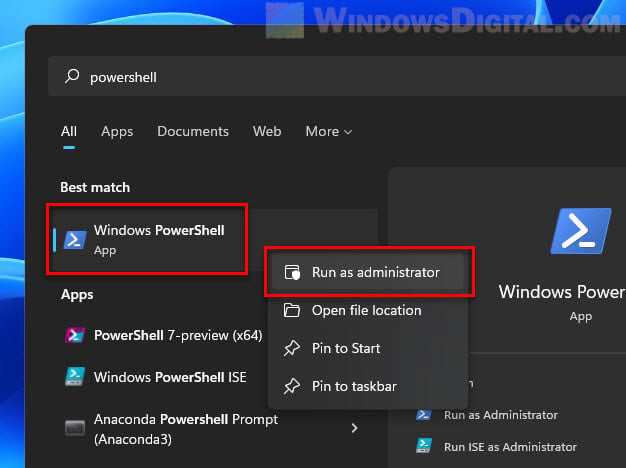
Run PowerShell as administrator
To have the right permissions:
- Press the Start button or Windows key on your keyboard.
- Type “PowerShell” in the search bar.
- Right-click “Windows PowerShell” from the results.
- Select “Run as administrator” from the menu.
After this, you’ll see a prompt asking if you want to let the app make changes to your device. Click “Yes.”

Now, with admin rights, you can run the Get-AppxPackage command without the “Access is denied” error.
A word of caution
When using PowerShell with admin rights, be careful with the commands you use. These permissions allow you to make big changes to your system, some of which can’t be undone.