When you try to change some settings of a registry key, like changing its permission, you might see an error message that says “Access is denied”. This can happen if you don’t have the sufficient permissions to edit that specific key.
In this guide, we’ll show you some other permission errors that you may encounter in regedit, why they occur, how to take ownership of a registry key and fix the issue.
Page Contents
Common errors without permission for a registry key
Here are some errors you might run into if you don’t have the required permission:
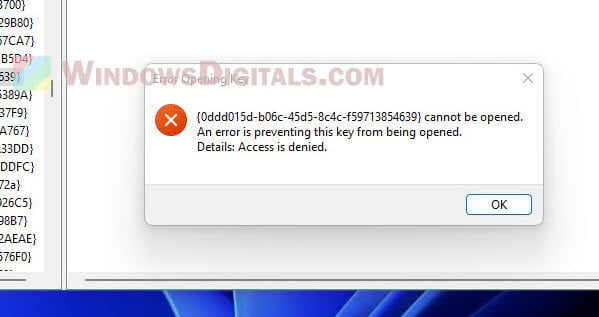
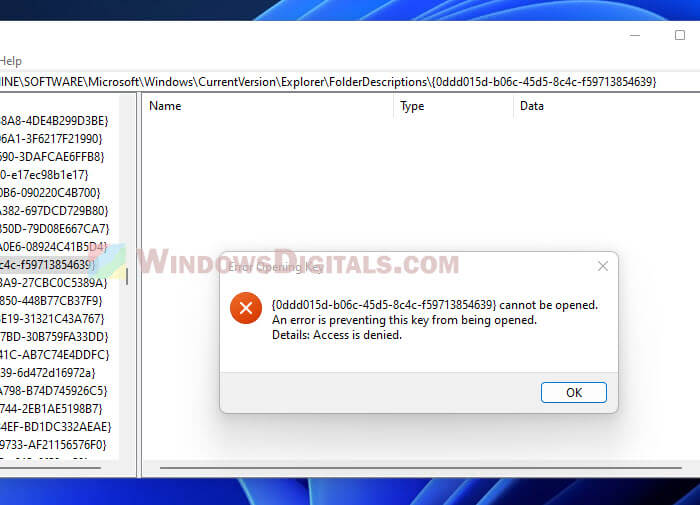
- “Error Opening Key – [registry key] cannot be opened. An error is preventing this key from being opened. Details: Access is denied.” – This pops up when your user account lacks the needed permissions to access a registry key.
- “Windows Security – You do not have permission to view the current permission settings for [registry key], but you can make permission changes.” – This means you can’t see the current permission settings for a registry key because you don’t have the permission.

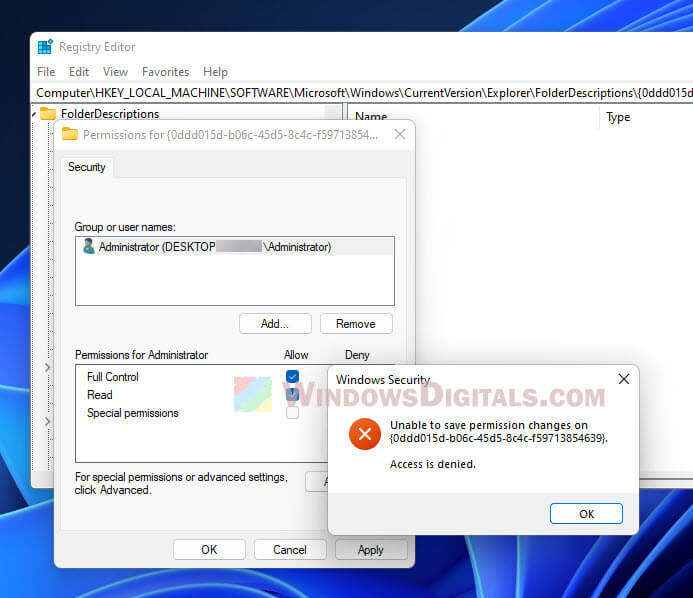
- “Unable to save permission changes on [registry key]. Access is denied” – This shows up if you don’t have the authority to change the permission or set a new owner for a registry key.
Why “Access is denied” pops up in regedit
This error can come up for a few reasons, like:
- If your user account doesn’t have the right permissions to get into or change a registry key, you’ll face this issue. Some keys are owned by the SYSTEM account or TrustedInstaller, and these have higher permissions than even an Administrator account.
- Ownership troubles can also cause problems. Sometimes, a different user or group owning a registry key stops you from getting in or changing it.
- Malware messing with your computer can protect registry keys from being accessed or changed. You’ll need extra steps to reset permissions before you can remove such keys.
Fixing “Access is denied” in Registry Editor
Try to take control of the registry key
First off, if you’re stuck with “Access is denied” while trying to edit or delete a registry key or adjust its permissions, try taking ownership of the registry key. But if you’re still out of luck even as an admin, check out the next solution.
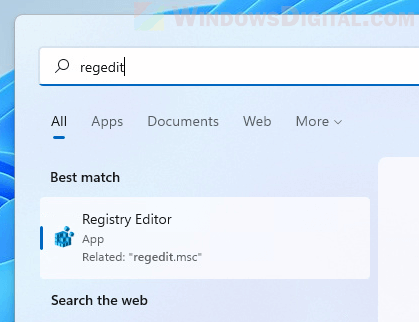
- Look up “Registry Editor” or “Regedit” in the Start menu and open it.
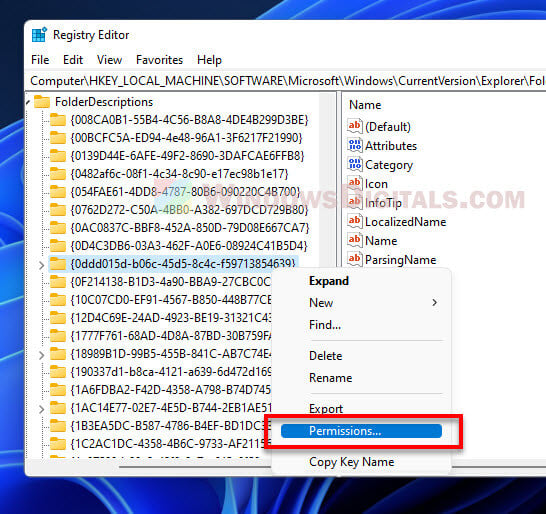
- Find the registry key you want to work on.
- Right-click it and pick “Permissions“.
- Hit the “Advanced” button next.
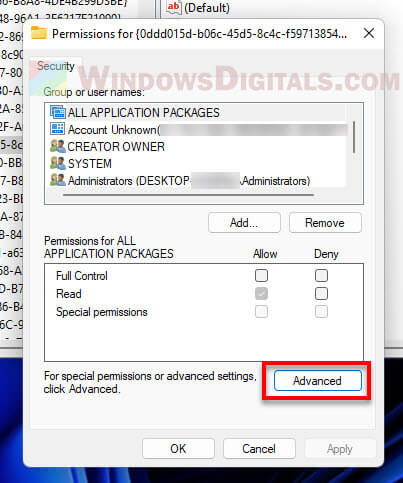
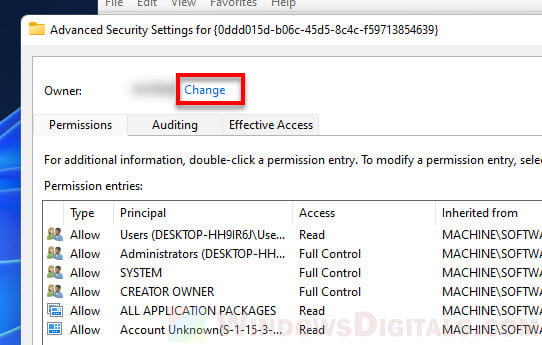
- If it says “Unable to display current owner,” or your account isn’t listed as the owner, click “Change“.
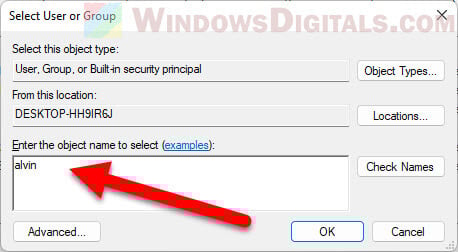
- Type your username in the “Enter the object name to select” box and hit “OK“.
- You should now see your user account as the owner. Tick the “Replace owner on subcontainers and objects” box if you want to own the subkeys too.
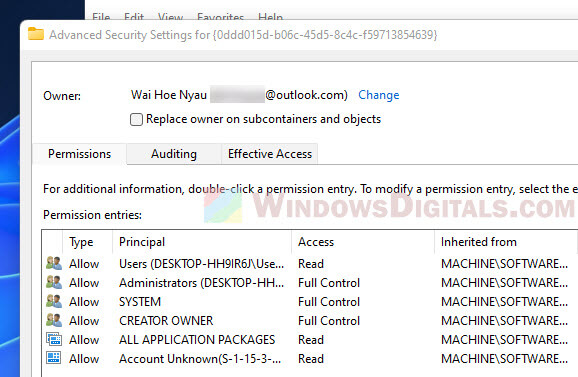
- Press Apply to make it official.
After you’ve claimed the registry key, you can set permissions for specific users or groups to change or remove the registry key. Here’s how:
- In the “Advanced Security Settings” window (reopen it if you closed it), click Add.
- In the Permission Entry window, tap “Select a principal“.
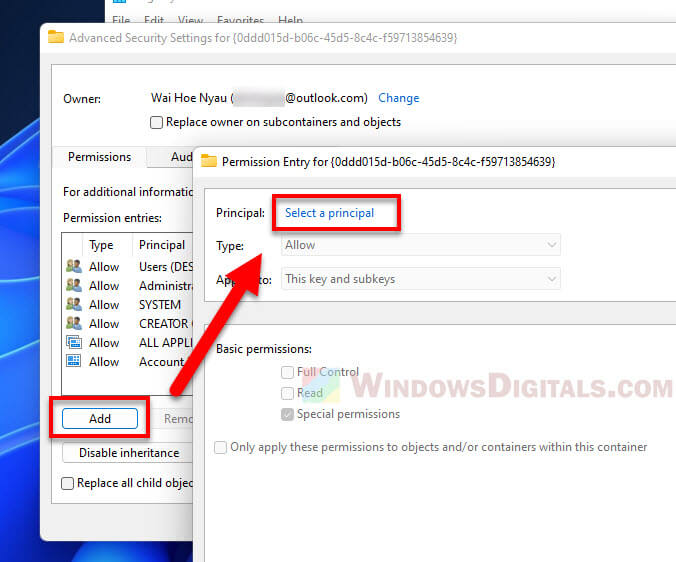
- Type the user account you want to edit permissions for, then click OK.

- Pick Full Control and Read under Basic permissions.
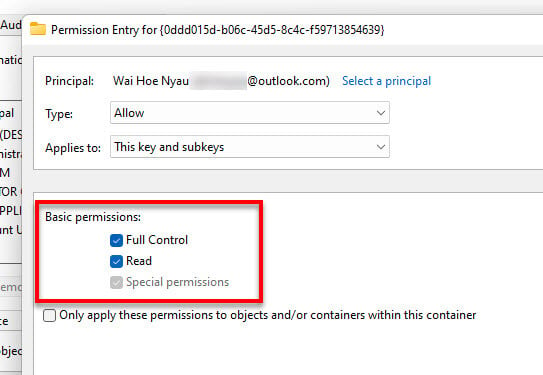
- Hit OK to lock in the changes.
- Back in the Advanced Security Settings window, press OK again.
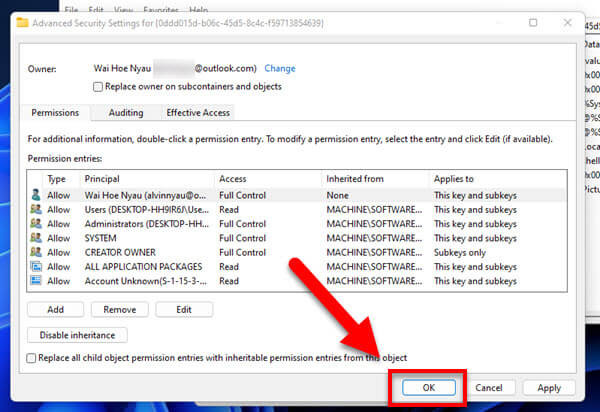
You can do these steps for other users like Administrator, too.
What if you can’t take ownership or change permissions?
Can’t take ownership or tweak the permission of a registry key? It might be because it’s owned by SYSTEM or TrustedInstaller. Even an Administrator account might not cut it then. To fix this, you need to run Registry Editor as SYSTEM or TrustedInstaller.
Using PsExec.exe from Windows Sysinternals
PsExec.exe is a tool from Windows Sysinternals, now part of Microsoft, that lets you run commands or programs as if you were another user, like SYSTEM. This is great for admin stuff that needs more access, including messing with registry keys owned by SYSTEM.
Here’s how to use PsExec.exe to run Registry Editor as SYSTEM:
- Grab PsExec.exe from the Windows Sysinternals site.
- Unzip the PsExec.exe file to a spot on your computer.
- Open Command Prompt as an admin.
- Change directory in CMD to where you put the PsExec.exe file.
- Type this and press Enter:
psexec.exe -sid c:\windows\regedit.exe
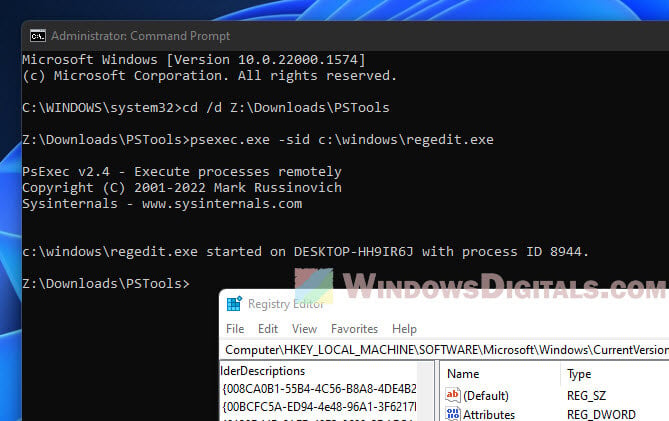
- This opens Registry Editor as SYSTEM, letting you edit the key.
You can skip step 4 by putting the full path to the psexec.exe file, like so:
c:\downloads\psexec.exe -sid c:\windows\regedit.exe
Using Advanced Run from Nirsoft
Advanced Run is another very useful tool, made by Nirsoft, that allows you to run any programs with special settings, like as SYSTEM or even TrustedInstaller. This can be super handy for occasions where you need a higher level of authorities to change a very highly secured file, like a system file.
To use Advanced Run to open Registry Editor as SYSTEM or TrustedInstaller, do this:
- Download Advanced Run from Nirsoft.
- Unpack the AdvancedRun.exe file to your computer.
- Start Advanced Run as an admin.
- Click “Browse” and find the Registry Editor executable (regedit.exe) or just type in its path: “C:\Windows\regedit.exe“.
- In the “Run As” section, choose “SYSTEM User” or “TrustedInstaller account“.
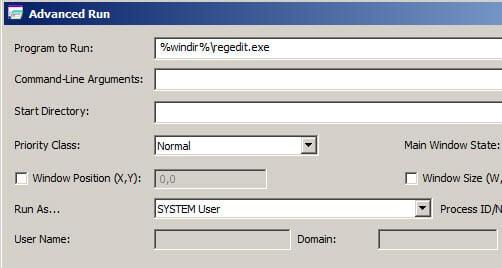
- Click “OK” to launch Registry Editor with those permissions.
After running Registry Editor this way, try taking the ownership of the registry key again.
One last thing
Before you try anything in the Registry Editor, I must stress that you should back up your registry or create a system restore point just in case things go south. The registry is very fragile and sensitive. A wrong deletion or edit can cause the entire PC to become bricked and unable to even boot. Be careful when you do anything inside regedit in Windows.