In Windows 11 or Windows 10, administrative permissions or rights are required to perform certain actions that make changes to the system or data, such as installing or uninstalling an app or program, renaming, moving, or deleting a file or folder.
A user account in Windows can be either an administrator, a guest, or a standard user account without admin rights. If you have access to an administrator account, you can grant admin rights to another user account. This short tutorial will show you 2 methods (via Settings and CMD) on how to give full administrator permission and rights to a user in Windows 10/11.
Also see: How to Change Administrator Email on Windows 11
Page Contents
How to give admin rights to user in Windows 11/10 via Settings
The bottom line is you need to have access to an administrator account on the Windows PC in order to give admin rights to another user account. Only the administrator account can grant admin rights and privileges to other users.
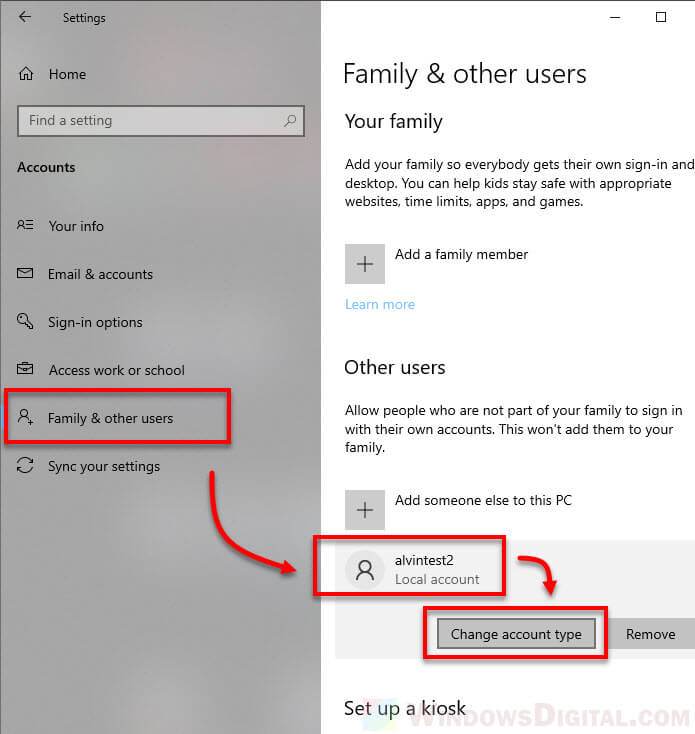
To give admin rights to a user in Windows 10/11, follow the steps below.
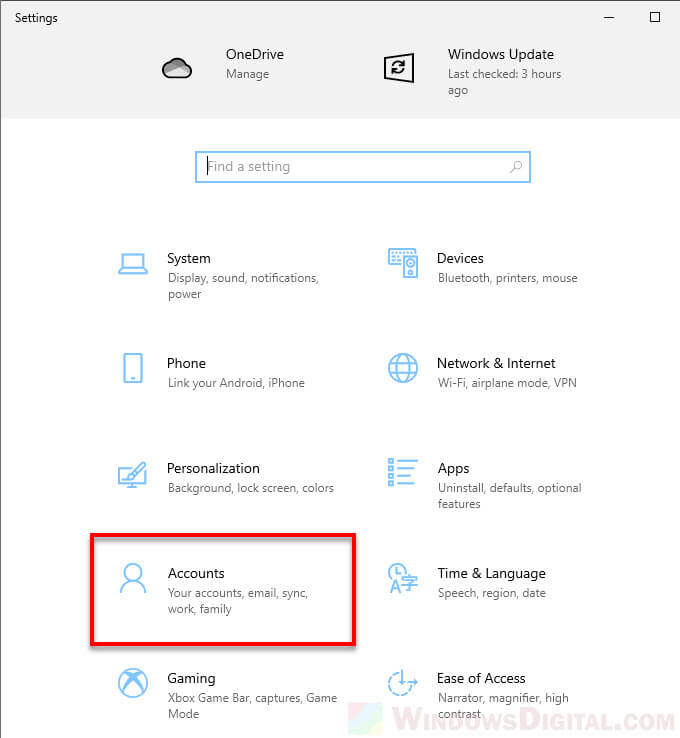
- In the Start menu, search for and open “Settings“.
- In Settings window, click on Accounts.
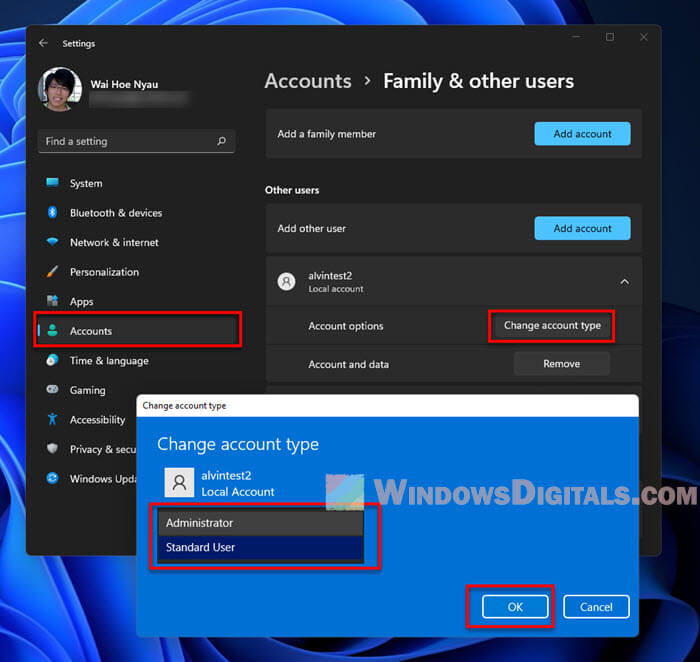
- On the left pane, click on Family & other users.
- Under “Other users“, select the account you want to give admin rights to.
- Then, click on Change account type.
- In the pop up window, click on the Account type down-down menu, then select Administrator.
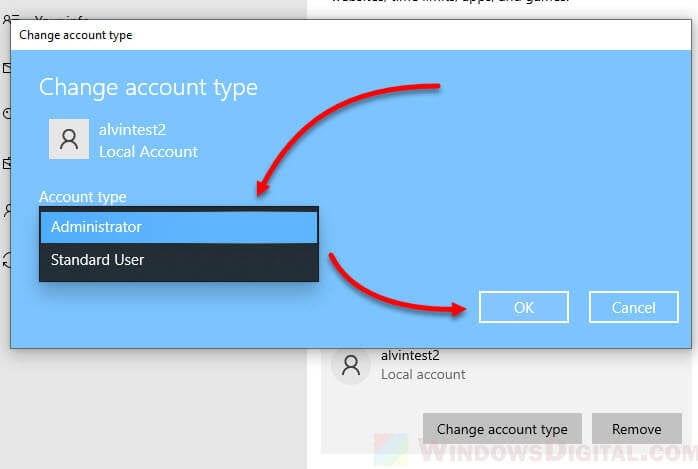
- Click OK to confirm the changes.
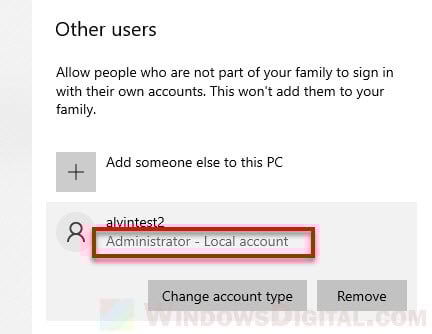
After changing the account type to administrator, you should then be able to see an “Administrator – Local account” label under the selected user account.
In addition, a Windows 11/10 system can have multiple administrator accounts. Thus, you can give admin rights to as many other user accounts as you like.
If you have not created the user account yet, you can directly create a new local admin account instead. Read: How to Create Local Admin Account Without Password on Windows 11/10.
How to give administrator permission in Windows 10/11 via CMD
If you prefer to give admin rights to a user via the command prompt instead of the GUI, here’s how to do it.
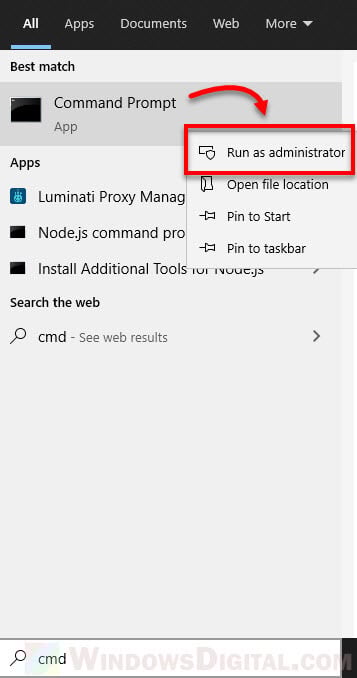
Firstly, open an elevated command prompt: Search for “cmd” on the Windows 10/11 search bar. Right-click Command Prompt from the search result, and then select “Run as administrator“.
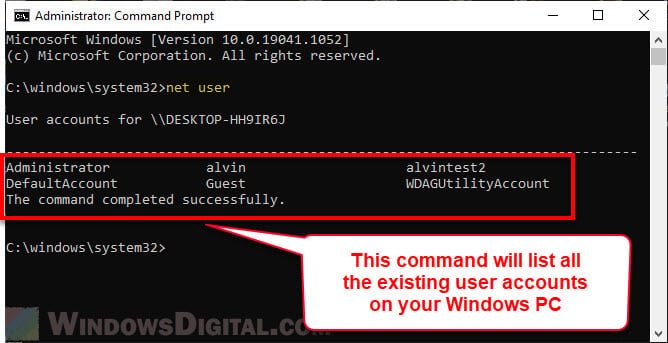
In the command prompt window, enter the following command to list all existing user accounts on your Windows 10/11 PC. This step is optional but useful if you do not know or are not sure about the exact name of the user account you want to give administrative rights to. You can copy the name of the user account to be used in the next step.
net user
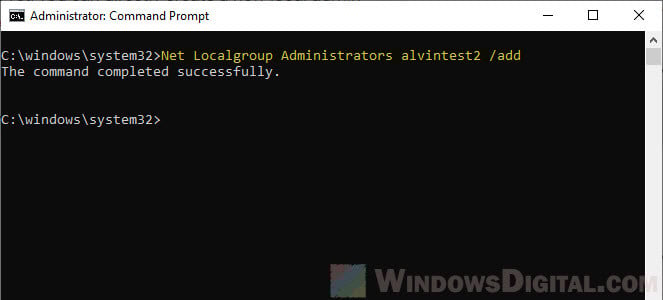
To give admin rights to a user account, use the following command. Note: Replace “UserAccount” with the actual name of the user account that you want to give admin rights to.
The following command will add the specified user account to the administrator group, thus granting full administrator rights to the user account.
Net Localgroup Administrators UserAccount /add
For example:
Net Localgroup Administrators alvintest2 /add
To remove an existing administrator account from the administrator group, in other words, changing it back to a standard user account, use the following command. Replace “UserAccount” with the actual user account name that you want to delete from the admin group.
Net Localgroup Administrators UserAccount /Delete
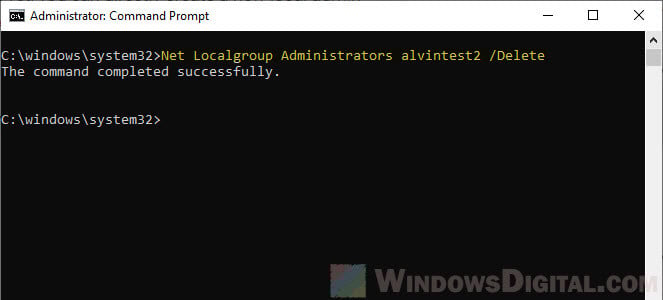
For example:
Net Localgroup Administrators alvintest2 /Delete
How to check if you have admin rights
If you’re not sure whether you have admin rights on your Windows 11/10 PC, you can check your account type by following these steps:
- Click the Start button and select Settings.
- Click on Accounts.
- On the left pane, click on Your info.
- Under “Your account type”, you should see whether you have an Administrator or Standard account.
If you have an Administrator account, you have admin rights on your PC. If you have a Standard account, you do not have admin rights and will need to be granted them by an Administrator.
How to remove admin rights from a user
If you’ve granted admin rights to a user and want to revoke them, you can do so by following the same steps as above and changing the account type back to Standard. Alternatively, you can use the CMD method described earlier to remove the user from the Administrators group.