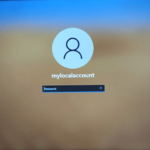
This is a guide on how to change your user account name that appears on Welcome screen and on the Start screen in Windows 11. The ways to change your username depends on what type of user account you have – whether you are signing into Windows using a Microsoft Account (online) or a local account.
However, you can use the same methods to change the account name for Administrator or Guest user account, provided you have the privilege required to do so.
Page Contents
How to change the user name for a local account
If your user account in Windows 11 is a local account that doesn’t link to any Microsoft account, you can easily change the account name via one of the 3 methods below.
You can use any of the 3 methods below to change the user name for an Administrator, Standard or Guest account. However, you must be signed in as an administrator in order to have the privilege required to change the username of any account on Windows 11.
Change account name via Control Panel
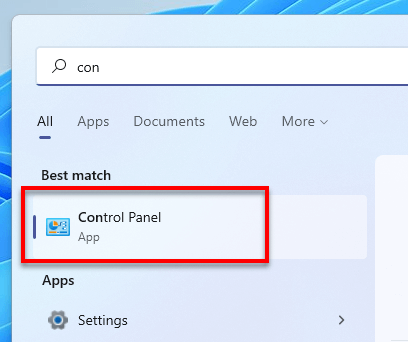
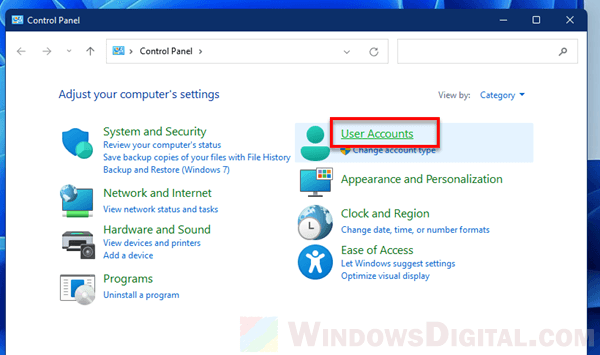
- On Windows 11, go to Start. Search for and open “Control Panel“.
- In the Control Panel window, click on User Accounts.
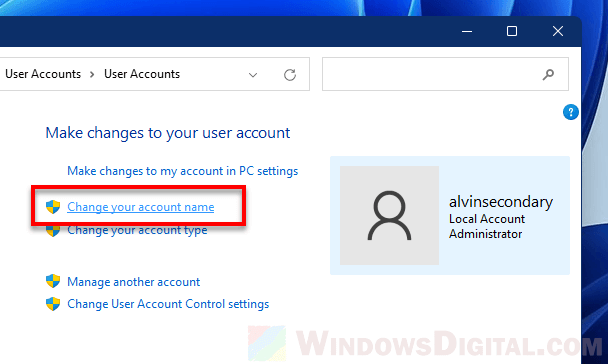
- On the next screen, click on User Accounts again.
- Under “Make changes to your user account”, click on Change your account name.
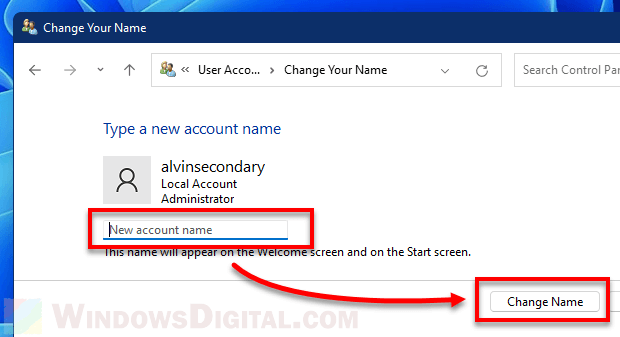
- Enter a new account name into the text field.
- Click on Change Name when you’re done.
- Restart your PC for the changes to take effect.
If you want to change the user name of a different account, click on Manage another account instead during step 4. Then, select the user account whose name you want to change and follow the remaining steps to do so.
Note: If you don’t see the “Change your account name” option during step 4, it likely means that your user account is a Microsoft account. Go to the second part of this guide below to learn how to change your Microsoft account’s username.
Rename a user via Netplwiz
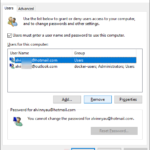
Another method to change the user account name in Windows 11 is by using the Netplwiz.exe – an advanced user accounts control panel in Windows.
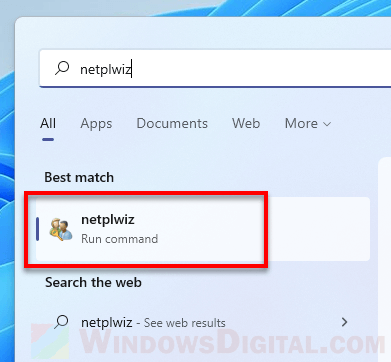
- Click on Start, then search for and open “netplwiz“.
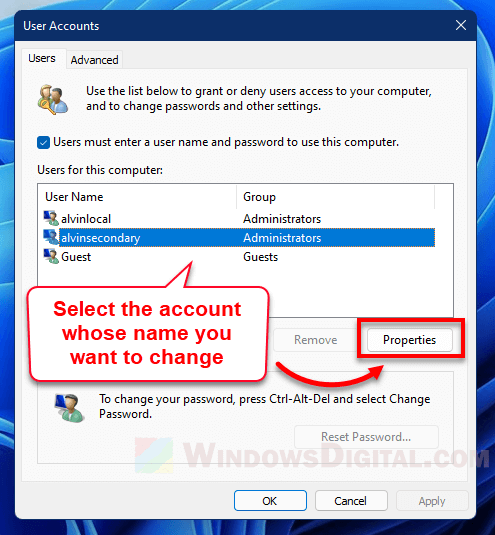
- In the User Accounts window, go to Users tab.
- Under “Users for this computer”, select the user account whose name you want to change.
- Then, click on Properties.
- In the General tab, enter a new name in the User name field.

- Click OK when you’re done.
- Restart your computer for the changes to take effect.
Change Windows user name using Command Prompt
If for any reason you can only use the command prompt to do the changes, here’s the command lines to change the user account name in Windows.
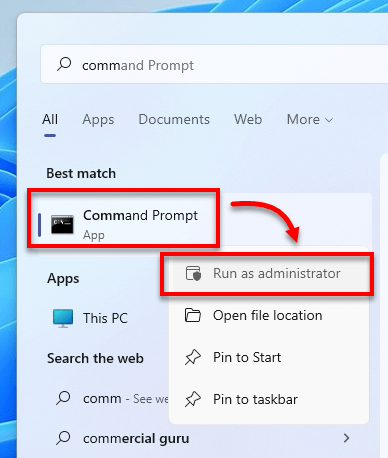
- In the Start menu, search for Command Prompt.
- Right-click Command Prompt from the search result and select Run as administrator.
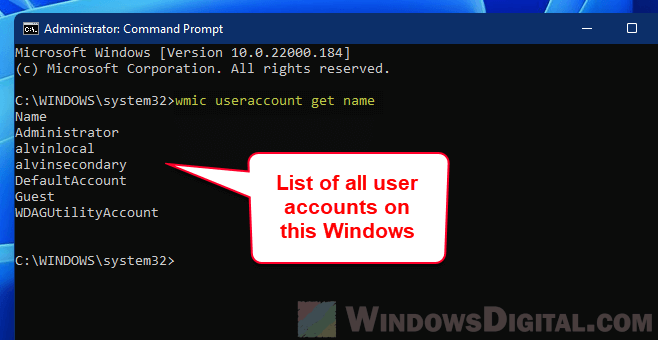
- Optionally, you can run the command below first to list all user accounts on your Windows. This is to show the exact username of the user account (whose name you want to change) as you will need it for the next step.
wmic useraccount get name
- Next, enter the following command to rename any user account. Replace OldAccountName with the current username of the user account, and NewAccountName with the new name you wish to use.
wmic user account where name="OldAccountName" rename "NewAccountName"
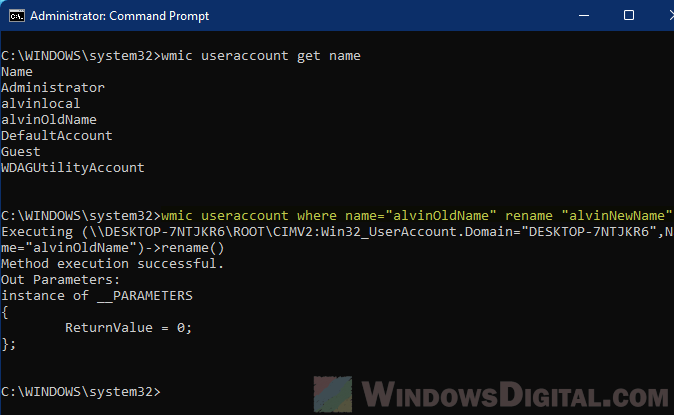
- If the command is executed successfully, it will show a line that reads “Method execution successful“.
- Restart your PC.
Note that you need to run Command Prompt as administrator so that it has the required permission to make changes to the user account in Windows.
How to change Microsoft account username
If you login to Windows 11 using a Microsoft account (commonly showing your full name as the user name), your user account name can only be changed via the Microsoft account’s profile page in Microsoft website. Here’s how to do so.
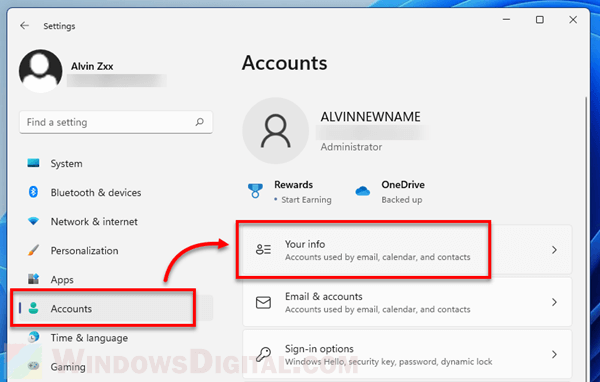
- Press Win + i keys to open Settings.
- On the left pane, select Accounts. Then, on the right, select Your info.
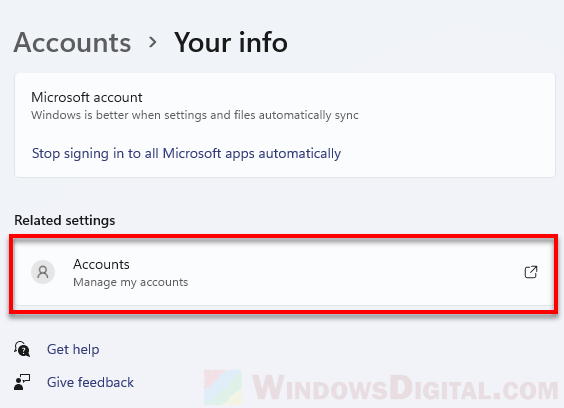
- On the next screen, click on “Accounts – Manage my accounts” under Related settings.
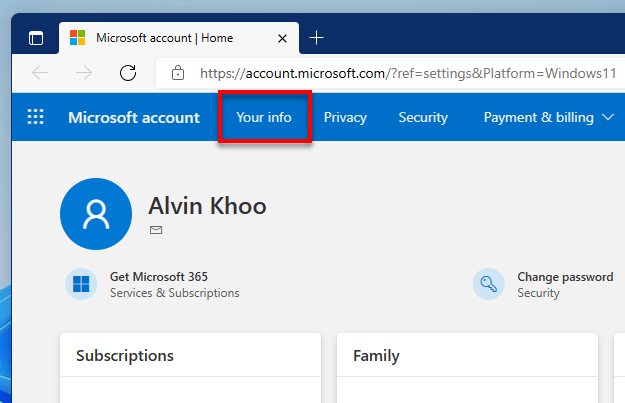
- This will open your profile page on Microsoft website on your default web browser. Click on Your info at the top menu bar in the Microsoft account’s profile page.
- Next, under Your info, click on Edit name.
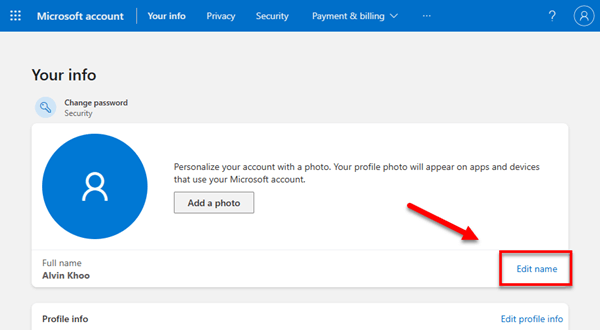
- Enter the new name you wish to use in the First and Last name fields. Then, enter the Captcha as requested.
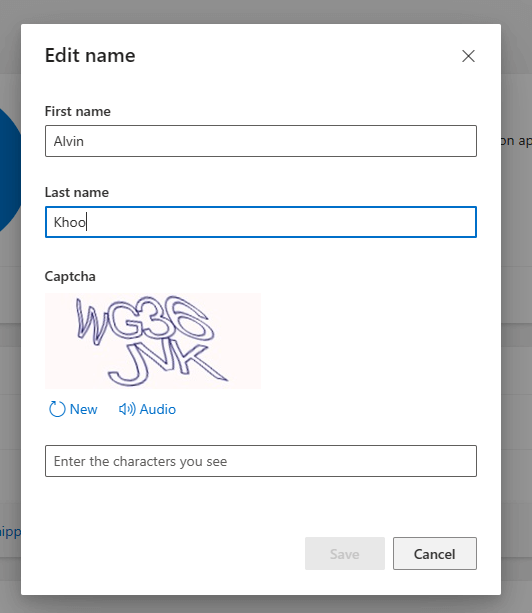
- Click Save to save the changes.
- Restart your PC for the changes to take effect.