When it comes to keeping your computer cool, knowing how to work with different types of fan connectors is really important. A lot of people wonder if they can use a 4-pin fan with a 3-pin header, or vice versa. This guide gives you the info you need to make smart choices for your computer’s cooling. We’ll go over what you need to know about these connectors, what happens when you mix them up, and some tips to get it right.
Also see: Why Are My PC Case Fans Not Spinning?
Page Contents
Connect a 4-pin fan to a 3-pin header
About the connectors
The 3-pin connectors are pretty basic, giving you power, ground, and a way to check how fast the fan is spinning. The 4-pin connectors add an extra wire for Pulse Width Modulation (PWM) control, which lets you adjust the fan’s speed more precisely.
Suggested read: All Motherboard Slots and Connectors Explained
Can I use a 4-pin fan on a 3-pin header?
Yes, you can definitely use a 4-pin fan on a 3-pin header or controller. The fan will mostly work like normal. The main thing you’ll miss is the PWM-based speed control. Instead, the fan will either run at a steady speed or change speed based on the voltage from the motherboard. Connecting your fan this way is generally safe and won’t cause any damage to your fan or motherboard.
Potential downsides
The big downside here is that you won’t have precise control over the fan speed. Without PWM, the fan might be louder when it’s running faster, or it might not cool things down as efficiently. But for most everyday uses, this shouldn’t be a huge problem.
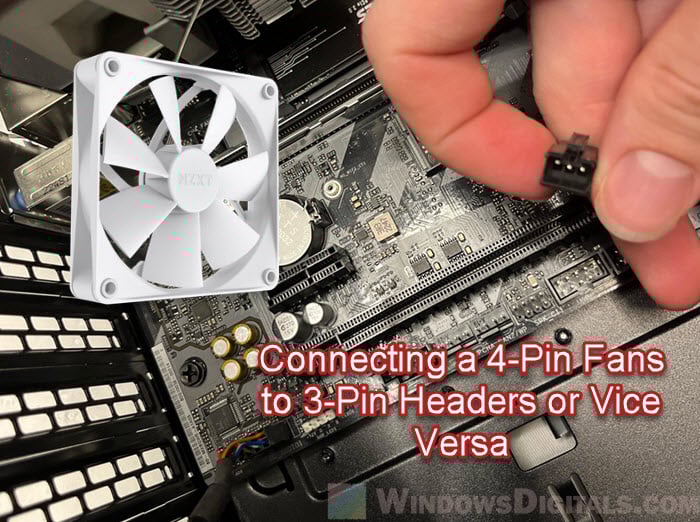
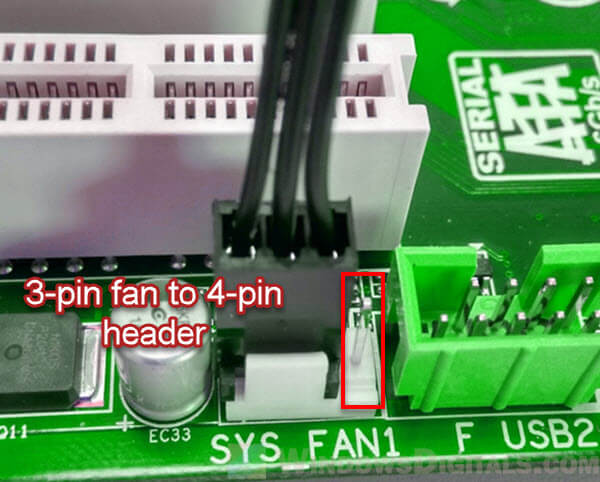
How to connect a 4-pin fan to a 3-pin header
Connecting a 4-pin fan to a 3-pin header is pretty easy and you don’t really need any special tools.
- First, find the 3-pin header on your motherboard. It’s usually marked as ‘SYS_FAN’, ‘CHA_FAN’, or something similar.
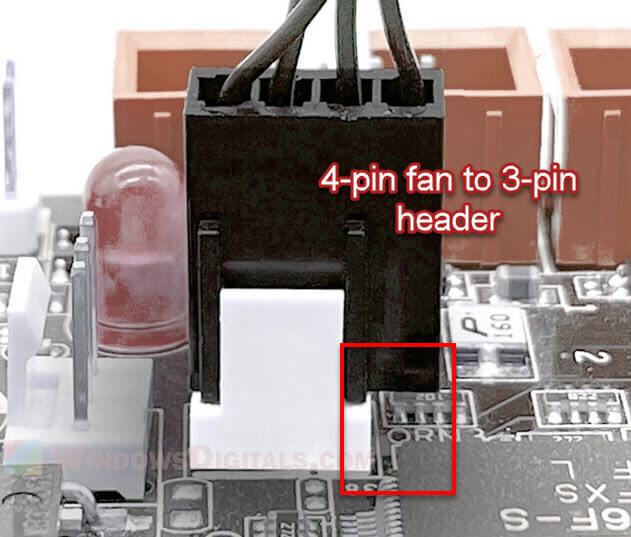
- The 4-pin connector on your fan will have one slot that’s blocked or missing. This helps you line it up correctly with the 3-pin header.
- Make sure the first three pins of the 4-pin connector match up with the 3-pin header. Getting this right is important for the fan to work properly.
- Push the connector gently onto the header. It should fit snugly without needing to push too hard. Make sure it’s secure so it doesn’t come loose later.
- Keep the cable tidy so it doesn’t block other parts or mess with the airflow.
What to really expect
After you connect it, your 4-pin fan will work just like a standard 3-pin fan. You won’t have PWM control, but it’ll still help cool things down. Normally, the fan will run at full speed all the time.
Related concern: Why is my CPU Overheating and How to Fix it?
Use a 3-pin fan on a 4-pin header
It’s also okay to connect a 3-pin fan to a 4-pin header. This is pretty common, and the fan will work, but like before, you’ll miss out on using PWM control.
How it works
When you plug a 3-pin fan into a 4-pin header, the fan uses power, ground, and tachometer signals from the first three pins. The fourth pin, which is for PWM, won’t be used. So, the fan will run at a fixed speed or the speed will be controlled by how the motherboard changes the voltage.
Things to consider
- The main thing you’ll notice is that you can’t use PWM to control the fan speed precisely. The fan’s speed will either stay the same or change based on how the motherboard handles the voltage.
- Without PWM control, the fan might not cool as effectively and could be louder, especially if it’s always running at high speeds.
- This setup is safe and won’t hurt your fan or motherboard. But it’s always a good idea to check your motherboard manual for any special instructions or limits.
This approach should work fine for basic cooling needs. If you have more serious cooling needs, especially with high-performance setups, it’s better to use PWM for better control and quieter operation.
See also: What Are The Different Types of PC Cases?
How to connect a 3-pin fan to a 4-pin header
Connecting a 3-pin fan to a 4-pin header is straightforward. Here’s a quick guide to help you get it right:
- Look for the 4-pin PWM fan header on your motherboard. You’ll often see it labeled as ‘CPU_FAN’, ‘SYS_FAN’, or something like that.
- The 4-pin header will have plastic guides. Line up the 3-pin connector of your fan with the first three pins of the header, following the guides.
- Gently push the connector onto the header so it fits well without too much force.
- Arrange the fan cable so it doesn’t get in the way of other components or airflow.
What happens next
After you connect it, the 3-pin fan will work based on voltage regulation for speed control. This means the motherboard will adjust the voltage to control how fast the fan spins, instead of using PWM.
Can I connect a 4-pin fan to a 3-pin power supply header?
If you try to connect a 4-pin fan to a 3-pin header on a power supply, you might run into some problems because they’re designed differently. Here’s what you need to know about these challenges and how to deal with them.
Physical design issues
- The 4-pin fan connector might be a bit bigger or shaped differently, which can make it tough to fit into a 3-pin power supply header.
- Some power supply units have 3-pin headers that are shaped in a way that doesn’t match up well with standard 4-pin connectors.
What are some solutions or alternatives?
- Make sure the notches and grooves (keying) of the connector and header line up properly. Sometimes, just lining up the first three pins (power, ground, and tachometer) can help the connector fit.
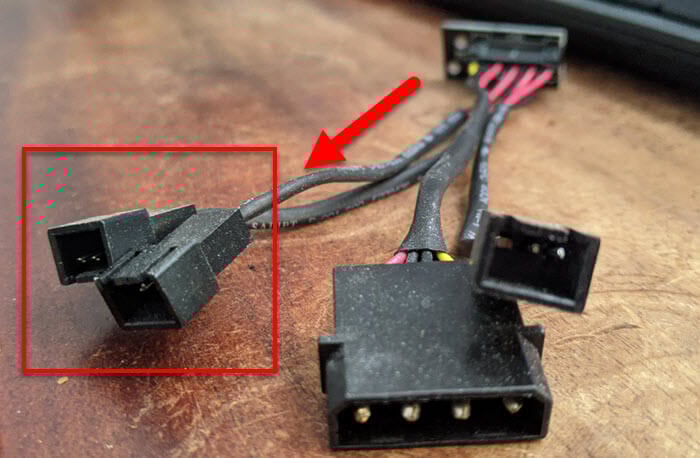
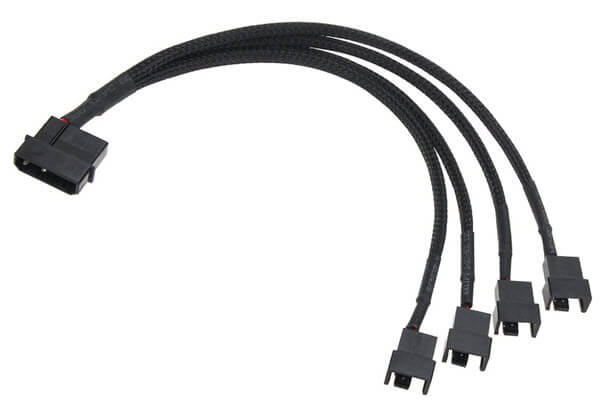
- If the fit is still a problem, you might need an adapter or converter. These can change the shape or alignment of pins, or they might switch a power supply connector to a standard 4-pin setup. Often, you’ll use a Molex to 4-pin female header adapter. Many power supplies have Molex connectors. A Molex to 4-pin adapter has a Molex connector on one end and a 4-pin (or sometimes 3-pin) fan connector on the other.
- Check the manuals for both the fan and the power supply. They usually have info about what’s compatible and how to connect things.
- If the power supply header doesn’t work, look for another spot to plug in the fan on the motherboard or use a different type of power connector if you can.
Things to consider
- Never force a fan connector into a header. If it doesn’t fit easily, it might not be the right match, and you could damage the parts.
- If you’re not sure, it’s a good idea to ask someone who knows about computer hardware, or check with the makers of the parts for advice.
Other things to note
Make sure the fans run as intended
To make sure your cooling system works well, whether you’re using a 4-pin fan on a 3-pin header or the other way around, below are some things to try:
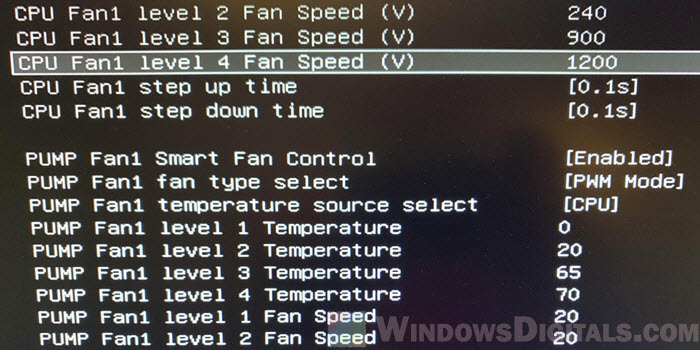
- If your motherboard lets you, change the fan speed in the BIOS or with software from the motherboard maker. This can help you get the best mix of cooling and noise.
- Keep an eye on your system temperatures, especially if your computer is powerful or it’s hot where you are. If things get too warm, tweak the fan speeds or think about more cooling options.
- Make sure your case has good airflow. How you set up intake and exhaust fans can really change how well your system cools down.
- Keep your fans and air filters clean. Dust can make fans less effective at moving air.
Check if the fans you want to connect are actually compatible
- Always look at your motherboard’s specs and manual. Some motherboards have special rules or setups for fan headers.
- Check out what your fans need in terms of voltage and power, and make sure your motherboard can handle it.
Upgrade your motherboard for advanced control
If you really need precise control over your fans, think about getting a better motherboard with advanced fan controls or a fan controller. This gives you more ways to manage how your fans work and keep your system cool.