If you’ve just installed or updated the AMD Ryzen chipset driver (for example version 8.09.28.1124 from October 2026) on your Windows 11 or 10 PC and the “AMD Chipset Software Install Summary” shows “Version number cannot be determined” next to some of the drivers, or the installer says it failed, this guide will talk about what the message most likely means and how to get the chipset driver installed properly.
Also see: AMD Chipset Driver Install Fails with Error 1603, What to do?
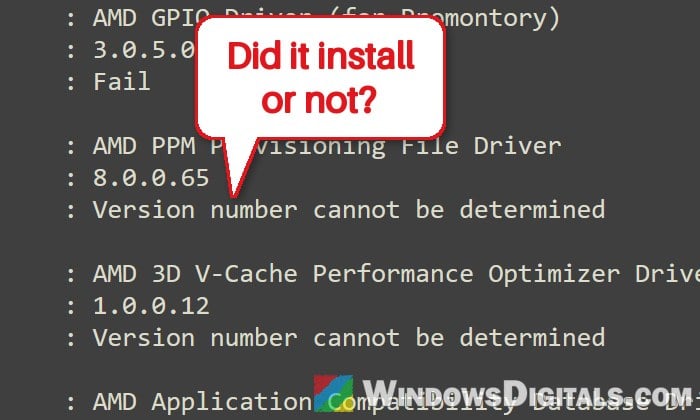
What does “Version number cannot be determined” mean?
At the end of the install, AMD’s chipset installer lists every driver in the package with its version and an “Install” result. Most lines should say “Success“. AMD doesn’t say what the “Version number cannot be determined” result means, but it most likely means the installer couldn’t read which version of that driver is already on your PC, so it couldn’t tell whether the update went through.
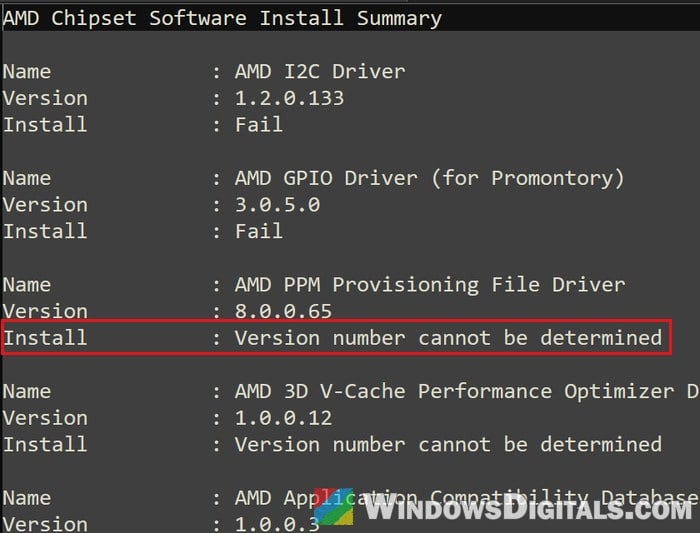
It can show up on one line or on most of them, often on these:
- AMD Processor Power Management Support
- AMD PSP Driver
- AMD PPM Provisioning File Driver
- AMD 3D V-Cache Performance Optimizer Driver
This isn’t new to the October package. The same message showed up a lot after the May 2026 chipset driver (8.05.04.516). AMD’s release notes for 8.09.28.1124 also list a known issue where the Ryzen PPKG sometimes fails to install or update, which could be related.
In many cases, the drivers are actually installed fine, and it’s only the version check that went wrong. So before you start uninstalling anything, check whether the install really failed.
Check whether the chipset driver actually installed
If the rest of the summary says “Success” and the installer didn’t say the whole setup failed, there’s a good chance everything went through. Here’s how to check:
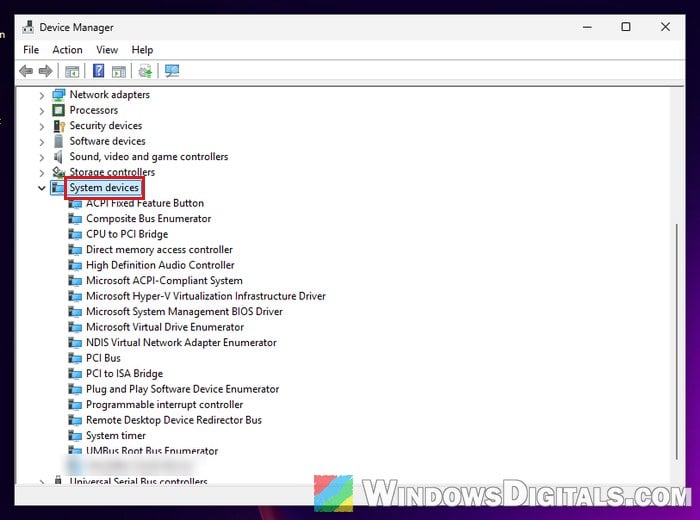
- Right-click the Start button and select Device Manager.
- Expand System devices and look for any device with a yellow warning sign.
- If you use AMD Install Manager, open it and check whether it lists the new chipset driver version as installed.
If nothing in Device Manager has a warning sign and AMD Install Manager shows the new version, it’s most likely just a display bug, and you can keep the new driver. Don’t worry if you can’t find a device called “Processor Power Management” in Device Manager. It doesn’t always show up as its own entry.
If the summary shows “Fail” on some lines too, the installer says the setup failed, or Device Manager shows warning signs, continue with the fixes below.
Might be useful: What is AMD.InstallManager and Is Its Notification Safe?
Uninstall AMD Chipset Software properly, then install it again
When the install really fails, the first thing to try is to remove the current chipset software the way AMD says, then install the new package fresh.
Please note that you should only uninstall the chipset software the way AMD describes below. AMD says not to remove chipset drivers through Device Manager or third-party uninstallers. Also, the AMD Cleanup Utility doesn’t touch chipset drivers at all (it’s for graphics and audio drivers), so running it won’t help with this.
Follow the steps below:
- Restart your computer.
- Press Win + R, type “appwiz.cpl” and press Enter to open Programs and Features.
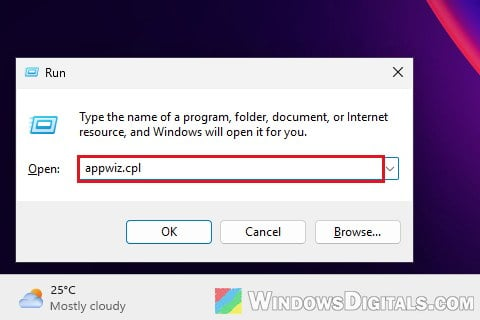
- Double-click AMD Chipset Software in the list. This opens the AMD Chipset Software Installer.
- Select the chipset drivers it lists for removal and follow the prompts to uninstall them. (AMD leaves the GPIO drivers in place on purpose, so don’t worry if they stay.)
- Restart your computer again.
- Run the chipset driver installer you downloaded from AMD’s website (see the section on downloading it from AMD below if you don’t have it yet).
When it finishes, check the install summary again. If every line now says “Success”, the driver is in place.
Related concern: Can’t Completely Uninstall a Driver in Windows 11 (Fix)
Rename the old C:\AMD folder and run the installer again
The chipset installer unpacks its files to the C:\AMD folder before installing them, and a later install can pick up what’s already in there. If files from an earlier install in that folder are damaged or incomplete, the installer can keep failing or keep showing the same results, no matter how many times you run it. Moving that folder out of the way can get rid of both the “Version number cannot be determined” and the “Fail” results.
The folder only holds installer files, so renaming it is harmless, and you can delete it later once everything works. Here’s what you should do:
- Close the AMD chipset installer if it’s open.
- Open File Explorer and go to
C:\. - Select the AMD folder, press F2 (or right-click it and choose Rename), and rename it to “AMD_old“.
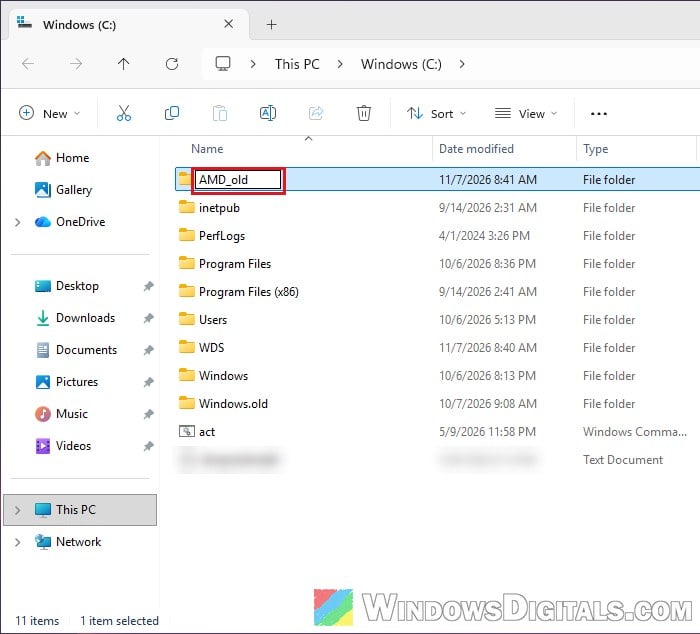
- Run the AMD chipset driver installer again. It will create a new
C:\AMDfolder with clean copies of its files.
If Windows says you don’t have permission to rename the folder, you’ll need to take ownership of it first, then try again.
If the install goes through this time with no “Fail” or “cannot be determined” results, you can delete the AMD_old folder.
Pro tip: How to Take Ownership of a File, Folder or Drive in Windows 11
Download the chipset driver from AMD’s website instead
If AMD Install Manager tells you there’s a chipset driver update but there’s no button to continue, or the update keeps coming back as “Update” after a restart, skip the app and install the package yourself. The standalone installer from AMD’s website doesn’t go through the app at all, so it gets around this.
Here’s how to get it:
- Go to AMD’s Drivers and Support page (
https://www.amd.com/en/support/download/drivers.html). - Scroll down to “Search or Browse Drivers and Support by Product“. Under Browse Products, select Chipsets.
- Under Product Family, select your CPU socket (for example AM4 or AM5).
- Under Product Line, select your motherboard’s chipset (for example B850), and click Submit.
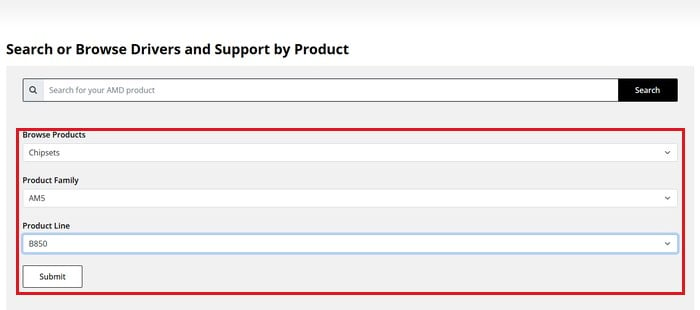
- Click Download next to AMD Chipset Drivers under your version of Windows.
- Run the downloaded installer and follow the prompts.
Once it’s done, look at the install summary again. Every line should now say “Success”.
If you’re on a laptop or a handheld with a Ryzen chip (like a Ryzen Z2 Extreme), AMD has a separate driver page for its mobile (laptop) chipsets, and your device maker’s support page usually has a chipset driver for your exact model too.
Should you go back to an older chipset driver?
Usually not. Going back to an older package doesn’t always work, and it can bring a “Fail” on the GPIO driver instead, which is worse than a version number the installer can’t read. If you really need to go back to an old installer from the 6.xx series or earlier, AMD says to uninstall the current chipset software first, delete the Qt_Dependencies folder in C:\Program Files (x86)\AMD\Chipset_Software, and only then run the older installer.