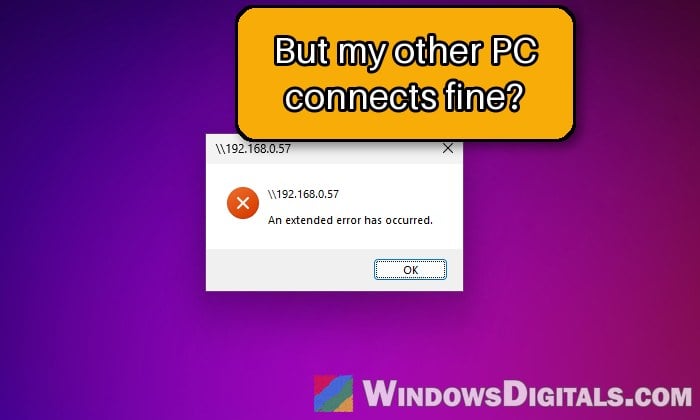
Mapping a shared folder on a NAS or another PC as a network drive takes a few clicks in File Explorer, and it usually just works. On Windows 11 24H2 or later, though, the same share can suddenly fail with a message that just says “The mapped network drive could not be created because the following error has occurred: An extended error has occurred“, while other PCs in the house or office still connect to it fine. This guide will explain what Windows is actually complaining about and how to get the share working again.
Also see: Windows 11 Cannot Access Shared Folder (Fix)
Why does Windows 11 show “An extended error has occurred”?
“An extended error has occurred” is a generic message. It shows up when the part of Windows that handles network connections returns its own error code, one Windows has no proper message for, so File Explorer gives you nothing useful to go on. If you open the share by its address instead (for example, from the Run box), you get the same message in a smaller box.
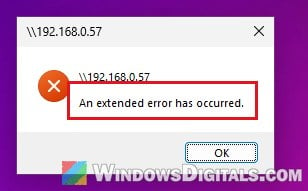
In most cases, the real reason is two security changes Microsoft made in Windows 11 24H2 (and kept in later versions) for file sharing (SMB):
- SMB signing is now required on all outgoing connections on most PCs. Signing stops someone on the network from changing the files on the way or reusing your sign-in. A NAS or older server that doesn’t sign its connections gets refused.
- Guest access is blocked. Many home NAS boxes let you in with no username or password at all (a “guest” connection). Windows 11 Pro no longer falls back to guest, and since signing can’t work with guest access anyway, these shares fail too.
That’s why the problem usually starts right after a PC moves to 24H2 or later, or on a new PC that came with it, while a Windows 10 PC or an older Windows 11 PC still opens the same share without any trouble. It’s a pretty common issue, mostly with WD, Buffalo and other home NAS drives, but it can also happen between two Windows 11 PCs.
If you want to see the real error behind the message, open Command Prompt and try to map the share there instead (replace the server and share names with yours, and Z: with any free drive letter):
net use Z: \\server\share
If it says “System error 3227320323 has occurred“, the signing or guest change above is almost certainly the cause.
Linked issue: Windows Cannot Access Network Drive or Shared Folder
Turn on SMB signing or set a password on the NAS itself
The safest fix is on the other end, not on your PC. Microsoft suggests these, in this order:
- Enable SMB signing in the NAS’s settings.
- Disable guest access on the NAS.
- Set a username and password for the share.
- Update the NAS firmware if it doesn’t have any of these options.
Every NAS brand puts these settings in a different place in its web page or app, so check the maker’s support site for the exact steps. If the share is on another Windows PC, the fixes below on your own PC are the ones to try.
Once the NAS signs its connections and asks for a username and password, Windows 11 connects to it again without lowering any security on your PC.
Save the share’s username and password in Credential Manager
When the share does have a username and password, saving them as a Windows credential for that server can get it working again. It’s worth trying before you lower any security on your PC. Here’s what you should do:
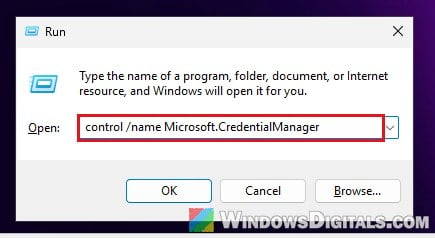
- Press Win + R, type “control /name Microsoft.CredentialManager” and press Enter.
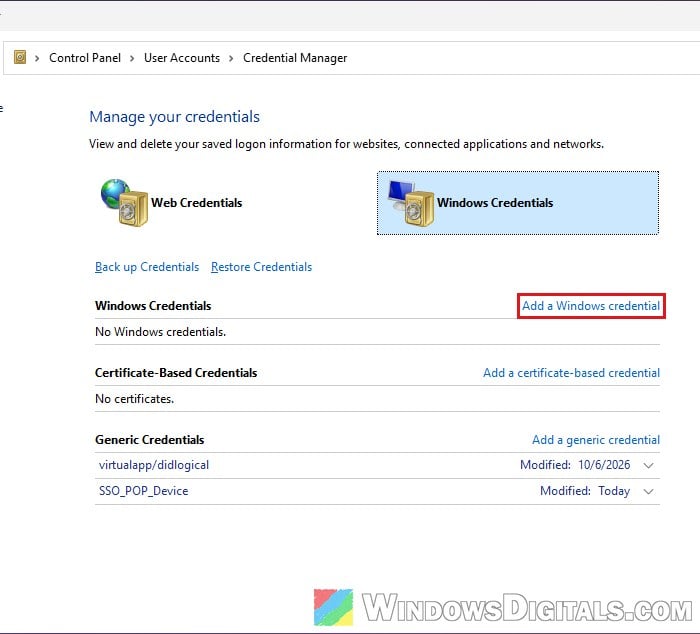
- Select “Windows Credentials“, then click “Add a Windows credential“.
- In “Internet or network address“, type the server’s name or IP address (for example,
\\192.168.0.100). Enter the username and password for the share, then click “OK“.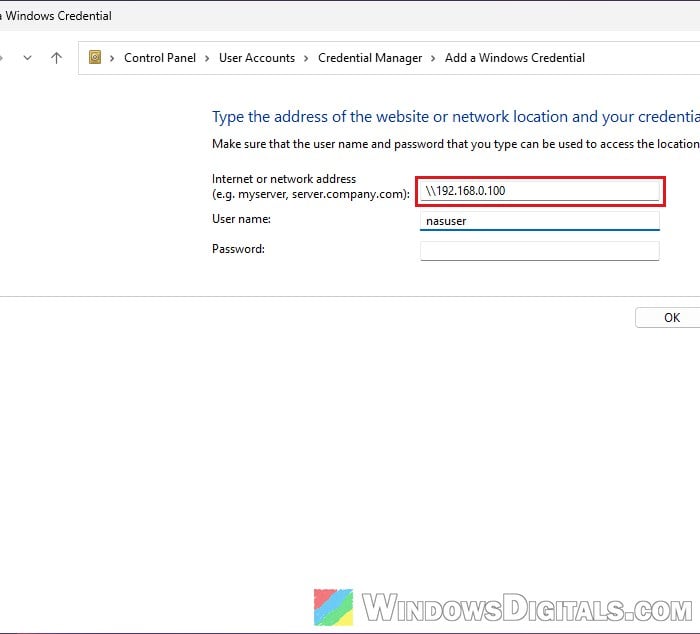
- Try opening or mapping the share again.
Related guide: How to Update Network Drive Login Credentials in Windows 11
Turn off the SMB signing requirement on your PC
This is the fix that has worked for most people on Reddit and Microsoft’s forums when the NAS can’t be changed. It tells Windows to stop insisting on signed connections, so it can talk to devices that don’t sign.
Please be warned that this makes your PC less safe on the network, which is why Microsoft doesn’t recommend it. Only do it when the device you connect to can’t be fixed, and only on a network you trust.
To turn it off with PowerShell, which works on every edition of Windows 11, follow the steps below:
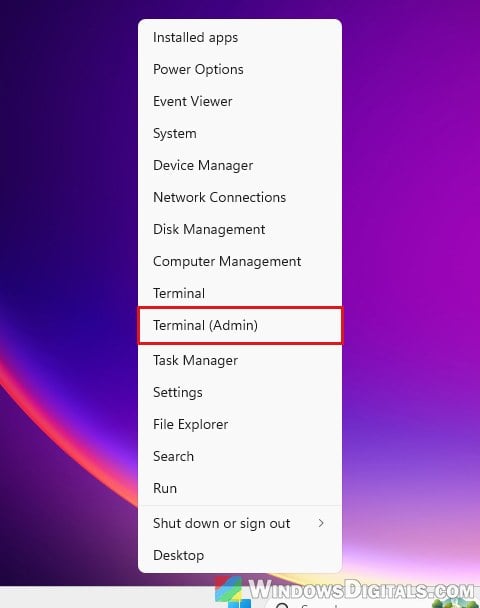
- Right-click the “Start” button and select “Terminal (Admin)“. Click “Yes” when Windows asks for permission.
- Type the following command and press Enter:
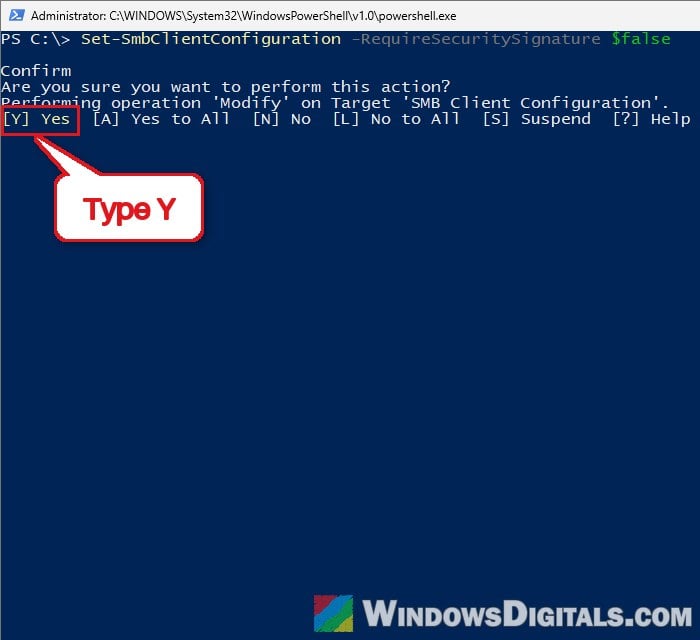
Set-SmbClientConfiguration -RequireSecuritySignature $false
- When it asks you to confirm, type “Y” and press Enter.
- Try to open or map the share again.
To check the setting, run Get-SmbClientConfiguration | FL RequireSecuritySignature. It should now say “False“. If you ever want the protection back (after replacing the NAS, for example), run the same command with $true at the end instead of $false.
Pro tip: How to Forget Samba (SMB) Credentials in Windows 11/10
Using Group Policy or the registry instead
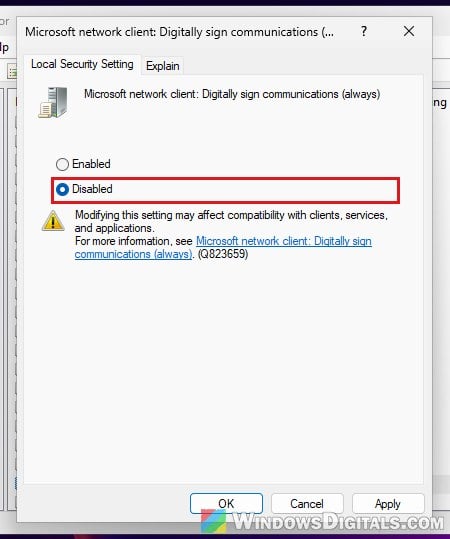
On Windows 11 Pro, the same setting is a policy. Open the Local Group Policy Editor (search for “gpedit” in the Start menu) and go to Computer Configuration > Windows Settings > Security Settings > Local Policies > Security Options. Double-click “Microsoft network client: Digitally sign communications (always)“, select “Disabled“, then click “OK“.
Home edition doesn’t have the Group Policy Editor. The PowerShell command above is the easiest way there, but the same setting is also stored in the registry. Incorrectly changing the registry could break Windows, so please at least create a system restore point first. If you’re not sure what you’re doing, it’s better to get someone to help you instead.
The value is RequireSecuritySignature (a DWORD set to 0) under this registry key:
HKEY_LOCAL_MACHINE\System\CurrentControlSet\Services\LanmanWorkstation\Parameters
Allow insecure guest logons (only for shares with no password)
If your NAS or share has no username and password at all, turning off signing alone may not be enough on Windows 11 Pro, because guest connections are still blocked. This is the least safe option of all, as Windows could then be tricked into connecting to a malicious device without asking for any password. Use it only when the device has no way to set a password.
In the same Terminal (Admin) window, run:
Set-SmbClientConfiguration -EnableInsecureGuestLogons $true
Type “Y” to confirm. On Pro, the matching policy is “Enable insecure guest logons” under Computer Configuration > Administrative Templates > Network > Lanman Workstation, set to “Enabled“.
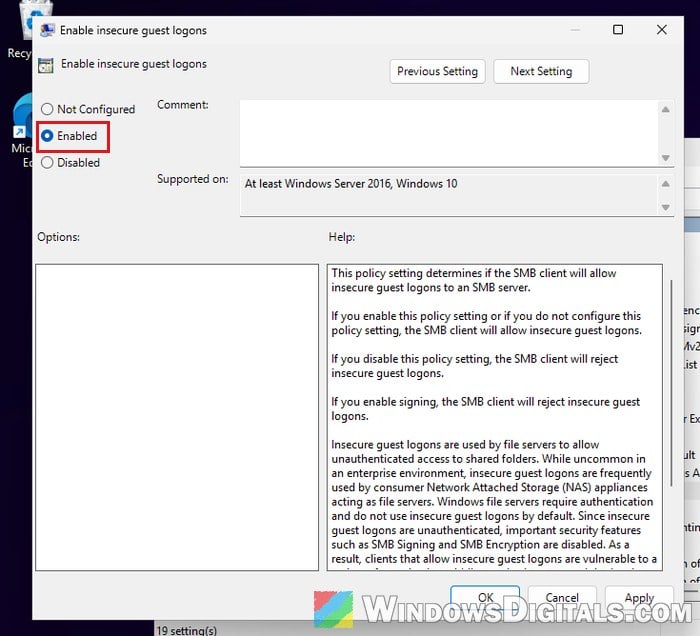
Signing has to be off for guest access to work, so do this together with the previous section, not instead of it. Then open the share again and see if it connects.
Might be useful: Windows 11: Turn On Network Discovery and File Sharing
What if the NAS is very old?
Some old NAS drives only speak SMB1, the original version of the protocol. Windows 11 has SMB1 turned off in every edition, and none of the fixes above will make such a drive connect. Microsoft advises against turning SMB1 back on just to get around the Windows 11 24H2 change.
A drive like that needs replacing. Copy your files off it from a PC that can still reach it and move them to a newer NAS or an external drive.