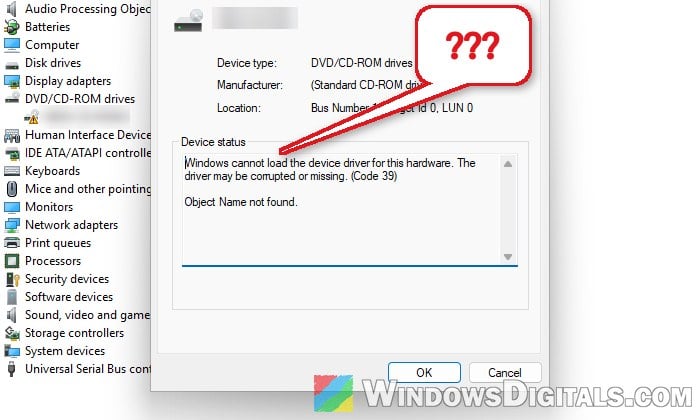
Device Manager normally shows every device in your PC working on its own driver, but sometimes one of them, say a DVD drive or a Bluetooth adapter, gets a yellow warning sign and stops working, and its status says “Windows cannot load the device driver for this hardware. The driver may be corrupted or missing. (Code 39)“. This guide will show you what usually causes it and how to get the driver loading again on Windows 11 or 10.
Also see: Can’t Completely Uninstall a Driver in Windows 11 (Fix)
What does Code 39 actually mean?
According to Microsoft, Code 39 simply means that the device’s driver couldn’t be loaded. Windows still sees the device, but it can’t use it without a working driver. Some common reasons are:
- The driver file, or another file it depends on, is corrupted or missing.
- Windows Update installed a newer driver that doesn’t suit your device, while the older one worked.
- The driver was made for an older version of Windows and needs something Windows 11 doesn’t have.
- Memory integrity is on and the driver isn’t compatible with it.
- A leftover filter driver from software you removed is still registered for that type of device.
To see the message, open the device’s Properties in Device Manager and look at Device status on the General tab.
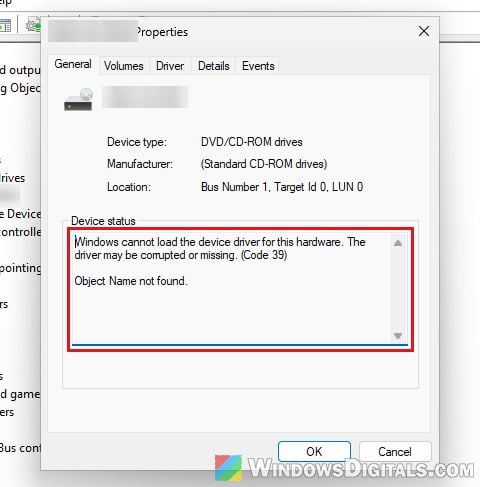
Uninstall the device and let Windows reinstall it
This is Microsoft’s own fix for Code 39. Removing the device clears its broken driver setup, and a hardware scan brings it back with a fresh install. Here’s how to do it:
- Click Start, search for “device manager” and open Device Manager.
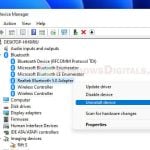
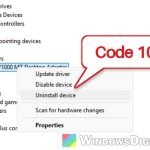
- Right-click the device with the yellow warning sign and select Uninstall device.
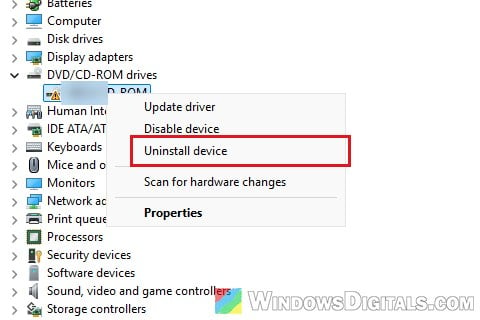
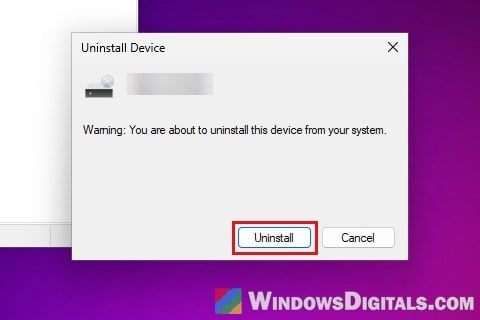
- If you see the “Attempt to remove the driver for this device” checkbox (not every device has it), tick it so Windows doesn’t just reuse the same broken driver, then click Uninstall.
- Click Action in the menu bar and select Scan for hardware changes.
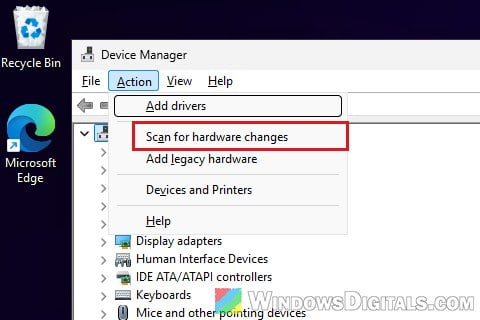
Restart your PC and check whether the warning sign is gone. If Windows asks for a driver you don’t have, see the next section.
Pro tip: How to Uninstall Drivers in Windows 11
Install the latest driver from the maker
If reinstalling brings back the same driver and the same error, the driver itself is likely the problem. Get the newest one for Windows 11 from the device maker’s website, or for a laptop, from the support page for your exact model. Stay away from driver download sites; plenty of them are full of malware.
Windows Update may also have one waiting:
- Open Settings and go to Windows Update > Advanced options > Optional updates.
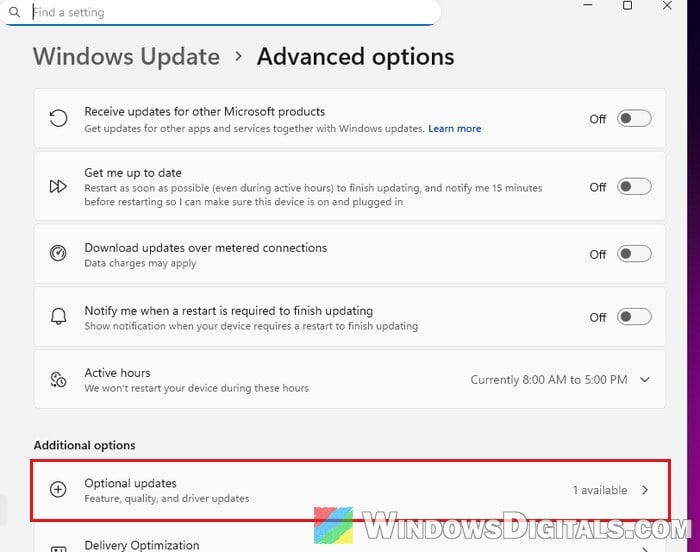
- Under Driver updates, tick the driver for your device if it’s listed, and click Download & install. If there’s no Driver updates group, Windows has no driver to offer right now.
Restart after installing and check the device again.
Related guide: How to Install or Update Driver in Windows 11
Roll back or pick the older driver
Sometimes it’s the other way around: the device worked fine until Windows Update installed a newer driver, and Code 39 showed up right after. An older Wi-Fi card, for example, can run fine on Microsoft’s generic driver and fail as soon as the maker’s driver goes on. To go back:
- In Device Manager, right-click the device and select Properties.
- Go to the Driver tab and click Roll Back Driver (if it’s grayed out, there’s no previous driver saved).
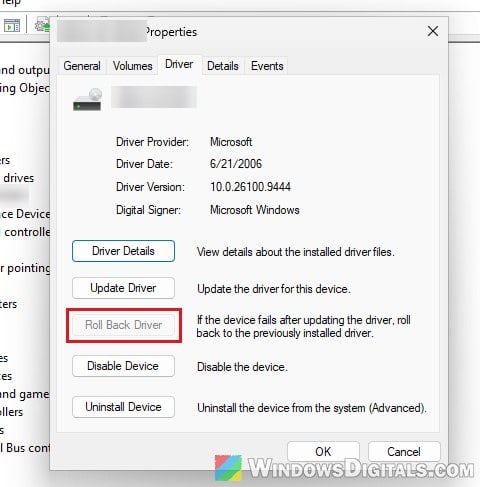
- Confirm the rollback and restart your PC.
Can’t roll back? Pick the older or generic driver yourself. Right-click the device, select Update driver > Browse my computer for drivers > “Let me pick from a list of available drivers on my computer“, then choose a different driver from the list (for Bluetooth, for example, “Generic Bluetooth Adapter“).
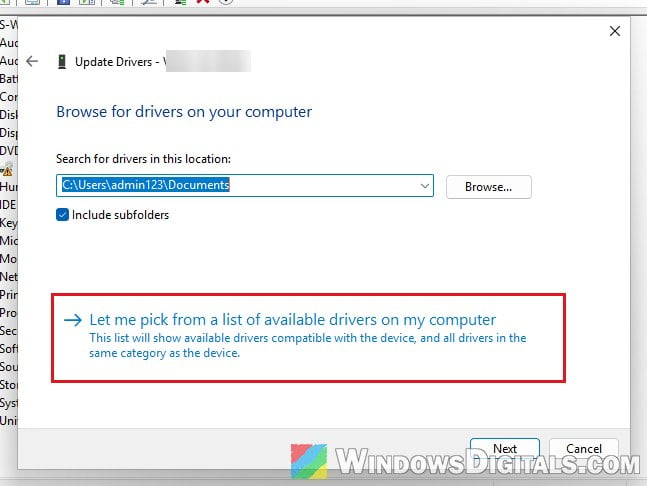
Windows Update may put the newer driver back later, so if Code 39 returns after an update, roll it back again.
Run SFC and DISM
If a system file the driver needs is damaged, the System File Checker can repair it. It’s safe and doesn’t change any settings, so it’s worth running before you edit the registry. Here’s what to do:
- Open Command Prompt as administrator.
- Run the following command:
sfc /scannow
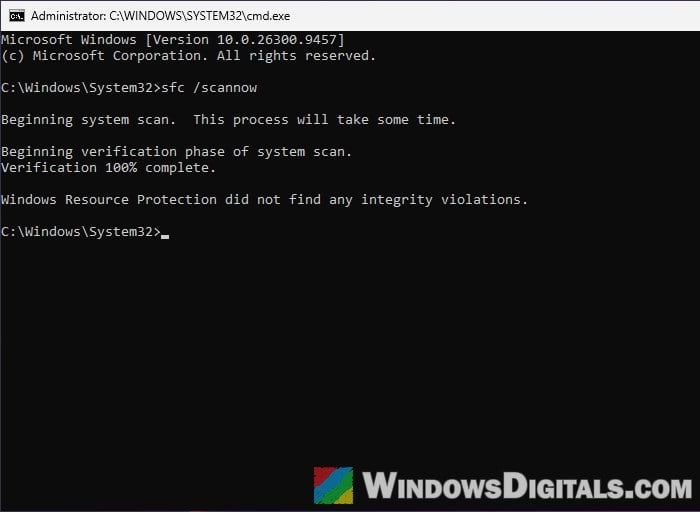
- Then run this one to repair the Windows image itself:
DISM /Online /Cleanup-Image /RestoreHealth
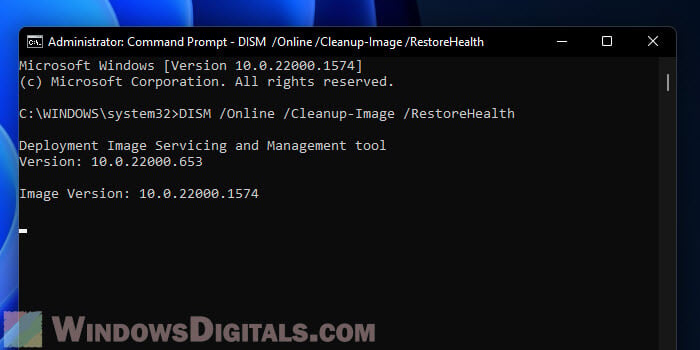
- Restart your PC and check the device again.
Might be useful: How to Run SFC Scannow Command At Boot in Windows 10/11
Check Memory integrity
Microsoft lists Memory integrity (Core isolation) as one reason for Code 39: an older driver that isn’t compatible with it won’t load while it’s on. To check it, open Windows Security and go to Device security > Core isolation details.
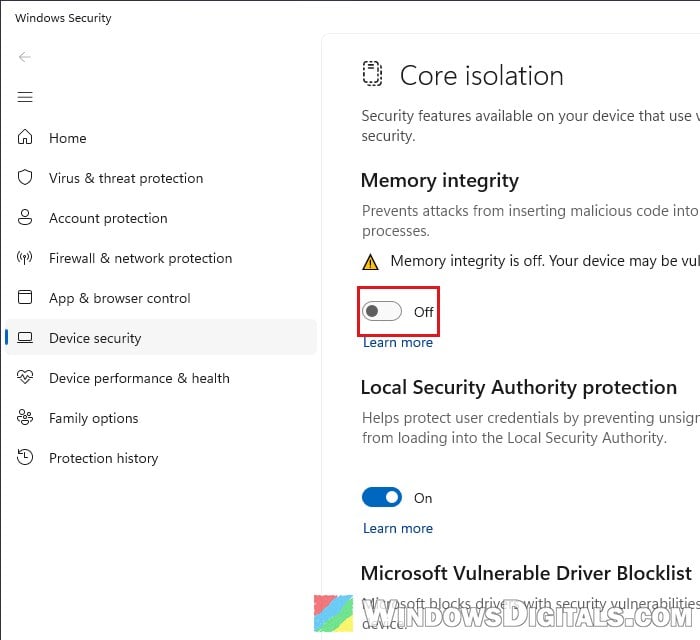
The proper fix here is a newer, compatible driver from the device maker. Turning Memory integrity off for a quick test can tell you whether it’s the cause, but it lowers your PC’s protection against malware, so turn it back on afterward. If turning it off changes nothing, the problem is somewhere else.
Related concern: Memory Integrity Can’t Be Turned On (Windows 11)
Remove leftover UpperFilters and LowerFilters values
Each type of device has a place in the registry where extra “filter” drivers are listed. When an app that added one is uninstalled but its entry stays, Windows tries to load a driver that no longer exists, and devices of that type can fail with Code 39. It’s an old fix, mostly for DVD drives, that has worked for many people when reinstalling didn’t.
Incorrectly changing the registry can break things badly, so please at least create a system restore point first. If in doubt, it’s better to get someone who knows to help you instead.
First, find the device’s class GUID:
- In Device Manager, right-click the device, select Properties, and go to the Details tab.
- Under Property, select Class Guid and note the value.
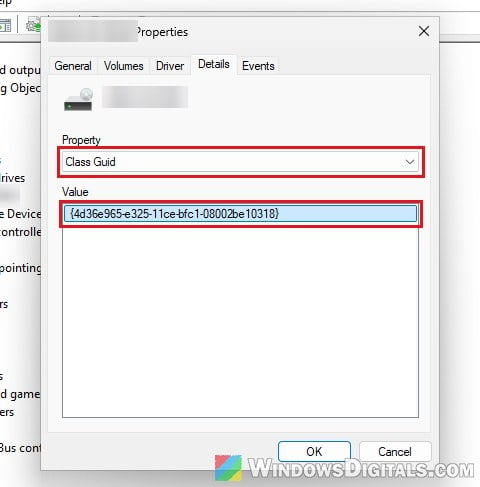
Be warned: Only edit the class of the device that shows Code 39. In the Keyboard and Mouse classes, Windows keeps its own drivers in UpperFilters (kbdclass and mouclass), and deleting them can leave you without a working keyboard or mouse.
Then remove the leftover filter:
- Press Win + R, type “regedit” and press Enter.
- Copy and paste the following path to the address bar, with your device’s class GUID at the end. This one is for DVD and CD drives:
HKEY_LOCAL_MACHINE\SYSTEM\CurrentControlSet\Control\Class\{4d36e965-e325-11ce-bfc1-08002be10318} - Right-click the GUID key on the left, select Export, and save a backup copy.
- Look on the right for UpperFilters and LowerFilters. If neither is there, this isn’t the cause, so close Registry Editor.
- Now delete what’s left over:
- For DVD and CD drives, Windows puts nothing in these values itself, so right-click UpperFilters, select Delete, and do the same for LowerFilters.
- For any other type of device, double-click the value and remove only the line that names a driver left behind by a program you’ve already uninstalled (never kbdclass or mouclass).
- Leave UpperFilters.bak alone if you see it.
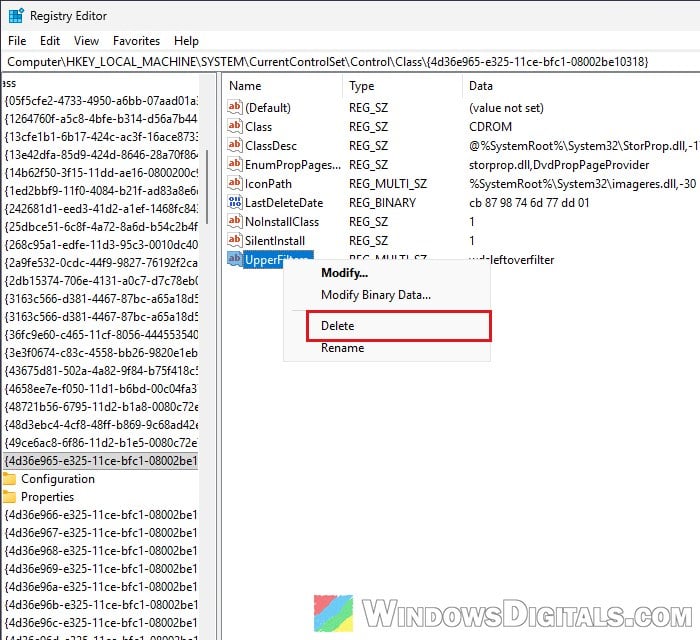
- Restart your PC, then check the device in Device Manager again.
A disc burning app that added its own filter may need reinstalling afterward.
What if the device just has no Windows 11 driver?
If nothing above helps and the device is old (a webcam, audio interface or Wi-Fi card from years ago), there may simply be no driver for it that loads on Windows 11. Ask the maker whether a newer driver exists, try Microsoft’s generic driver as shown above, or replace the device. For Bluetooth, a USB Bluetooth adapter is often the quickest way out, and for Wi-Fi, a newer card with an Intel chip usually does the job.