If you can’t turn on the Memory Integrity option under Core Isolation in Windows 11 because it is grayed out and displays an error description that says “Resolve any driver incompatibilities and scan again“, this post is intended to help you resolve the issue.
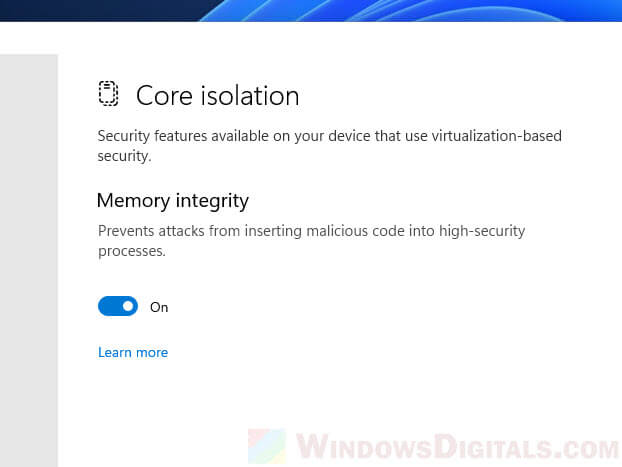
In Windows 11, there is a built-in security feature called Windows Security that helps protect your computer and data. Windows Security includes several protection features such as virus & threat protection, account protection, firewall and network protection and device security. The Memory Integrity option is part of the Core Isolation feature for device security.
Also see: How to Disable Desktop Pop Up Notifications on Windows 11
When the Windows Security detects that the Memory Integrity is off, Windows 11 will prompt you with a notification and suggest that you turn it back on. While this option is usually turned on automatically, you may be prompted to manually turn it back on when there are any issues that may cause it to be turned off.
Page Contents
Windows 11 Memory Integrity can’t be turned on (Fix)
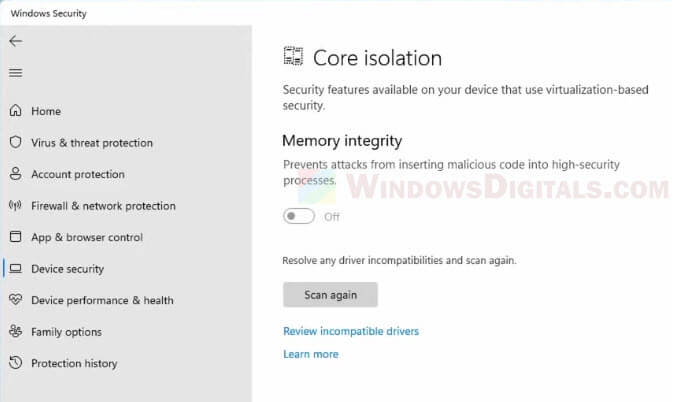
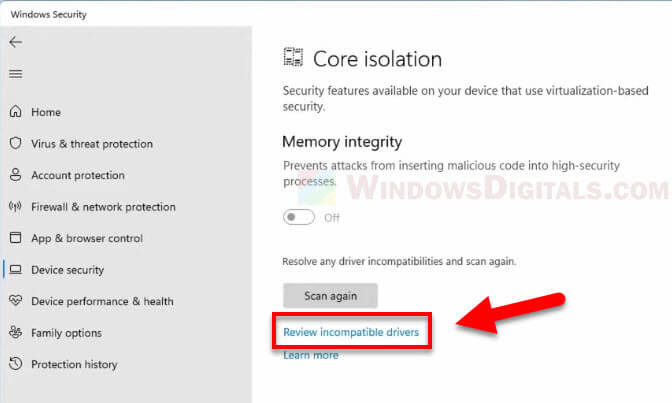
If the Memory Integrity option cannot be turned on because the toggle button is grayed out and unclickable, you can try the solutions suggested below to resolve the issue.
Remove the incompatible drivers
In most cases, the issue is caused by incompatible, incorrect or outdated driver(s) of your hardware, causing the memory integrity to be turned off in Windows 11 and can’t be turned on again until the driver issue is resolved.
Learn more: How to See What Drivers Are Installed in Windows 11
To fix the issue, you can try removing the problematic drivers as stated by Core Isolation in the “Review incompatible drivers” section. The instructions below will show you how to properly do so.
- First, in the Core Isolation’s Memory Integrity setting page, click the “Review Incompatible drivers” below the “Scan again” button.
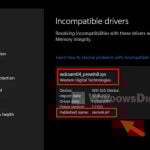
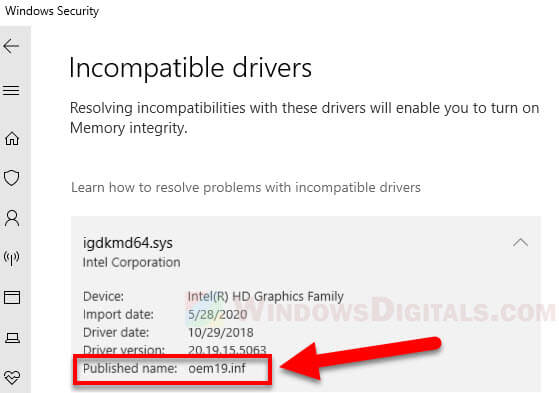
- On the “Incompatible drivers” page, you will see a list of drivers that Windows has detected as incompatible and causing problems. Click the down arrow next to a driver to expand it to see more information. Make a note of the “Publisher name” of the incompatible driver.
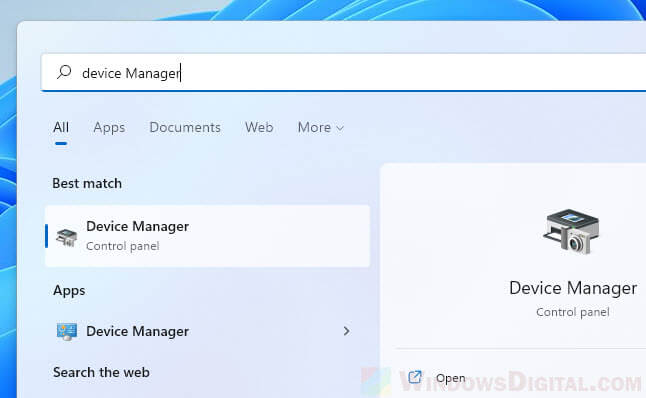
- Next, search for and open “Device Manger” via Start.
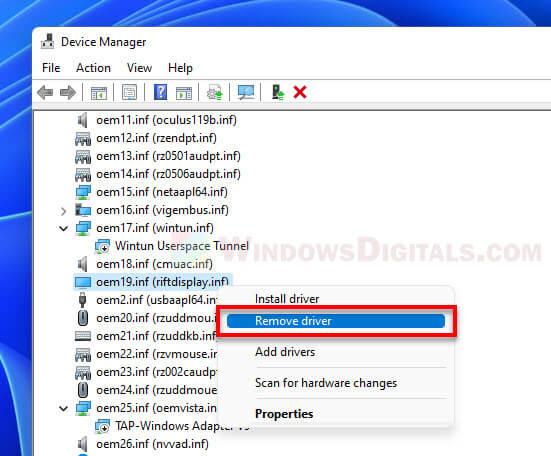
- In Device Manager, click View from the menu bar and select “Devices by driver“. Doing so will list the devices by their driver’s name.

- Since the drivers are now sorted by their names, you can easily find the incompatible driver from the list. Right-click the problem driver and select Remove driver.
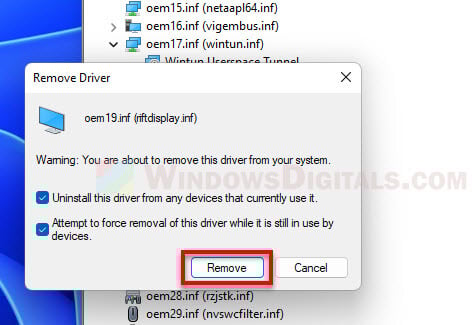
- When prompted to remove the driver, you may also want to check the option for “Attempt to force removal of this driver while it is still in use by devices”. Click Remove to uninstall the driver.
- If you have more than one incompatible driver, repeat the steps above.
- Restart your PC after removing the incompatible drivers.
- After restarting, go back to the Core Isolation > Memory Integration setting and click the “Scan again” button.
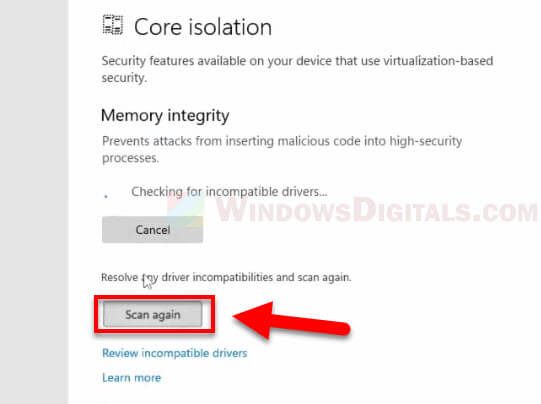
- If Windows does not detect any incompatible driver, you will be able to turn on the Memory Integrity option again.
Related: How to Update Realtek Drivers in Windows 11
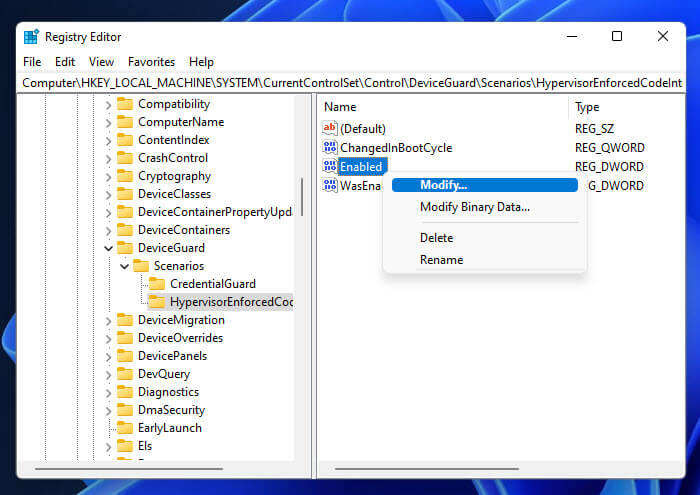
Turn on Memory Integrity using Registry Editor
Alternatively, you can try enabling Memory Integrity via Registry Editor. Follow the steps below to do so.
- Search for and open “Registry Editor” (or “regedit”) via the Start menu.
- In the Registry Editor window, navigate to the following registry key.
Computer\HKEY_LOCAL_MACHINE\SYSTEM\CurrentControlSet\Control\DeviceGuard\Scenarios\HypervisorEnforcedCodeIntegrity
- Next, select the “HypervisorEnforcedCodeIntegrity” key from the left pane.
- Then, right-click “Enabled” on the right and select Modify.
- In the “Value data” field, change the value to “1” and click OK to save the changes.
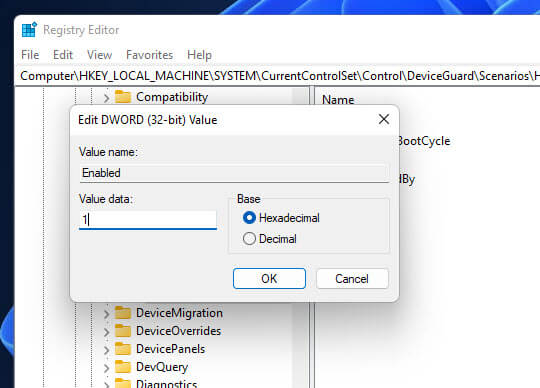
- Restart your computer and retry turning on Memory Integrity in Windows 11.
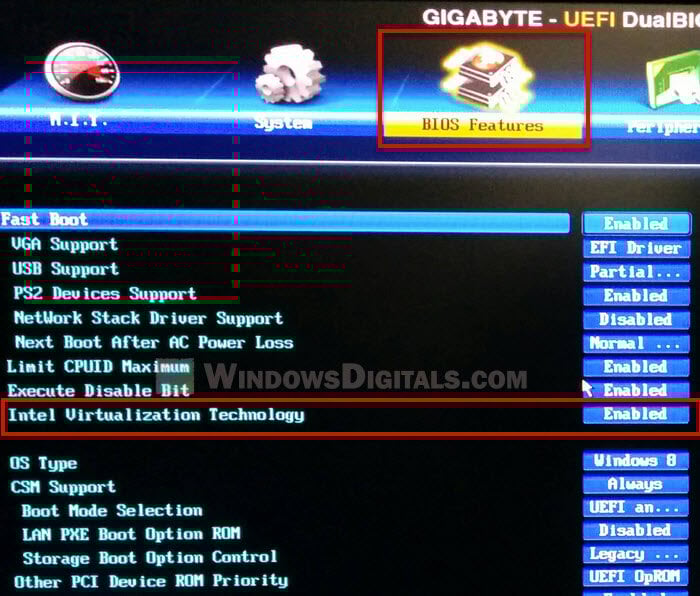
Enable Hardware Virtualization in BIOS
The Memory Integrity and Core Isolation feature will only work when Hardware Virtualization is enabled on your computer. Virtualization settings are usually configured through BIOS settings.
As different motherboards have different BIOS firmware, it is impossible to give precise instructions on how to enable hardware Virtualization for all types of BIOS interfaces. You will have to find it yourself via the BIOS settings of your computer.
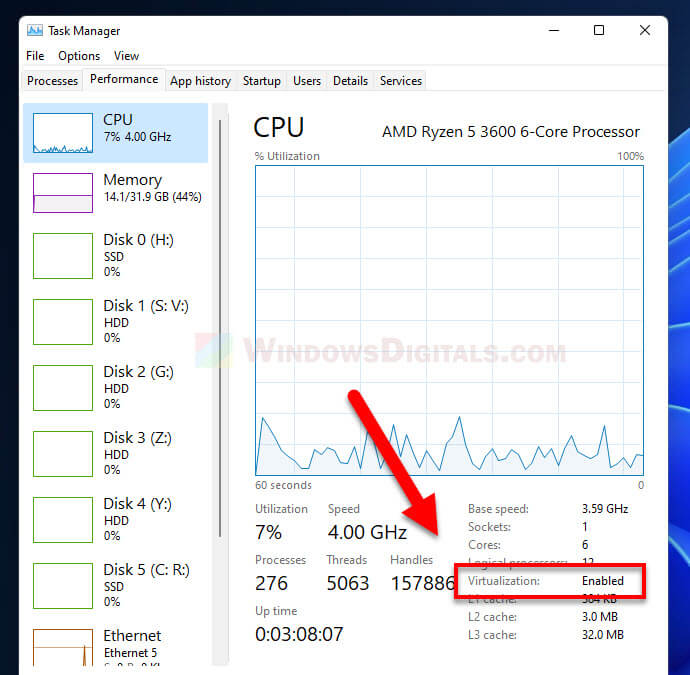
In addition, you can check if Virtualization has been enabled via Task Manager > Performance > CPU. If hardware virtualization is enabled, the “Virtualization” detail will show “Enabled“.
System restore or reset Windows 11
If there is no solution to your problem, you may want to try doing a system restore to restore your PC to its previous state (if there was a system restore point saved previously). Also, as a last resort, you can backup your important files and data, and then reset Windows 11 to factory defaults.