If you’re trying to update your motherboard’s BIOS (maybe because Modern Warfare 4 told you to) and MSI’s M-Flash or Gigabyte’s Q-Flash shows your USB drive but not the BIOS file you put on it (or doesn’t seem to list the drive at all), the file is usually wrong for your board or isn’t where the tool looks for it (still zipped, in a folder, or on a drive format it can’t read). This guide will walk you through the usual reasons and how to get M-Flash or Q-Flash to see the file.
Also see: ASRock Instant Flash “No image file detected”, Why?
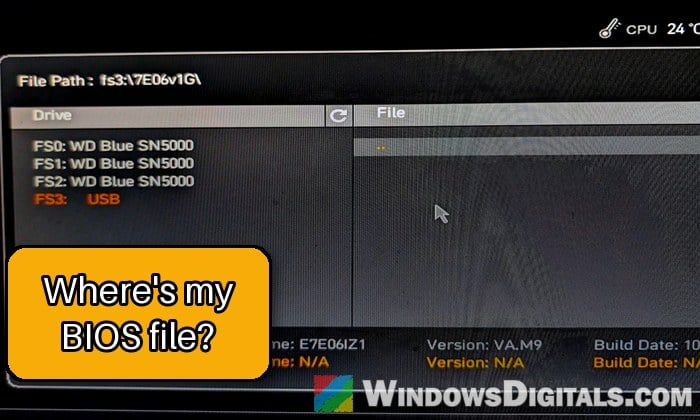
Why can’t M-Flash or Q-Flash see the BIOS file?
M-Flash only shows BIOS files meant for your exact board, so a wrong file simply doesn’t appear. Q-Flash may list it but call it invalid. MSI’s own FAQ on this exact problem says to download the correct BIOS file for your board, extract it and save it to the USB drive.
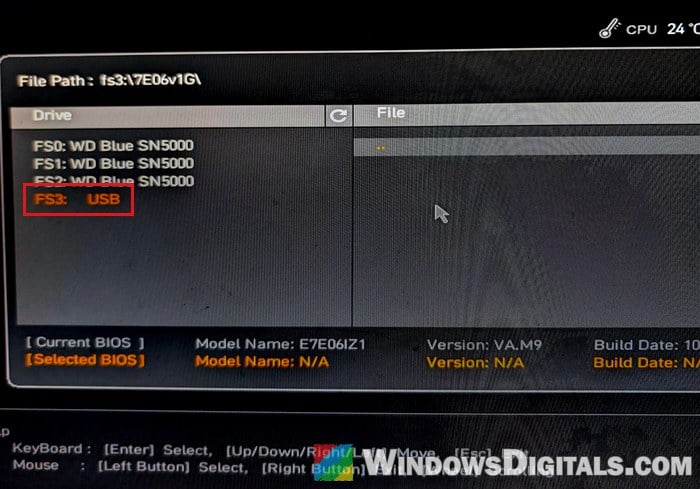
Some common reasons the file doesn’t show up are:
- The file is for a different board, often one with a near-identical name (a WiFi, WiFi 6E or DDR4 version).
- The PC is a prebuilt running its maker’s own version of the BIOS.
- The file is still zipped or inside a folder instead of in the root of the drive.
- In Q-Flash, the stick itself can hide at the very bottom, below several “Unknown Device” entries.
- The drive is formatted as NTFS or exFAT. MSI wants FAT32 (or FAT16), and so does Gigabyte.
- The stick was once made bootable, and its leftover partitions confuse the tool.
The first one is the most common, so start there.
Linked issue: MW4 Says “BIOS Firmware Update Required” but Your BIOS Is Up to Date
Make sure the BIOS file is for your exact motherboard
M-Flash won’t offer a file built for another board, even a near twin like the WiFi6E version of a B850 Gaming Plus WiFi, and on Gigabyte boards the revision (such as “rev 1.x”) matters too. Check the model in the BIOS itself, since Windows can show the wrong board name on prebuilt PCs:
- Restart the PC and enter the BIOS (press Del during startup on MSI boards).
- Note the motherboard’s name and the BIOS version shown on the main screen.
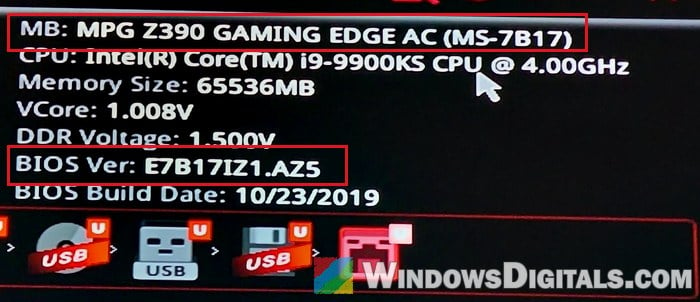
- Go to the support page for that exact model on MSI’s or Gigabyte’s website, and open the BIOS downloads.
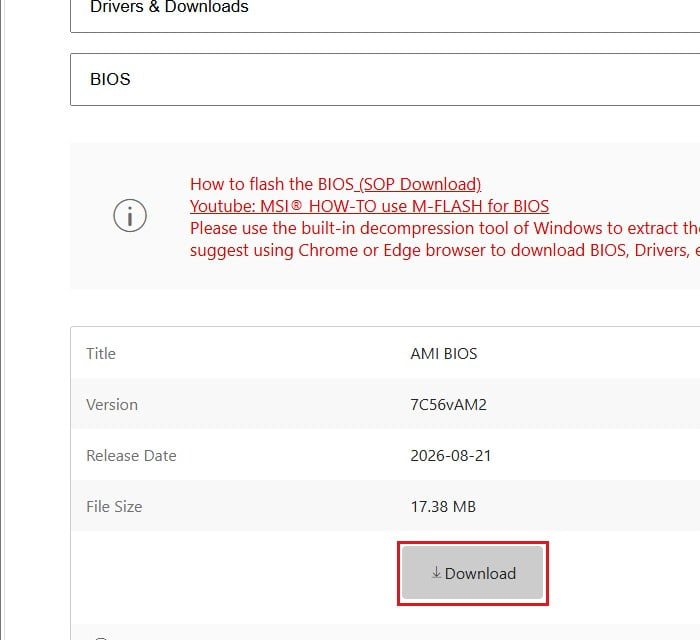
Downloading the file for the right model usually fixes it. On MSI boards you can double-check once the file is extracted (next section).
Bought a prebuilt PC?
Prebuilt PCs from companies like NZXT or Origin PC may run an OEM version of the board’s BIOS, and M-Flash hides the regular retail file. If the BIOS version has letters like IZ1 instead of MS, it’s an OEM BIOS. On some NZXT PCs the right file was a “CEC” version of the board’s BIOS. Look for that, check the PC maker’s support site, or contact them.
Extract the file and copy only the BIOS file to the drive’s root
M-Flash and Q-Flash can’t look inside the downloaded ZIP file, and MSI and Gigabyte both say the BIOS file has to sit in the root of the drive, not in a folder. Follow the steps below:
- Right-click the downloaded ZIP file and select “Extract All“, then click “Extract“.
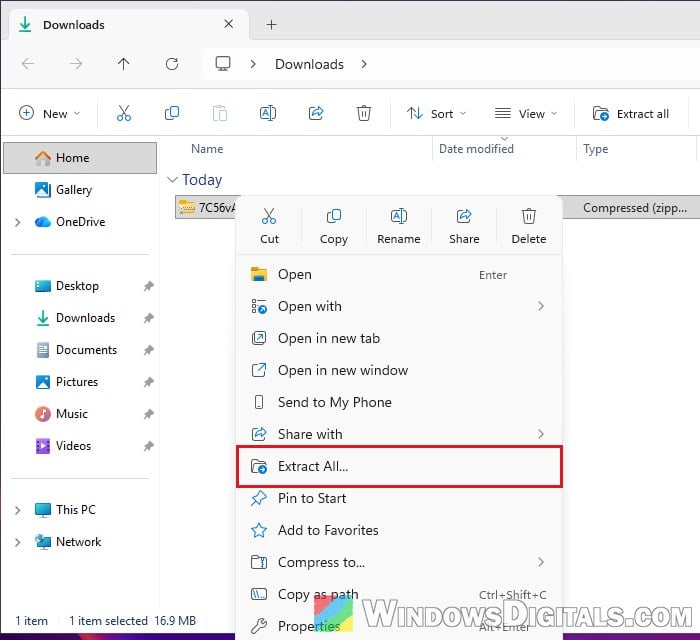
- Open the extracted folder and copy the BIOS file. On MSI boards it’s named after the board, such as
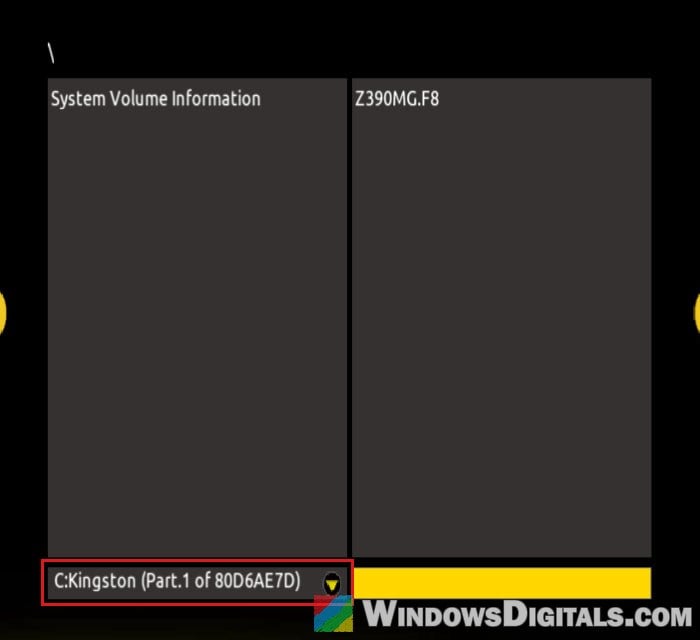
E7C56AMS.AM2. On Gigabyte boards it’s a short form of the model plus the version, such asZ390MG.F8for a Z390 M Gaming on BIOS F8. On an MSI board, the part before the dot (E7C56AMShere) should match the start of the BIOS version you noted. If it doesn’t, it’s the wrong file. - Open the USB drive in File Explorer and paste the file directly into it, not into a folder.
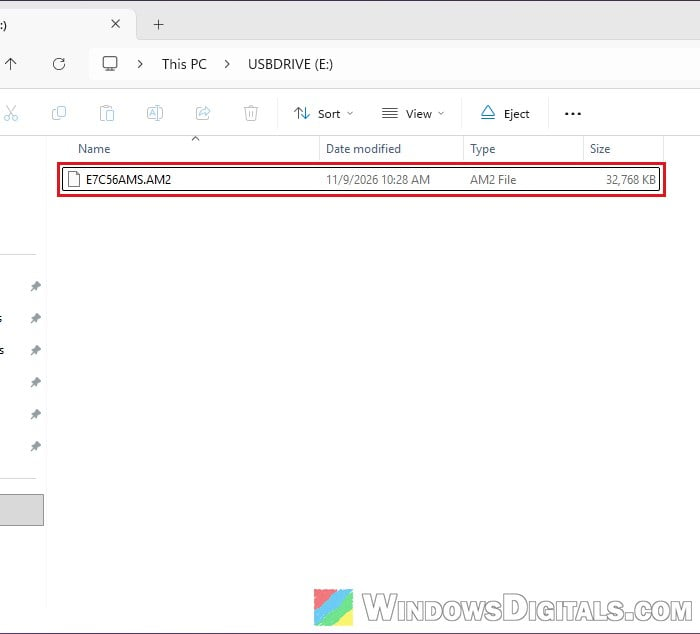
No renaming is needed: MSI.ROM and GIGABYTE.bin are only for the flashback button (last section). On MSI boards, open M-Flash again by pressing Ctrl + F5 during startup, or press Del, click “M-FLASH” and then “Yes” to restart into flash mode.
Might be useful: Windows 11 Not Activated After BIOS Update
Look further down the drive list in Q-Flash
Q-Flash can list several “Unknown Device” entries, which are partitions on your internal drives, and the USB stick can be the last item below all of them.
Open Q-Flash again (press End during startup, or press F8 or click the “Q-Flash” icon in the BIOS), select “Update BIOS“, and go through the whole list until you see your stick’s brand and model. The small arrow at the right end of the drive bar under the file lists switches between drives and partitions.
Related guide: Enabling TPM 2.0 and Secure Boot on Gigabyte Mobo
Format the USB drive as FAT32
MSI and Gigabyte only list FAT32 and FAT16 for their tools, so an NTFS or exFAT stick may not be read.
Warning: Formatting erases everything on the USB drive. Copy off anything you need first.
Here’s how to do it:
- Open File Explorer and go to “This PC“.
- Right-click the USB drive and select “Format“.
- Set “File system” to “FAT32” and click “Start“, then “OK“.
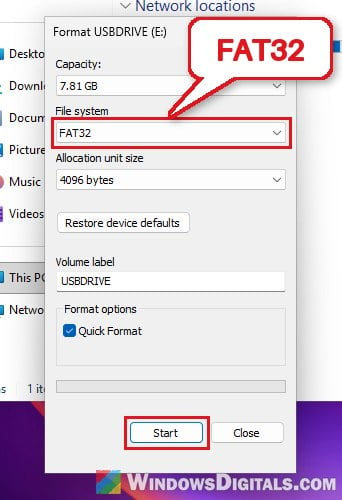
- Copy the BIOS file back onto the root of the drive.
The Format window in Windows only offers FAT32 on drives up to 32 GB. If your stick is bigger, the easiest way out is a smaller one. Then open M-Flash or Q-Flash again and check whether the file shows.
Was the stick used to boot Windows or Linux before?
A stick that was once made bootable (with Rufus, or as a Linux live USB) can keep hidden partitions that a normal format doesn’t remove, and Q-Flash may then show “Can’t read” or “Invalid file“. Wiping it with DiskPart and formatting it again can clear it.
Be warned: The clean command erases the whole disk you select, so unplug other external drives first. If you’re not sure, get someone to help you instead.
- Search for “cmd” in the Start menu, right-click “Command Prompt” and select “Run as administrator“.
- Type the following commands one by one, and press Enter after each. Find your USB stick by its size in the
list diskoutput and put its number in place of#:diskpart list disk select disk # clean create partition primary format fs=fat32 quick assign
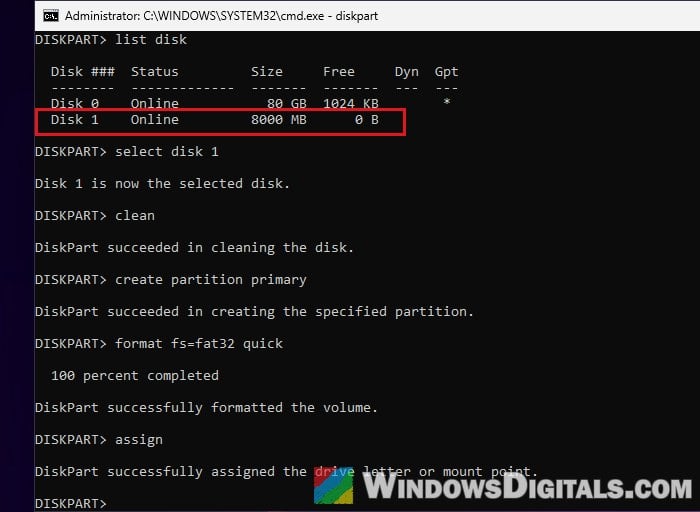
- Type
exit, then copy the BIOS file to the drive again.
On a stick over 32 GB, this format fails too, so use a smaller one. Once the file is back on the stick, try Q-Flash again.
Try another USB stick or a rear port
Some sticks just aren’t read by these tools, and several users on Reddit found that an older, smaller USB 2.0 stick worked when a newer one didn’t. Prepare another stick the same way and plug it into a port on the back of the PC.
On an MSI Intel board with an old BIOS, update in steps
If your BIOS is a few years old, M-Flash may not list the newest file even when it’s the right one, since MSI’s flashing rules can stop an old BIOS from taking it directly (a Pro Z690-A WiFi DDR4 on a 2022 BIOS is one example). Flash an in-between release first, then update again.
Use the BIOS flashback button instead
Some MSI and Gigabyte boards have a back-panel button that updates the BIOS straight from a USB drive: the “Flash BIOS Button” on MSI, “Q-Flash Plus” on Gigabyte (your board’s manual says whether it has one). It also gets around a Q-Flash that keeps asking you to restart without starting the update.
Be warned: A BIOS update can brick your motherboard if it’s interrupted. Don’t turn off the PC or unplug the drive while the light is flashing. If you’re not sure what you’re doing, it’s better to get someone to help you instead.
For MSI boards:
- Rename the BIOS file to
MSI.ROMand save it to the root of a FAT32 USB drive. - With the PC shut down but the power supply connected, plug the drive into the “Flash BIOS Port” on the back panel.
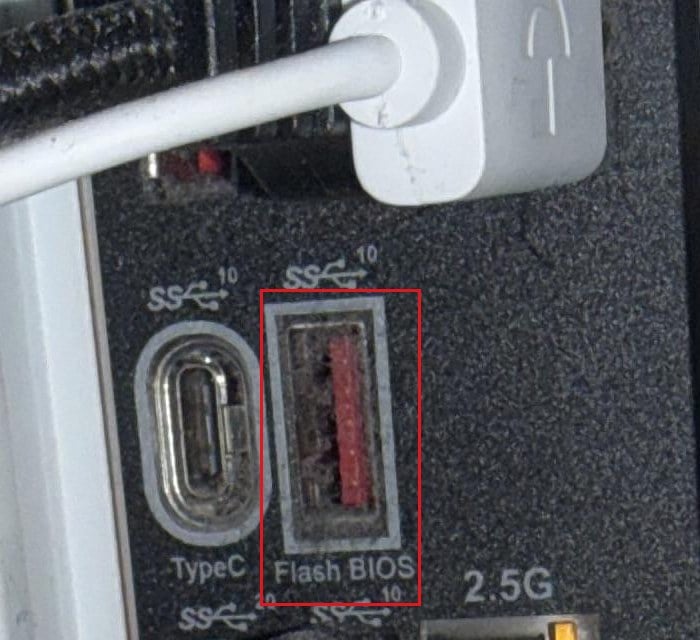
- Press the “Flash BIOS Button“. The light flashes, and turns off when the update is done.
For Gigabyte boards:
- Rename the BIOS file to
GIGABYTE.binand save it to the root of a FAT32 USB drive. - Turn on the power supply with the PC shut down, then plug the drive into the “Q-Flash Plus” port.
- Press the “Q-Flash Plus” button. The light flashes during the update, which takes about 6 to 8 minutes.
Once the light stops, start the PC and check the version in the BIOS. If nothing worked, contact MSI, Gigabyte or your PC maker with the model and BIOS version you noted.