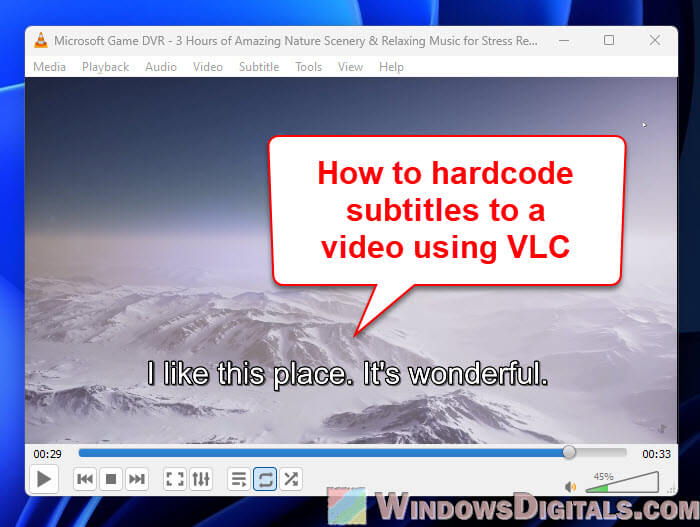
When we talk about putting subtitles directly into videos, it’s called “hardcoding“. This means the subtitles become part of the video itself. Unlike subtitles you can switch on or off, these are always there, no matter where and how you watch the video.
VLC Media Player is pretty awesome because it can play lots of different video types and can also merge subtitles right into your videos. This guide will show you how to use VLC for this.
Note: This article assumes you’ve already installed VLC Media Player on your PC. If not, you can download it from videolan.org. Make sure it’s the latest version to get all the latest features.
Also see: How to Add Subtitles to Video in Windows 11
Page Contents
Preparing your video and subtitle files you want to merge
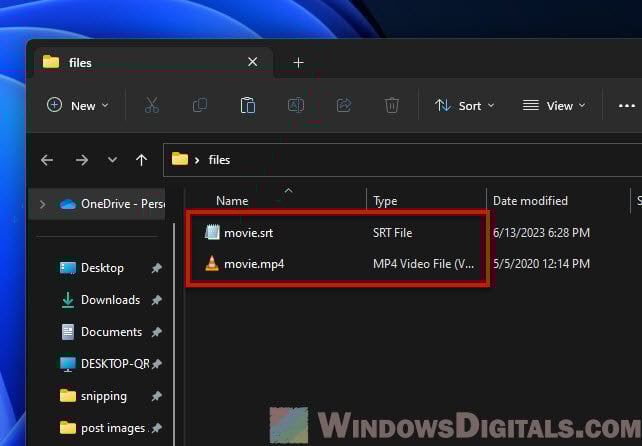
First off, make sure you have both your video and subtitle file ready to go.
Video file: VLC can play many video formats like MP4, AVI, and MKV. So, your video can be in any of those formats. Just make sure it’s clear and high quality because converting won’t make it look better.
Subtitle file: This is the text file with all the dialogues. SRT is the most common format, but VLC also works with other formats like SSA and ASS too. Make sure the timings in your subtitle file match up with the video.
Useful guide: How to Download Subtitles in VLC on Windows 11
Loading your video and subtitles
Open up VLC Media Player. Click on the “Media” menu and then “Open File” to pick your video file.
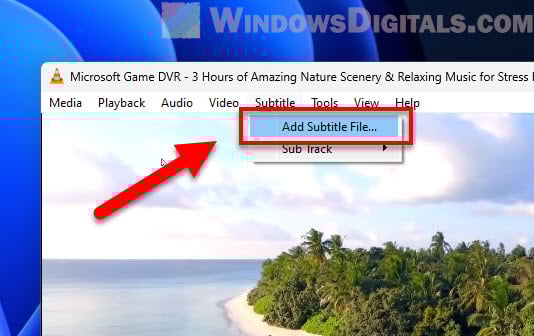
Next, to add your subtitle file, go to the “Subtitle” menu and click on “Add Subtitle File…”. Pick the right subtitle file from your computer.
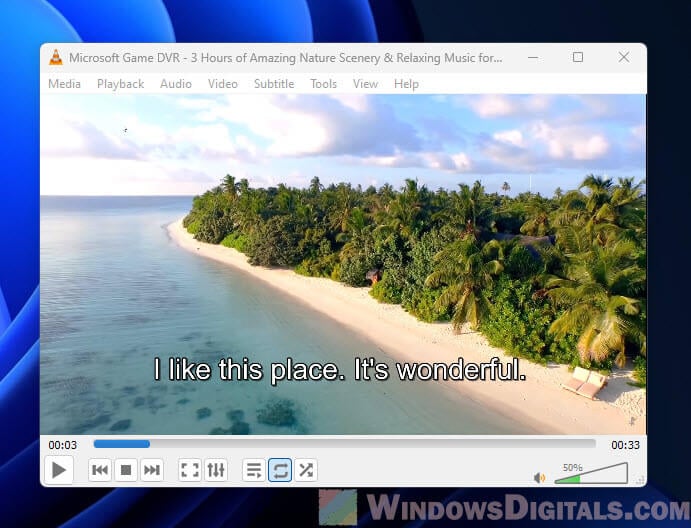
Hit play to make sure the video plays with the subtitles. But note that they’re not part of the video yet. We’ll use VLC’s conversion feature for that.
Pro tip: How to Move Subtitles in VLC Player
Setting up the conversion
Now, let’s get your video and subtitles ready to merge.
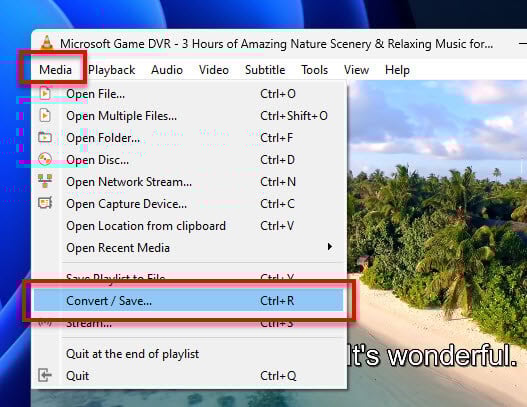
Head over to the “Media” menu and pick “Convert / Save…”. You’ll see a box pop up. Your video should be listed there.
If you don’t see your video, no stress. Just click “Add…” to find it on your computer.

Make sure to check “Use a subtitle file” and then browse to pick your subtitle file. This makes sure VLC includes your subtitles in the video.
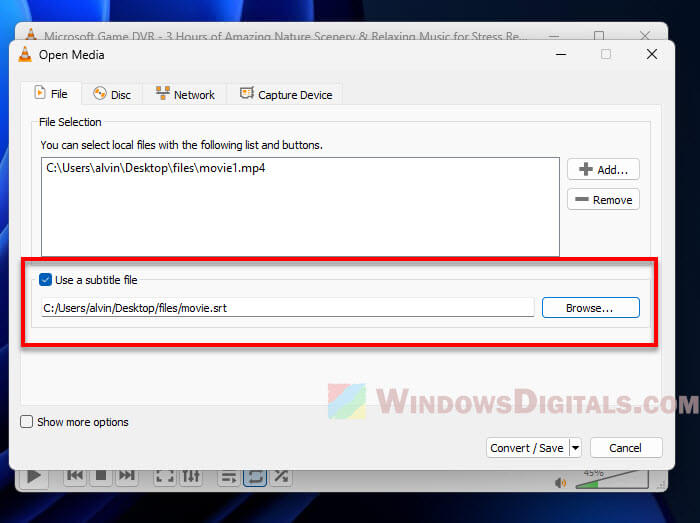
If your video and subtitle file are in the same place and have the same name (but different endings), VLC will figure it out and do the work for you.
Click on “Convert / Save” to move to the next steps.
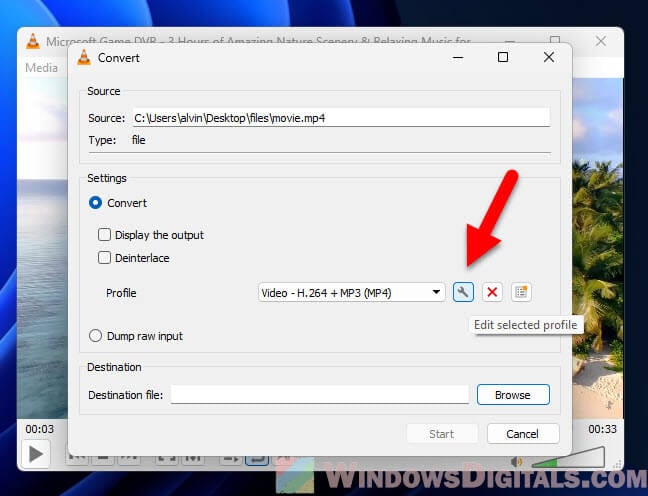
Choose a profile that works for most devices, like “Video – H.264 + MP3 (MP4)”. Then, click on the “Edit selected profile” button next to the profile drop-down list.
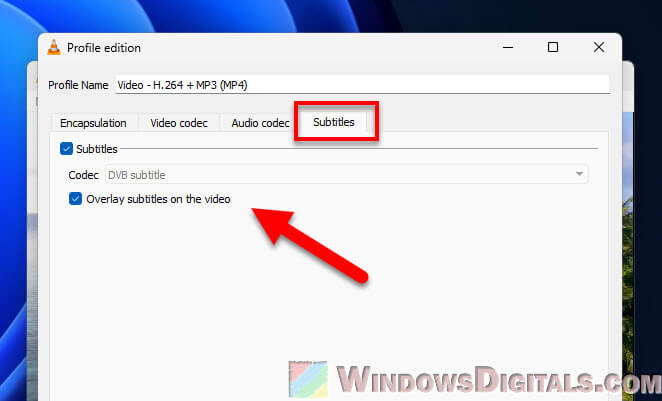
In the “Subtitles” tab of the “Profile edition” window, tick the “Overlay subtitles on the video” checkbox. This makes the subtitles part of the video.
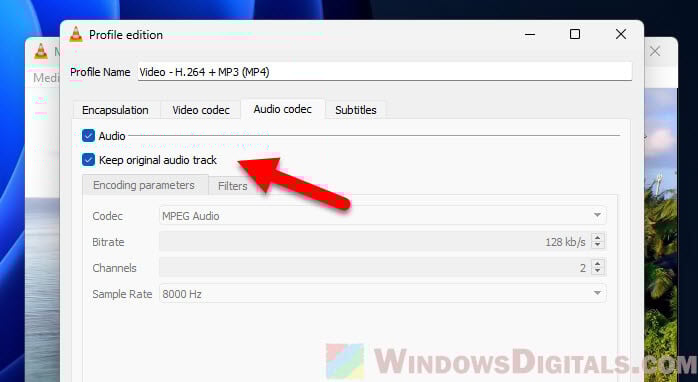
Also, check “Keep original audio track” to keep your video’s sound as is.
Hit “Save” and you’re all set for the next step.
Pro tip: Convert SRT to 3D Subtitles and Add them to 3D Movies
Starting the conversion to merge the subtitles with your video
Now, choose where to save your video and what to name it.
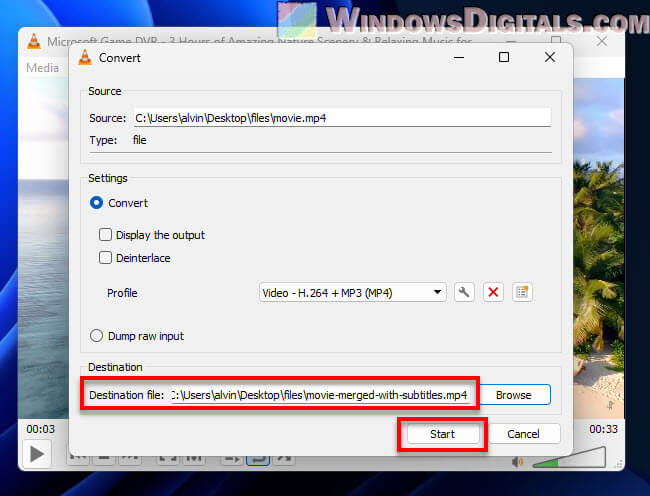
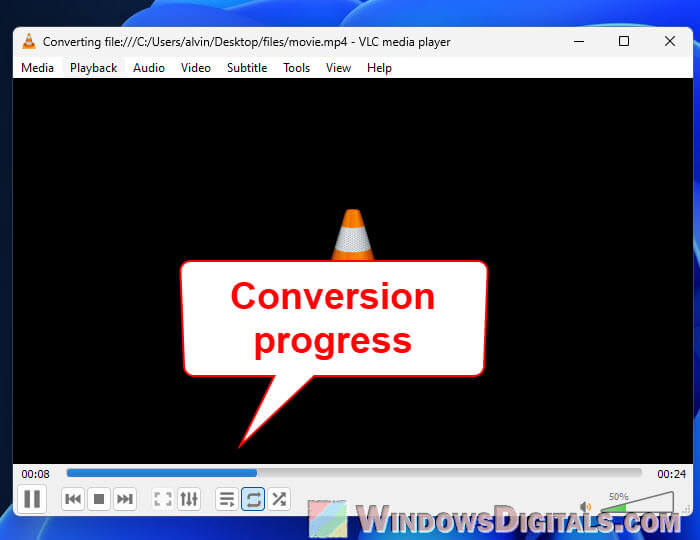
Click “Start” and VLC will begin merging your subtitles with the video. You’ll see a progress bar showing how it’s going.
After it’s done, head to where you saved your video, and you’ll find it with the subtitles now a permanent part of it.
Related resource: How to Cut Video Using VLC in Windows 11
Some common issues
If you run into trouble, like missing subtitles or them not matching the video, here’s what might help:
- Uncheck “Keep original video track” in VLC’s settings if your subtitles aren’t showing up after conversion.
- Double-check your subtitle file. It might not match your video, especially the timing of the dialogues.
- Make sure your subtitle format is supported. VLC loves SRT, SSA, or ASS formats. If yours isn’t one of these, you might need to change it using a subtitle converter tool.
- Keep your VLC updated. An old version might not work well with some subtitle files.
One last thing
While we talked about using VLC here, there are many tools out there that can do the same job. Your choice depends on what you need, how much you know, and what you have access to.