FFmpeg is a very popular and useful open-source tool that lets you work with videos and audios in many different ways. It can do things like converting, recording, streaming, or even splitting and combining audio and video files. It’s the secret sauce behind many Python tools and scripts for video and audio tasks.
Ever tried using a command-line tool but it just didn’t work because FFmpeg wasn’t there? Well, this guide will show you how to get FFmpeg set up on your Windows 11 computer so you can run those Python scripts that require it. Believe me, it’s surprisingly easy to install, even if you’re new to installing software.
Page Contents
Why do you need FFmpeg?
FFmpeg is an important tool for many users who often need to work with video and audio. Whether you’re into coding with Python and need to make scripts that deal with multimedia formats, or you just want to merge, split, convert, or stream media files, FFmpeg can do all that. Most importantly, it supports tons of formats.
Related resource: Convert SRT to 3D Subtitles and Add them to 3D Movies
Downloading FFmpeg
Before we can use the FFmpeg’s features, we need to first download the software. There are plenty of places online where you can download FFmpeg for Windows 11 or 10. Choose the version that fits what you need it for, as they come with different features and capabilities.
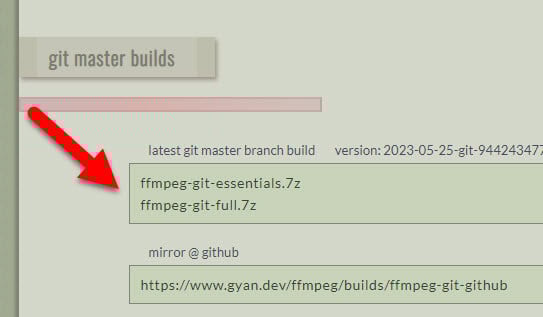
- Visit a reliable FFmpeg builds page. Here’s a site where you can find various FFmpeg builds, like Gyan.dev FFmpeg Builds. Just go there with your browser.
https://www.gyan.dev/ffmpeg/builds/
- Look for
ffmpeg,ffprobe, andffplayon the page. For Python stuff, eitherffmpeg-git-essentials.7zorffmpeg-git-full.7zwill do the job. Pick the one that matches your needs. - Click the link for the build you want to start downloading it.
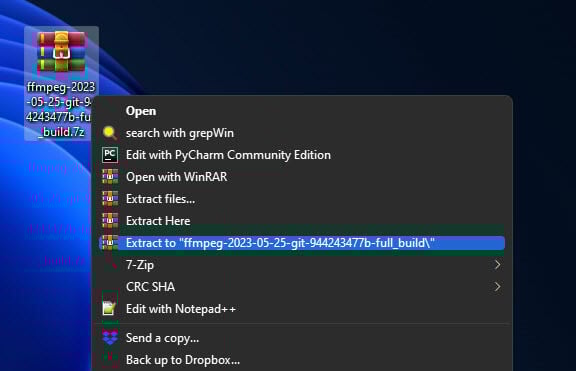
- After downloading, you’ll get a .7z file. You’ll need a tool like 7-Zip to open it. Right-click the file, pick “Extract Here” or “Extract files”. If you don’t have 7-Zip, it’s free to download and use.
Installing FFmpeg in Windows 11
Now that you have the FFmpeg files, the next step would be to install it on your PC. The most crucial step is to add FFmpeg to your system path, so your computer knows where to find it. This makes sure you won’t get errors when trying to use FFmpeg from the command line or with Python scripts.
- Make a new folder in your
C:drive calledFFmpegto keep things tidy.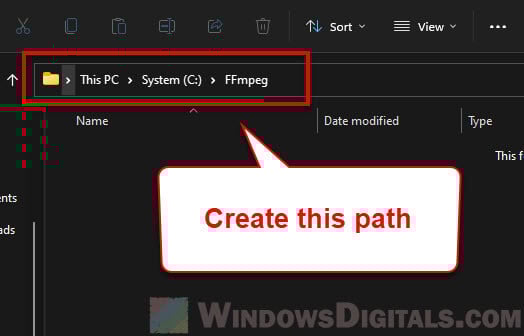
- Move all the extracted files into the
FFmpegfolder you just made.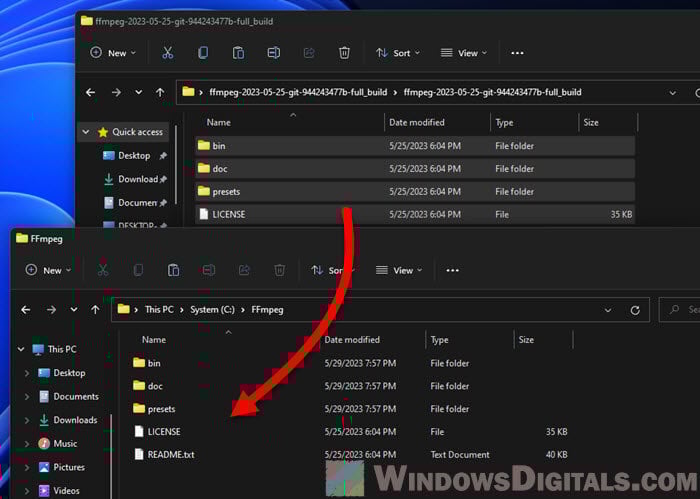
- We need to tell your computer where FFmpeg locates so you can use it from anywhere. Here’s how:
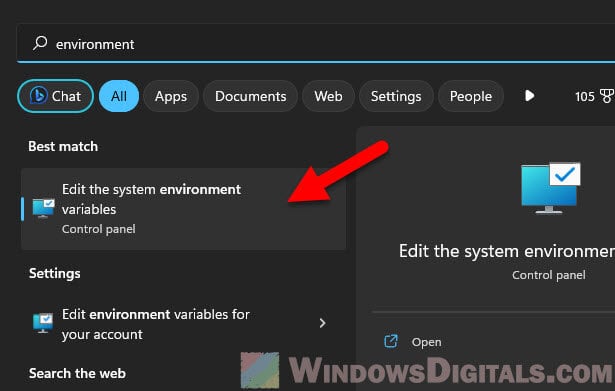
- Hit the Start Menu, look up “Environment Variables”, and choose “Edit the system environment variables”.
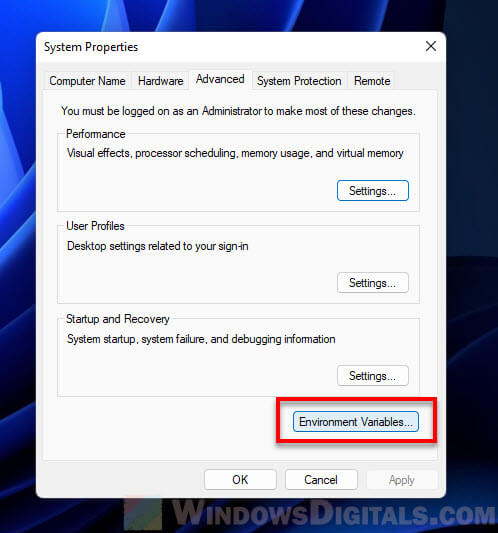
- In the window that comes up, click “Environment Variables”.
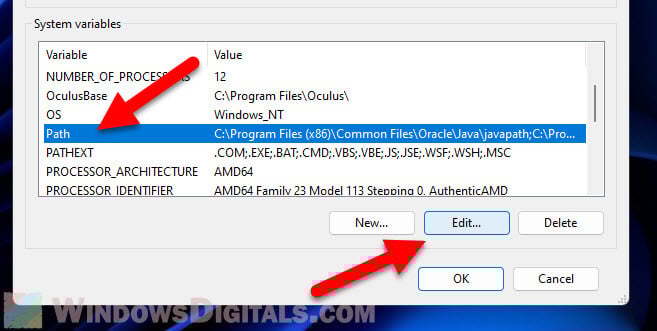
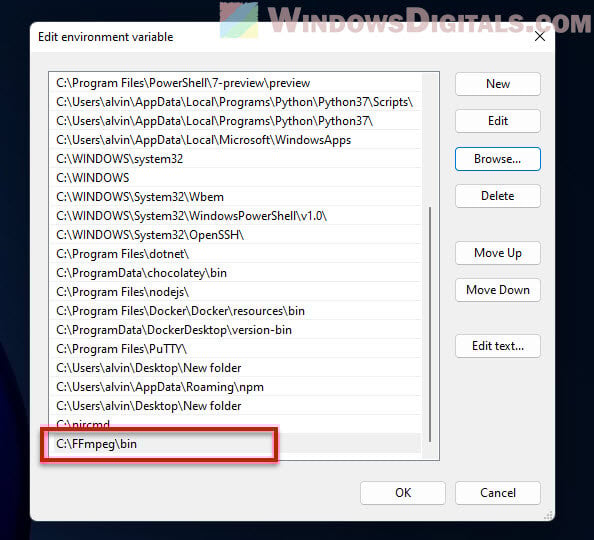
- Find the “System variables” section, scroll to “Path”, select it, and click “Edit”.
- Click “New” then “Browse”.
- Browse to the
C:drive, open theFFmpegfolder, and inside it, thebinfolder.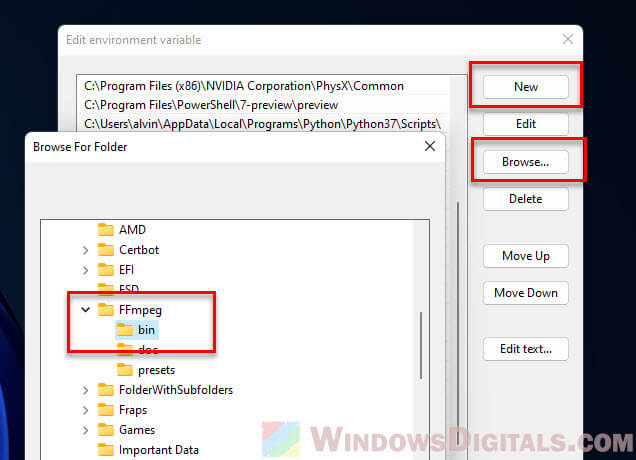
- Click “OK” to save the changes and close all windows.
- Hit the Start Menu, look up “Environment Variables”, and choose “Edit the system environment variables”.
Checking the installation
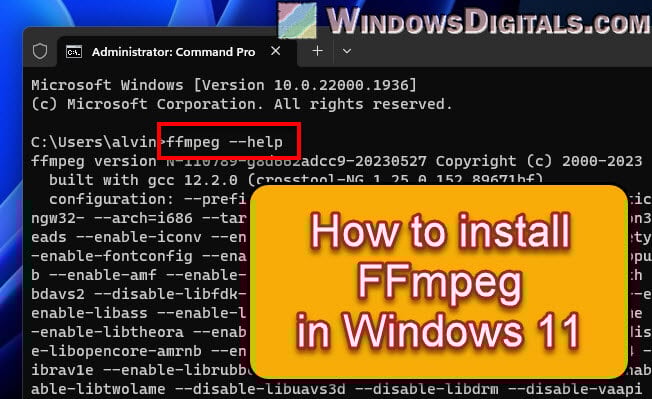
To make sure FFmpeg is already installed and ready to be used, open a new command prompt window (just type cmd in the search bar and hit Enter). Type ffmpeg -version and hit Enter. If everything went right, you’ll see info about the FFmpeg version installed on your system.

Some final words
Congrats! You’ve got FFmpeg installed on your Windows 11 PC. Now, all those Python scripts and command-line tools that need FFmpeg to deal with video and audio stuff should work just fine. If you need to manually use it for tasks like converting or streaming, you can check what you can do with it by running the ffmpeg -help command to see a list of commands that you can use with it.