Solid-state drives, most often known as just SSDs, are a new type of storage that is built entirely differently from a conventional Hard Disk Drive (HDD). An SSD is much faster, uses lesser power and sometimes has better reliability than an HDD. But not all SSDs are the same. It’s important that you know which SSD can work with your motherboard, otherwise you might end up wasting your money on something that cannot be used. This guide will explain how to check if your SSD and motherboard can work together compatibly, talking about things like their form factors, connection types, and software they might need.
Also see: All SSD Connectors Types Explained (SATA, M.2, NVMe, etc.)
Page Contents
Why compatibility matters
If an SSD doesn’t work well with your system, it might not work at all or won’t work as it’s supposed to, which can waste your time and money and cause lots of frustration. That’s why checking if your SSD fits with your motherboard is a must-do before you buy.
Linked issue: HDD Not Detected After Installing M.2 SSD in Windows 11/10
SATA vs. M.2 vs. PCIe physical interfaces
Different physical interfaces help SSDs connect to the motherboard, and not every motherboard can connect with all SSD interfaces. Let’s look at the types of interfaces you might see.
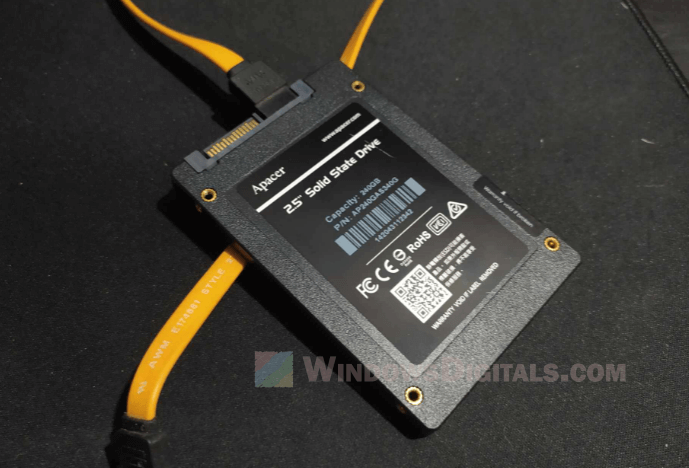
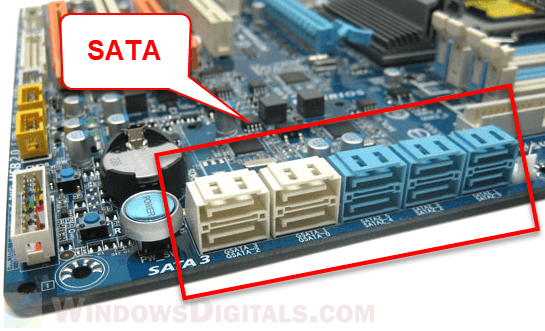
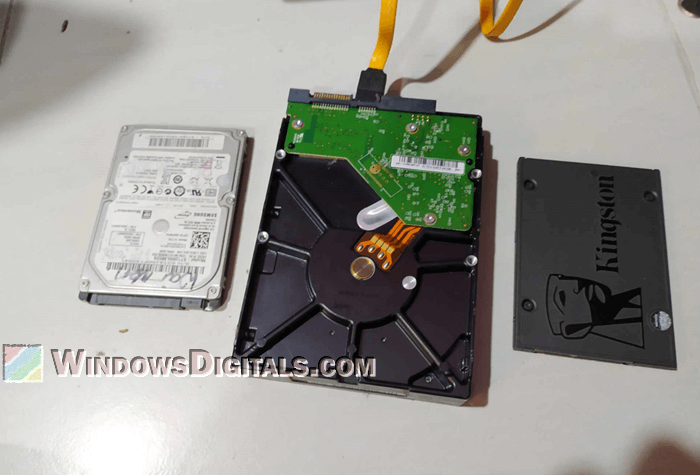
SATA interface and common sizes
The Serial ATA (SATA) interface is very common and has been around for a while. It’s often found in 2.5-inch and 3.5-inch drives, which are usually in desktops and connect through SATA ports that most motherboards have.
 How to check compatibility:
- Look at your motherboard to see if it has SATA ports.
- Read the SSD’s info to see if it’s a SATA type.
- If both are true, then they should work together.
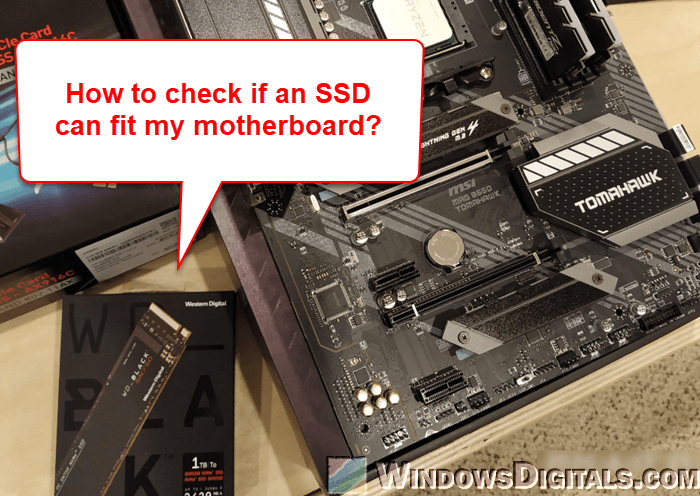
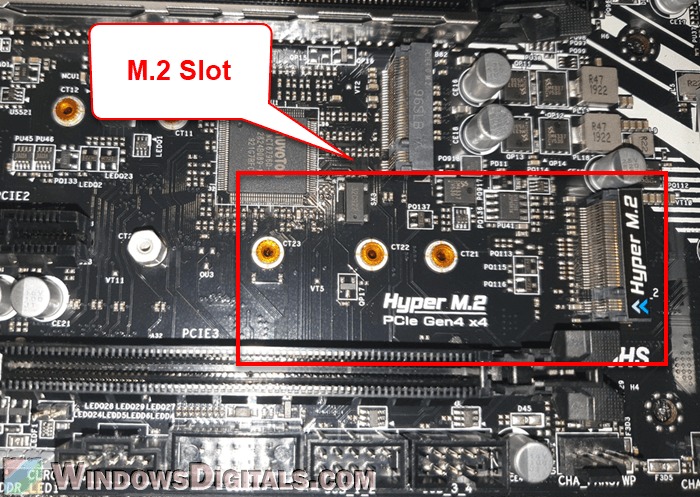
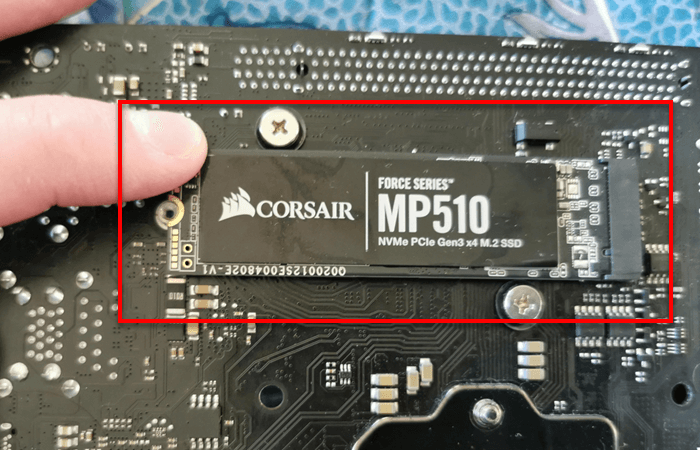
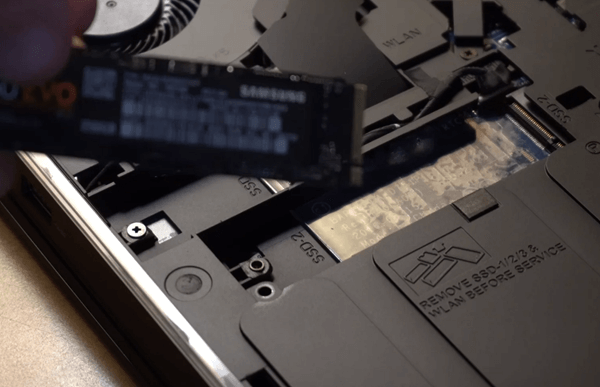
M.2 SSDs and their slots
M.2 SSDs are smaller and connect directly to a slot on the motherboard. These can use SATA for older models or NVMe for newer, faster models. Most new motherboards have M.2 slots and are great for faster speeds.
 How to check compatibility:
- See if your motherboard has an M.2 slot.
- Read the motherboard’s info to see if it supports SATA or NVMe SSDs, or both.
- Make sure your SSD type fits what the motherboard’s M.2 slot can handle.
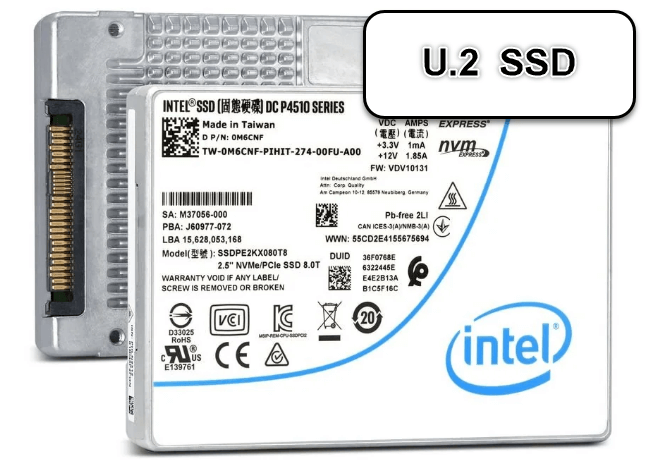
U.2 connector
U.2 connectors are rare and usually found only in high-end motherboards and SSDs meant for business use.
 How to check compatibility:
- Check both the SSD and the motherboard for U.2 support.
- These are rare in regular use, so be sure to check the specs closely.
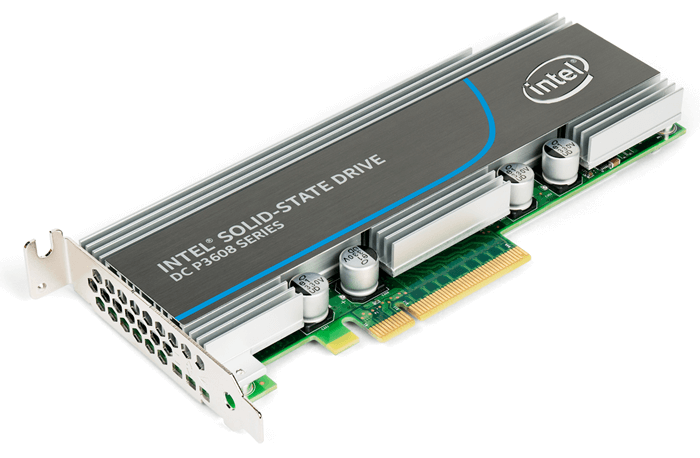
PCIe slot
Some top-performance SSDs connect through a PCIe slot on the motherboard.
 How to check compatibility:
- Check if there’s a free PCIe slot on your motherboard.
- Look at the SSD’s needs for generation and lanes (like PCIe Gen3 x4).
- Make sure the motherboard’s PCIe slot meets or exceeds these needs.
mSATA drives
mSATA is even smaller and mostly found in laptops and some desktops. You need an mSATA slot on the motherboard to use this type of drive.

By knowing these interfaces and SSD shapes, you can better decide if a certain SSD will work with your motherboard.
More info to check out: How to Format New SSD Drive in Windows 11/10
SATA vs. NVMe protocols
After figuring out the physical connections your motherboard has, think about the SSD’s protocol. These affect how the drive connects and talks with the motherboard. SATA and NVMe are the main types you’ll see.
SATA drives
Serial ATA (SATA) is older and mostly found in 2.5-inch and 3.5-inch drives. SATA III, the latest, moves data up to 6 Gb/s. If your motherboard has SATA ports, a SATA SSD should work. But using a SATA III drive in a SATA II port will slow it down to SATA II speeds.
NVMe drives
Non-Volatile Memory Express (NVMe) is newer and designed for faster SSDs, often in M.2 shape. They connect via PCIe lanes on the motherboard for much faster speeds, sometimes 2,000 to 5,000 Mb/s. To use an NVMe SSD, you need:
- A motherboard with M.2 slots that support NVMe.
- A CPU and motherboard that can handle PCIe lanes for fast data moving.
To check its compatibility:
- Look at your motherboard’s manual or online info for supported connections and protocols.
- Make sure your CPU and motherboard can support the PCIe lanes needed for an NVMe drive.
Common issue to watch out for: Disk Management or Diskpart Freezes when Initializing SSD or HDD
BIOS and UEFI support
After checking the physical and interface stuff, make sure your motherboard’s firmware supports your SSD. The two main types of firmware are BIOS and UEFI.
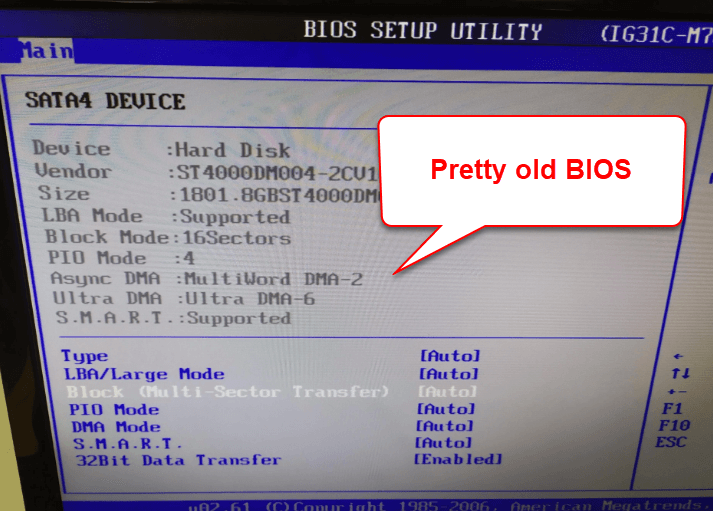
BIOS
Older motherboards usually have BIOS firmware. If yours does, it might only support up to 2TB of storage. Check the specs to see if your SSD fits these limits.
UEFI
Newer motherboards often have UEFI, which supports bigger storage sizes and is easier to use. UEFI is also more likely to support modern SSD tech like NVMe.

How to check firmware compatibility
- Check your motherboard’s manual or the maker’s website for firmware details.
- Look for firmware updates that might make your SSD work better, especially for NVMe drives. Be careful: Wrong update steps can break your hardware.
- See if the SSD maker has any tools to check if your motherboard’s firmware will work with their SSD.
This might help: Partition New, Existing or External SSD in Windows 11/10
Think about the power and data cables
It might seem small, but you should also think about the cables you need. This is especially true for SATA drives, as NVMe drives usually don’t need separate cables—they connect straight to the motherboard.
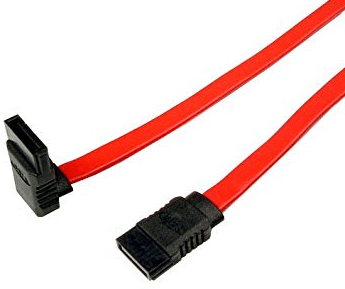
SATA power and data cables
If you go for a SATA SSD, you’ll need a SATA power cable and a SATA data cable. Most new power supplies have SATA power cables, but double-check just to be sure. The SATA data cable connects the SSD to one of the motherboard’s SATA ports. These cables are cheap and easy to find.
Cable length and routing
Think about how long your cables need to be and the path they’ll take inside your computer. Make sure they’re long enough to reach from the power supply to your SSD without pulling on the connectors.
Steps for checking cable needs
- Make sure your power supply has the right SATA power cables, or get one if needed.
- Check if you have a SATA data cable that’s long enough for your setup. If not, get the right length.
- For NVMe drives, you usually don’t need extra cables, but check your motherboard manual to be sure.
Checking cables ahead of time saves you trouble later and makes installing easy.
Good to read: What to do when HDD Makes Clicking, Humming, or Screeching Sound
Software and drivers for your SSD
After making sure the physical and firmware stuff matches, the last step is to check for any software or drivers you might need for your SSD to work best. While most new SSDs just plug in and work, some special features might need certain drivers or software from the maker.
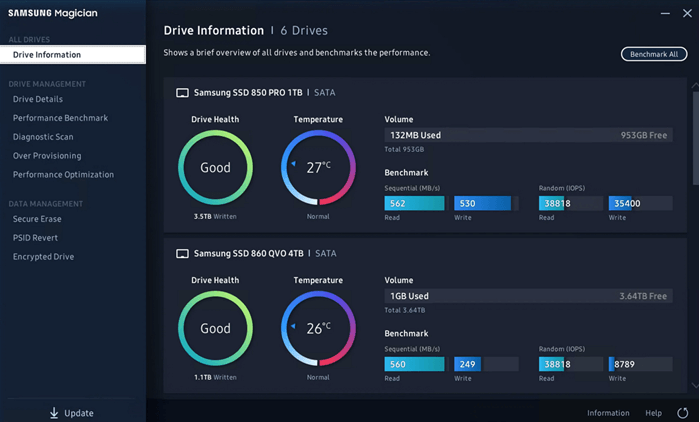
Software from the manufacturer
Many SSD makers have software that lets you clone drives, update firmware, and keep an eye on performance. These tools are great for setting up and keeping your SSD running well.
Operating system needs
Your operating system (OS) affects how well an SSD works, too. Older Windows versions might not support the newest SSD tech. Make sure your OS is up-to-date, or think about upgrading if it’s old. Most new OSs, like Windows 11 or 10, work fine with most SSDs.
Steps to check software and driver compatibility
- Go to the SSD maker’s website to get any recommended software or drivers.
- Make sure your operating system can use these tools and the SSD.
- Update your OS and drivers as needed for your new SSD.
Having the right software and drivers makes everything smoother, from setting up to using your new SSD every day.
Tools for checking compatibility between motherboard and SSD
It would be great to have a tool or website just for checking if an SSD and a motherboard work together by just typing in their models. But such a tool isn’t there yet because it’s usually easy to figure out based on their interfaces like SATA, M.2, and so on.
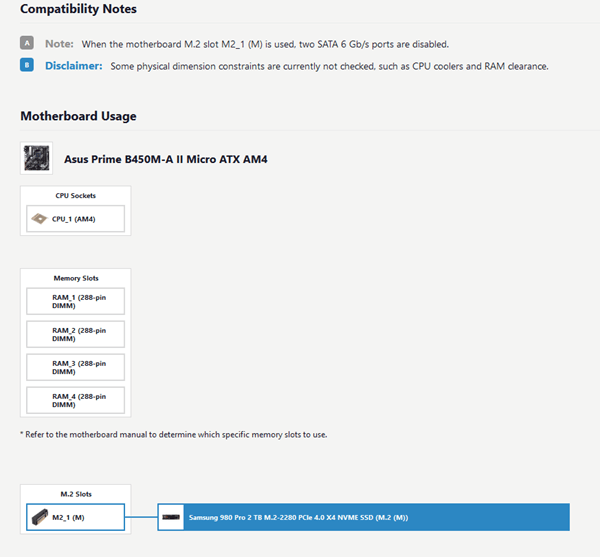
But there are websites that do thorough checks, like PCPartPicker.com. This site lets you pick parts for a computer, including SSDs and motherboards.

After you add an SSD and a motherboard to a build on PCPartPicker, the site will point out any problems. While this helps when you’re building a whole computer, it’s not as direct as just checking two model numbers for SSD and motherboard compatibility.
Even without a special tool, using sites like PCPartPicker and carefully reading your motherboard and SSD specs can tell you if they’ll work well together.
Some final notes
Sites like PCPartPicker are great for checking if different computer parts, including SSDs and motherboards, will work together. But they can’t replace checking the specs yourself. Most of the time, you’ll need to look at your SSD and motherboard details to make sure they match. Most new motherboards should work with different types of SSDs, but there are always exceptions, like a motherboard without an M.2 slot, which is needed for M.2 SSDs.