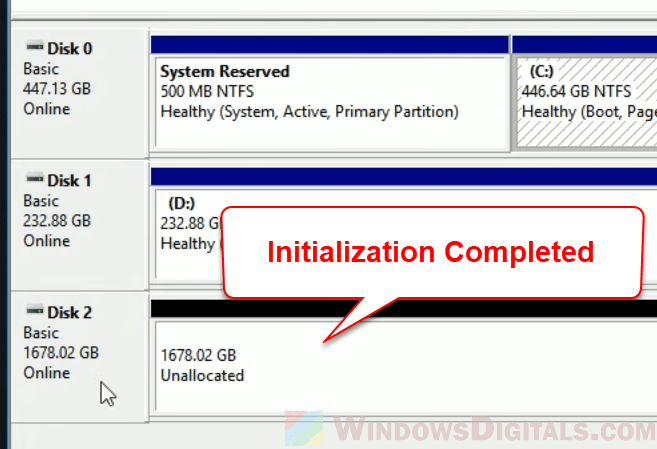
When you add a new Solid State Drive (SSD) or Hard Disk Drive (HDD) to a Windows 11 or 10 PC, you usually have to first “initialize” the drive and pick a partition style: either Master Boot Record (MBR) or GUID Partition Table (GPT). You can use Disk Management or the diskpart utility in Windows for this, and it should take only a few seconds to a minute.
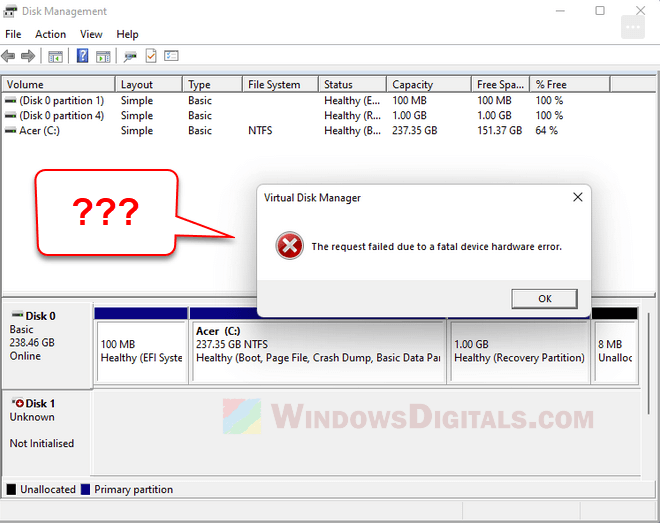
But there is a pretty common problem where Disk Management may just keep loading forever, or it might even stop responding or just crash. Sometimes, you might see an error message that says “The request could not be performed because of an I/O device error” after a long wait. This guide will talk about what could be the cause of this issue, mainly if it’s because of a bad SSD or HDD, and show you what you can do to fix it.
Page Contents
What could be the causes of disk management crashes when initializing a hard drive or SSD?
The following are some reasons that could be causing Disk Management or diskpart to stop working, freeze, or crash when you try to initialize a new SSD or HDD.
- A new drive that came broken or has defects could stop the initialization from working.
- Loose or bad cables, not putting the drive in right, or not having enough power could be problems.
- Sometimes, the issue isn’t with the hardware but with Disk Management or diskpart itself because of bugs in the software.
- Wrong or old drivers for the disk or motherboard could make initializing the drive difficult.
- It’s rare, but broken system files on your operating system can make these utilities not work right.
Each solution we’ll talk about later deals with one or more of these issues.
Related concern: Hard Drives Makes Clicking, Humming, or Screeching Sound
Try the alternative tool for initialization
If one utility doesn’t work, you might have better luck with the other one. If you’re having problem with Disk Management, just try using the diskpart utility in Windows, or the other way around. During this process, you’ll usually have to choose between MBR or GPT for your partition style.
How to use diskpart to initialize a disk
- Press the Windows + X keys together, and pick “Windows Terminal (Admin)” or “Command Prompt (Admin)” from the menu that shows up.
- Type
diskpartand press Enter to open the diskpart utility. - Type
list diskand press Enter to see all the disks connected to your computer. - Pick the disk you want to initialize (like Disk 1). Type
select disk 1and press Enter. - If the disk was used before or has partitions already, you might want to clear it. Type
cleanand press Enter. This step is optional but can help give you a fresh start. - Type
convert mbrorconvert gpt, depending on what you need, and press Enter.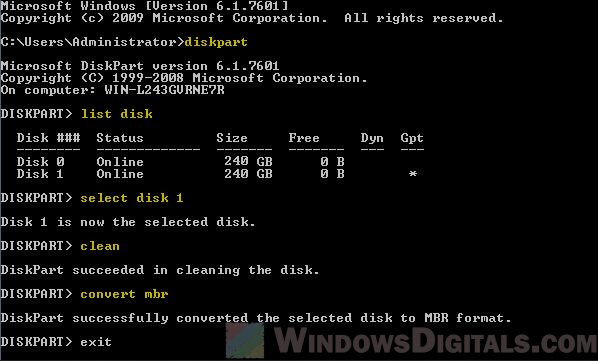
How to use Disk Management to initialize a disk
-
- Press the Windows + X key combination and pick “Disk Management” from the menu.
- Normally, the initialization wizard pops up when Disk Management sees a disk that needs to be initialized. If you don’t see it, look for the drive that needs to be initialized in the list of drives.
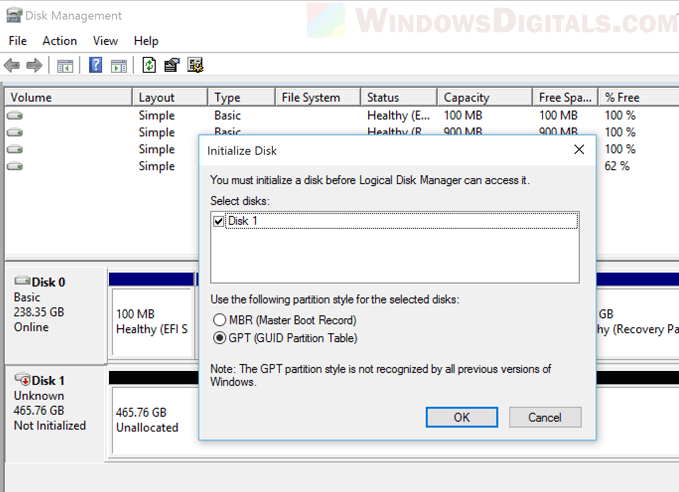
- Follow the prompts on the screen to finish the initialization.
Switching to the other utility might avoid any specific software issues that happen only with one of them.
Also see: How to Format New SSD Drive in Windows 11/10
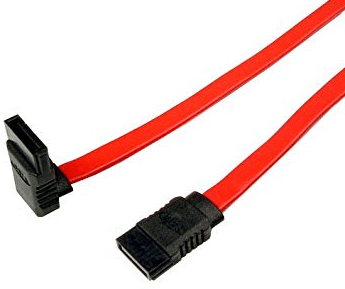
Check hardware issues and their connections
Sometimes the problem might be with the physical connections between the drive and the computer. Loose or bad cables can make Disk Management or diskpart stop responding or crash during the initialization process.
- Turn off your computer to avoid any electrical risks.
- Open the side panel of your computer case to get to the inside.
- Check the SATA or data cable that connects the drive to the motherboard to make sure it’s plugged in tightly at both ends.
- Make sure the power cable that goes from the power supply to the drive is also plugged in well.
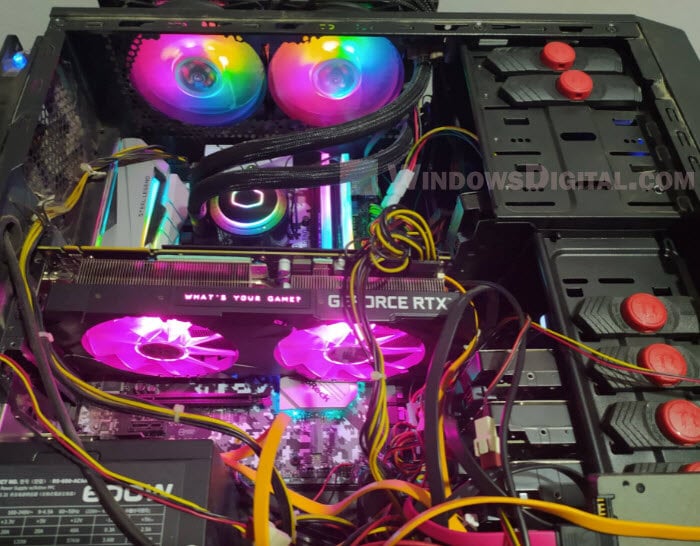
- If you have extra SATA or power cables, try using those to see if the cable was the issue.
- Unplug and replug the drive to make sure it’s properly set in its place.
- Once you’ve checked and secured all connections, close up your computer, turn it back on, and try to initialize the disk again.
Linked issue: HDD Not Detected After Installing M.2 SSD in Windows 11/10
Try initializing your SSD or HDD on another computer
If the both diskpart and Disk Management have problems initializing your new drive, you can try do it on a different computer and then move it back. But, of course, this is not guaranteed to work if it is the disk that is the problem.
- Turn off your computer and safely take out the SSD or HDD you’re trying to initialize.
- Put the drive into a different computer, making sure to connect both data and power cables properly.
- Try initializing the drive using Disk Management or diskpart on the new computer.
What you should expect
If the disk initializes successfully
This suggests that the issue is likely with your original computer setup. You can then move the initialized drive back to your original computer and continue to use it as normal.
If the disk also fails to initialize on the second computer
This is a strong sign that the SSD or HDD itself is faulty. In this case, the drive may be defective and might need to be replaced.

This method is very useful for figuring out if the problem is with the drive or something specific to the computer where the drive was first installed.
Useful guide: How to Format HDD After Cloning Windows 11/10 to SSD
Check disk health using SMART data
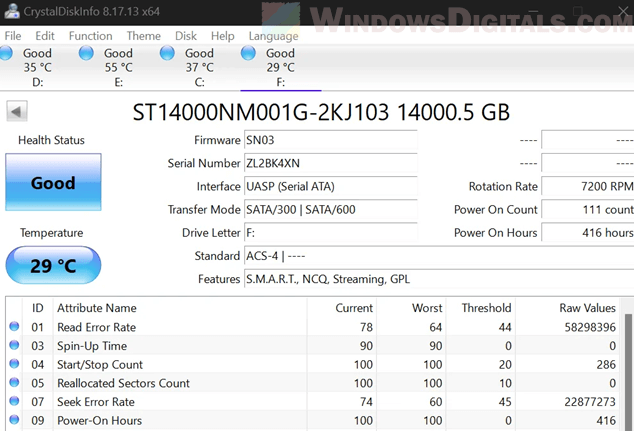
Another possible reason why Disk Management or diskpart might stop responding or crash during the initialization process could be the health of the SSD or HDD itself. Drives with bad sectors or other hardware issues could cause these utilities to stop responding or crash during the initialization process. Checking the Self-Monitoring, Analysis, and Reporting Technology (SMART) data can give you insights into the health of your drive.
You can usually check a disk’s health using SMART data even if the disk hasn’t been initialized yet. SMART data is built into the disk hardware, separate from any partitions or file systems, so tools that read SMART data talk directly to the disk’s firmware. This lets you check important health indicators like “Reallocated Sectors Count,” “Read Error Rate,” and “Drive Life Remaining,” etc., without the need for the disk to be initialized first.
- Download a SMART monitoring tool like CrystalDiskInfo, Hard Disk Sentinel, or SSD Life.
- Install the tool and open it. Follow the instructions on the screen.
- The tool will show different metrics that give insights into your drive’s health. Look for indicators like “Reallocated Sectors Count,” “Read Error Rate,” or “Drive Life Remaining” to see how your drive is doing.
- If all indicators look good, it’s unlikely that your drive’s health is causing the problem.
- If the SMART data shows caution or bad indicators, it might be best to replace the drive as it could be failing.
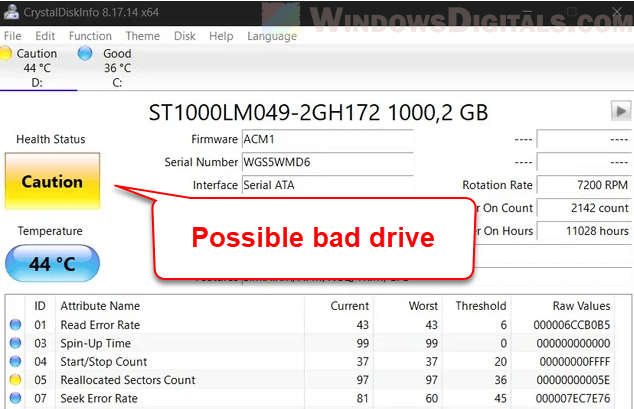
If the SMART data suggests your drive is failing, you should immediately back up any important data right away (if you have any on the disk) and think about getting a new drive. A failing drive could be why your Disk Management or diskpart is having problems.
Suggested read: Does Faulty RAM Cause Freezes or Crashes on PC?
Update your storage controller drivers
While SSDs and HDDs usually don’t need separate drivers to work on most modern operating systems, the drivers related to your storage controllers are very important. Usually, the operating system comes with general drivers that work well enough for basic tasks. However, old or incompatible storage controller drivers can mess with Disk Management or diskpart and might make them stop responding or crash.
Why focus on storage controller drivers?
The main reason we’re focusing on storage controller drivers rather than specific SSD or HDD drivers is that storage controllers manage how your computer talks to all connected drives. A problem with these drivers could therefore affect your ability to initialize or manage your SSD or HDD.
How to update it through Device Manager
- Press Win + X and pick Device Manager from the menu that pops up.
- Click on the arrow next to “Storage controllers” to see more options.
- Right-click on your storage controller and pick Update driver.

- Pick Search automatically for updated driver software and follow the steps on the screen.
If Windows can’t find a new driver, you can also go to the website of the manufacturer to download and install the latest driver yourself.
How to update drivers manually instead
- Go to the website of your motherboard or laptop brand to find the right storage controller drivers.
- Find the latest drivers for your storage controller and download them.
- Note where the downloaded driver is saved on your computer.
- Figure out the type of driver file you’ve downloaded:
- If it’s an
.exeinstaller, run the installer and follow the instructions on the screen to finish the installation. You might need to restart your computer after. - If it’s an
.inffile or another type, go back to Device Manager, right-click on your storage controller, and pick Update driver. Then, choose “Browse my computer for drivers” and go to where you saved the downloaded driver. Follow the steps on the screen to finish the installation.
- If it’s an
After updating the storage controller drivers, restart your computer and try to initialize the drive again. This often fixes any issues that might have caused crashes or freezes in Disk Management or diskpart.
Check for software conflicts
Another possible reason for Disk Management or diskpart to stop responding or crash might be software conflicts. If you have third-party disk management or system optimization tools installed, these might interfere with the native Windows utilities.
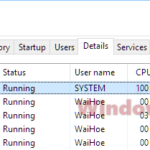
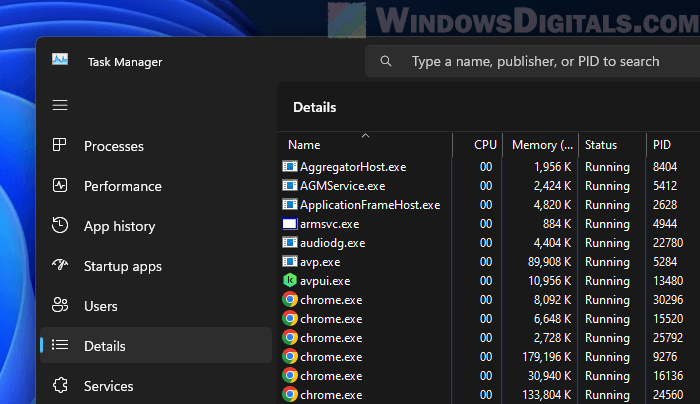
- Press Ctrl + Shift + Esc or Ctrl + Alt + Delete and pick Task Manager from the menu.
- Look for any third-party disk management or system optimization tools that are running.
- Right-click on the conflicting software and choose End Task.
- Open Disk Management or
diskpartand try the initialization process again to see if it completes without issues.
Disable startup items
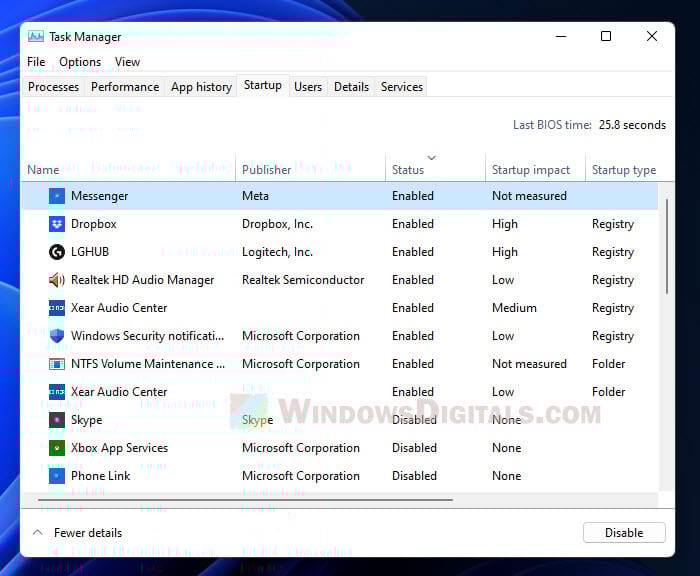
If ending the task solves the problem, you might want to stop the software from starting up with your computer.
- In Task Manager, switch to the Startup tab.
- Right-click on the conflicting software and pick Disable.
Consider uninstalling it
If you find that a particular software keeps causing the problem, you might want to uninstall it.
- Press Win + X and select Apps and Features or Installed Apps.
- Find the software and click on it.
- Pick Uninstall and follow the steps on the screen.
After doing these things, try to initialize your drive again. If the conflict was the cause, this should fix the problem.
Use built-in system checks to repair corrupted files
Broken system files could be why Disk Management or diskpart isn’t working right. The System File Checker (SFC) and Deployment Imaging Service and Management Tool (DISM) are built-in Windows tools designed to fix these files.
SFC checks and fixes individual system files that Disk Management or diskpart needs to work properly. DISM, on the other hand, fixes the whole Windows image, which includes all the files and data essential for the operating system. These tools help make sure the operating system works well, improving the chances that Disk Management and diskpart will work as expected.
How to run the SFC (System File Checker)
- Press Win + X and choose Windows Terminal (Admin) to open a command prompt with admin rights.
- Type
sfc /scannowand press Enter. - Wait for the scan to finish. This might take a while, so you need to be patient.
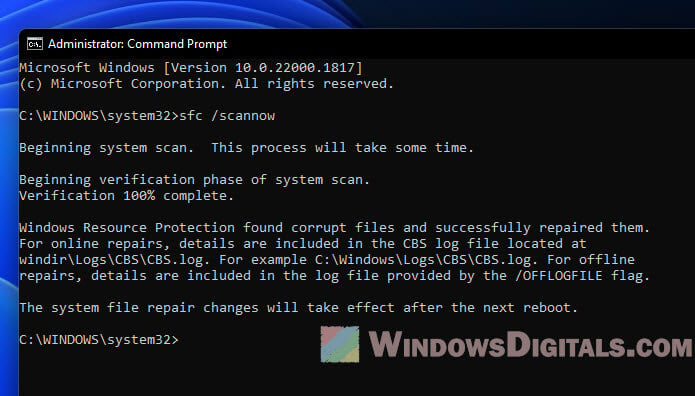
- Follow any instructions on the screen to fix corrupted files.
How to run DISM (Deployment Imaging Service and Management)
- Open a new Windows Terminal window with admin rights like before.
- Type
DISM /Online /Cleanup-Image /RestoreHealthand press Enter. - Wait for the process to finish. This could also take a while, so be patient.
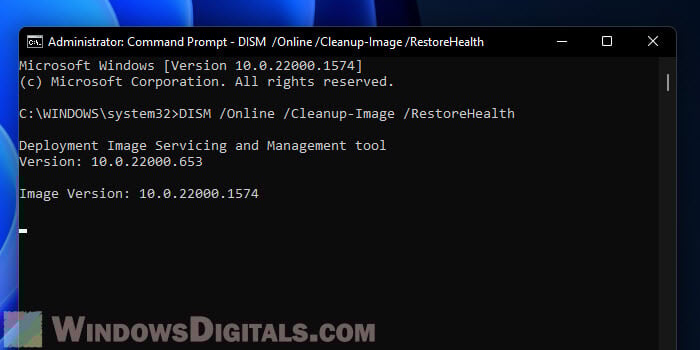
- Follow any instructions that might show up on the screen.
After running these built-in system checks, restart your computer and try to initialize your SSD or HDD again. If broken system files were causing the issue, these steps should help fix the problem.