The Windows 11 version 26H2 update shows up in Windows Update like any other feature update, but on some PCs it downloads, sits there for a long time and then stops with “Install error – 0x800f0831“. Clicking Retry just brings the same error back. It means a file Windows needs from an earlier update is missing from your PC. This guide will help you repair that and get 26H2 installed.
Also see: Windows Update Error 0x80073712 “Some update files are missing or have problems”
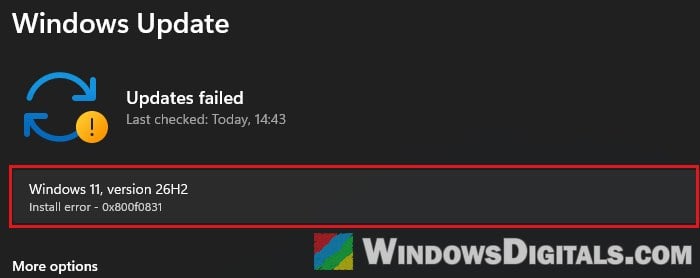
What does error 0x800f0831 mean?
According to Microsoft, 0x800f0831 means the Windows component store is corrupted. The component store is where Windows keeps the files it needs to install and update itself.
Each update builds on the ones installed before it. When Windows installs a new update, it looks for the record (called a manifest) of an earlier update package. If that record is missing, the install can’t go on and fails with 0x800f0831. Microsoft also says this is more likely to happen on PCs that don’t have access to Microsoft Update.
It’s not only a 26H2 problem. The same code has shown up with monthly cumulative updates on Windows 11 25H2 and on Windows 10 too. Microsoft doesn’t list 0x800f0831 as a known issue for 26H2, so it’s most likely something on your PC rather than a bug in 26H2 itself. The fixes below start with repairing the component store and end with reinstalling Windows over itself, which keeps your files.
Repair the component store with DISM and SFC
This is Microsoft’s own fix for 0x800f0831. DISM checks the component store and replaces damaged or missing parts with good copies, and SFC then fixes the system files using the repaired store. Both are safe and don’t touch your files.
Here’s how to run them:
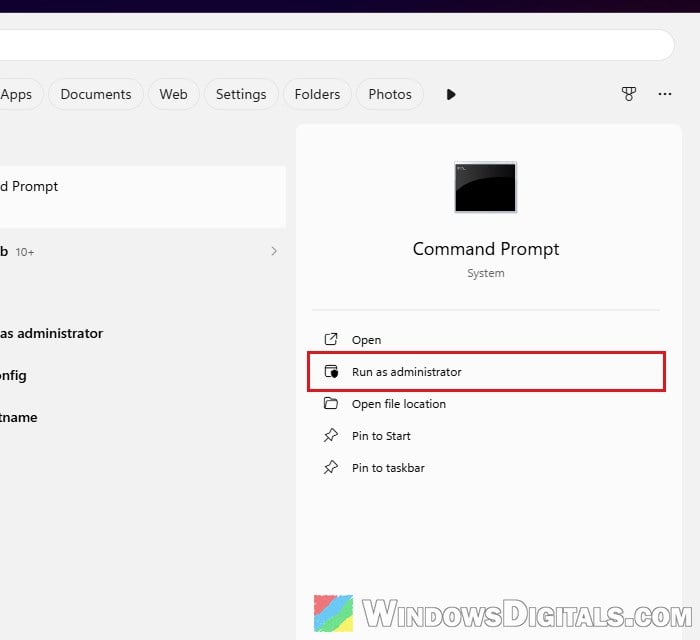
- Click Start, type “cmd“, and select Run as administrator for Command Prompt, then click Yes.
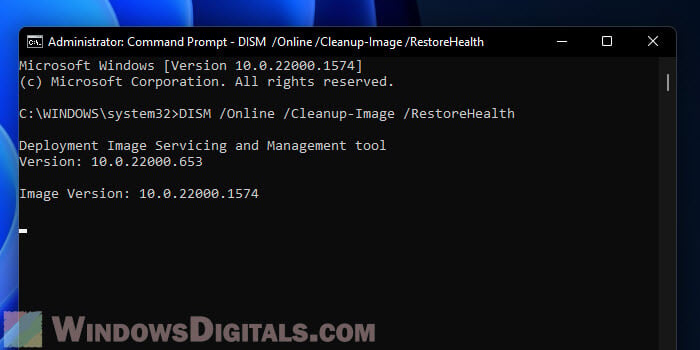
- Type the following command and press Enter:
DISM /Online /Cleanup-Image /RestoreHealth
It can take a while, so let it finish before you go on.
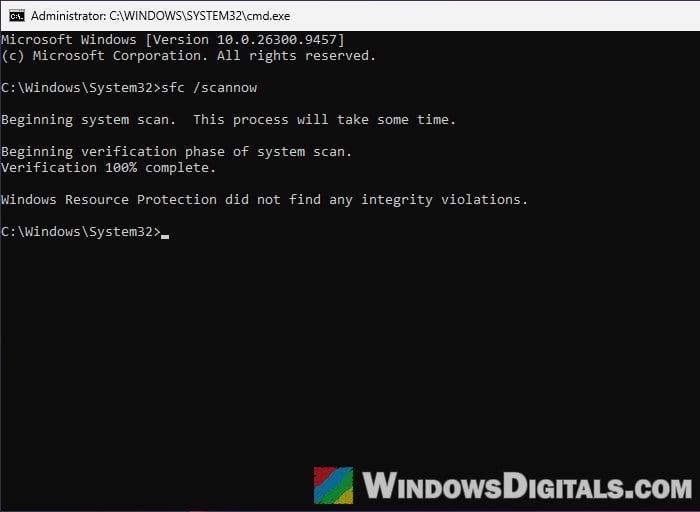
- Then type the following command and press Enter:
sfc /scannow
- Restart your PC, go to Settings > Windows Update and try the 26H2 update again.
If DISM itself fails with error 0x800f0915 or 0x800f081f, it couldn’t find the files it needs to do the repair. In that case, go straight to the in-place upgrade at the end of this guide, which doesn’t need DISM to work.
Related problem: DISM Error 0x800f0915 “The repair content could not be found anywhere”
Reset Windows Update components
Resetting Windows Update clears out the update files it has already downloaded, so it starts over with a fresh download of 26H2. It doesn’t repair the component store, so do it after DISM and SFC, not instead of them.
Here’s what you should do:
- Open Command Prompt as administrator, as in the section above.
- Type the following commands one by one, and press Enter after each:
net stop usosvc
net stop wuauserv
net stop bits
ren C:\Windows\SoftwareDistribution SoftwareDistribution.old
net stop cryptsvc /y
ren C:\Windows\System32\catroot2 Catroot2.old
net start cryptsvc
net start bits
net start wuauserv
net start usosvc
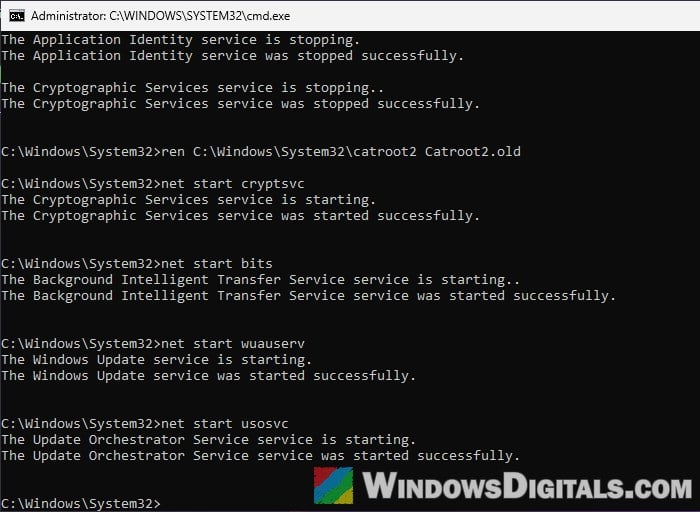 Messages like “is not started” or “has already been started” are fine. If a
rencommand says “Access is denied”, a service started again on its own. Run thenet stopcommands above it once more, then therencommand right after. - Restart your PC and check for updates again.
Try the update from a clean boot
Apps and services that start with Windows can sometimes get in the way of a big update. A clean boot starts Windows with only Microsoft’s own services, so you can install 26H2 without them. While you’re at it, unplug anything you don’t need (external drives, docks, printers) and leave just the keyboard, mouse and monitor connected.
Follow the steps below:
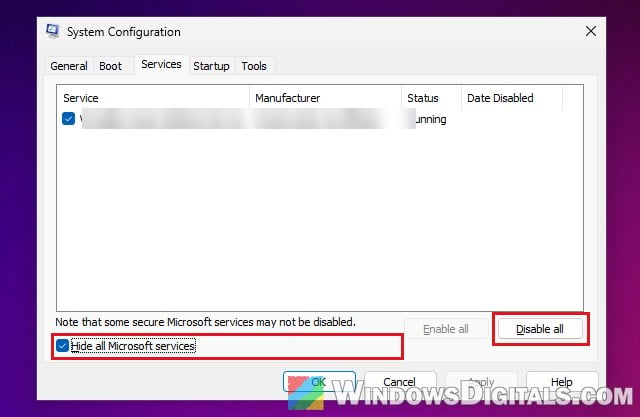
- Press Win + R, type “msconfig” and press Enter.
- Go to the Services tab and check “Hide all Microsoft services“.
- Click Disable all, then click OK.
- Press Ctrl + Shift + Esc to open Task Manager, go to Startup apps, and select each app in the list and click Disable.
- Restart your PC and try the update again.
Once the update is done, go back to msconfig and click Enable all on the Services tab, then turn your startup apps back on in Task Manager.
Pro tip: How to Disable Startup Programs in Windows 11
Install the 26H2 enablement package by hand
If your PC is on Windows 11 24H2 or 25H2, 26H2 is only a small package (KB5121794) that switches it on, and you can download and install it yourself instead of through Windows Update. It might get you past the error, but no one has reported it fixing 0x800f0831 yet, so treat it as a maybe.
It only installs if your PC already has the September 22, 2026 preview update (KB5124010) or a later cumulative update. The full steps and the download address for 64-bit PCs are in our guide below.
Related guide: Windows 11 26H2 Update Fails with Error 0x80072efd
Use “Fix problems using Windows Update”
If DISM can’t repair the component store, reinstalling Windows over itself is what has cleared 0x800f0831 for people. Windows 11 has a built-in way to do that: it downloads a fresh copy of the version you’re on now and reinstalls it, keeping your apps, files and settings. Once that’s done, check for 26H2 again.
Here’s how to do it:
- Press Win + I and go to System > Recovery.
- Under “Fix problems using Windows Update“, click Reinstall now.
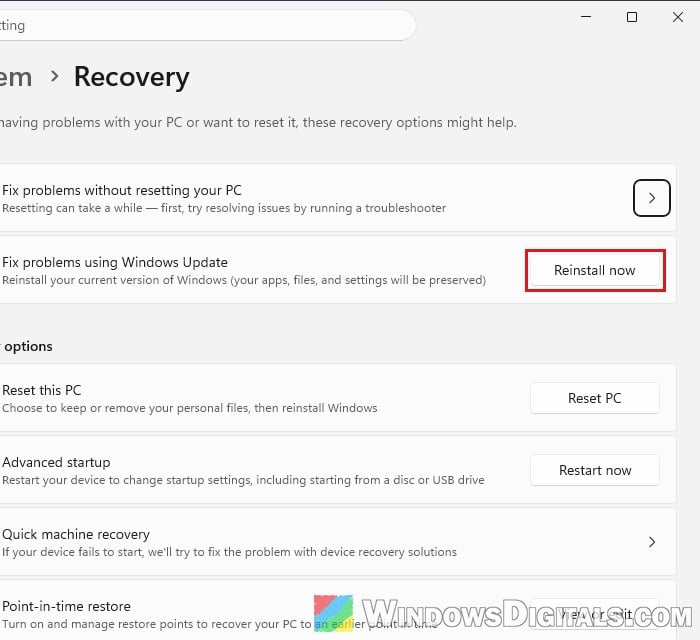
- In the window that opens, choose whether your PC should restart by itself 15 minutes after the installation, then click OK.
Keep your PC plugged in and connected to the internet until it’s finished. According to Microsoft, this option might not be there if your PC is managed by your work or school, or if its updates are managed by an organization.
Learn more: “Reinstall your current version of Windows” Message
Do an in-place upgrade to 26H2 with the ISO
When nothing else works, this is the fix that has worked for people on Reddit with 0x800f0831, even when DISM kept failing. Running Windows 11 setup from Microsoft’s ISO file reinstalls Windows over itself and puts your PC on 26H2 straight away, without going through Windows Update at all. Your files and apps stay, but back up anything important first, just in case.
Here’s how to do it:
- Go to
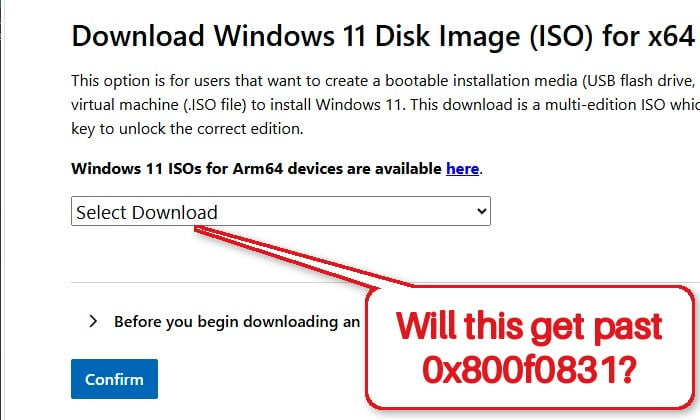
https://www.microsoft.com/en-us/software-download/windows11. - Under “Download Windows 11 Disk Image (ISO) for x64 devices“, pick the Windows 11 ISO from the list and click Confirm, then download the ISO.
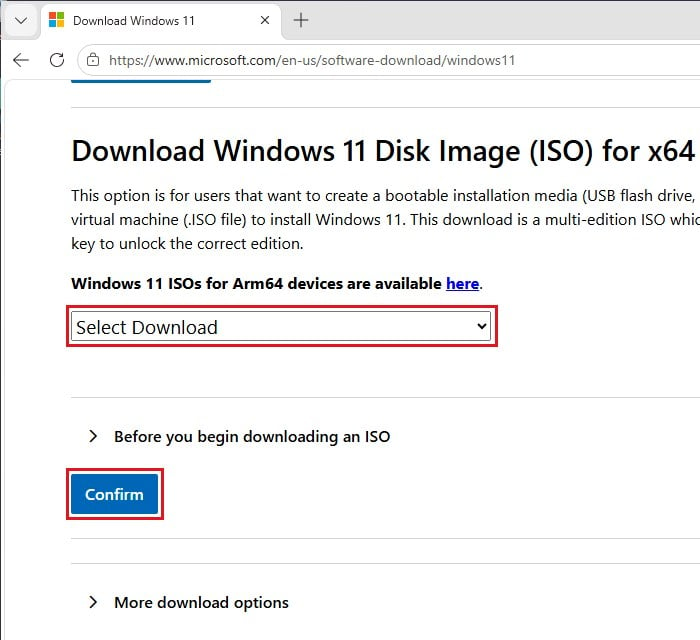
- Right-click the ISO file, select Mount, then double-click setup.exe in the drive that opens.
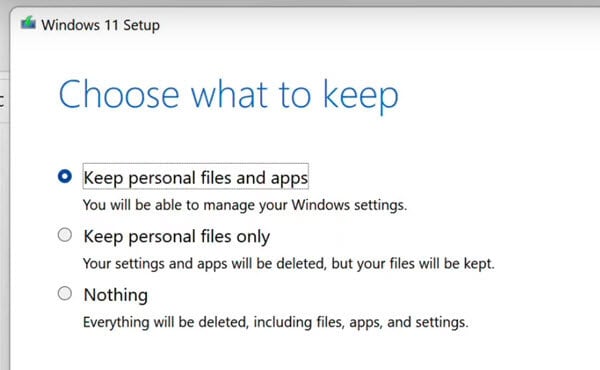
- Follow the prompts, and make sure “Keep personal files and apps” is selected before you start the installation.
If you’d rather not deal with an ISO file, the Windows 11 Installation Assistant on the same Microsoft page does the same kind of upgrade. When setup finishes, press Win + R, type winver and press Enter to check that it now says Version 26H2.