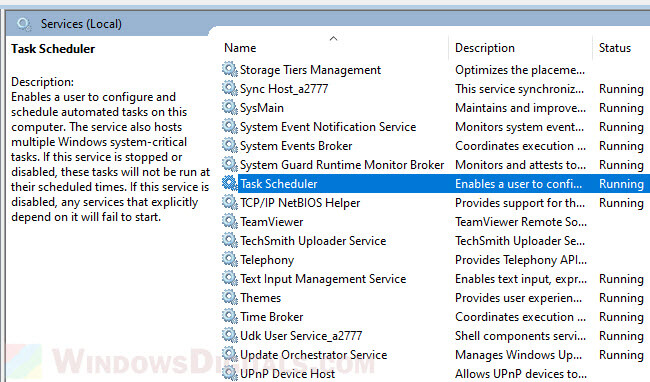
When you’re trying to make things work automatically in Windows 11 or 10, like setting up tasks without having to remember to do them yourself, you and apps that need to do so might use the Task Scheduler. But there’s a common issue where the Windows Task Scheduler Service will sometimes refuse to start or stop itself right after starting.
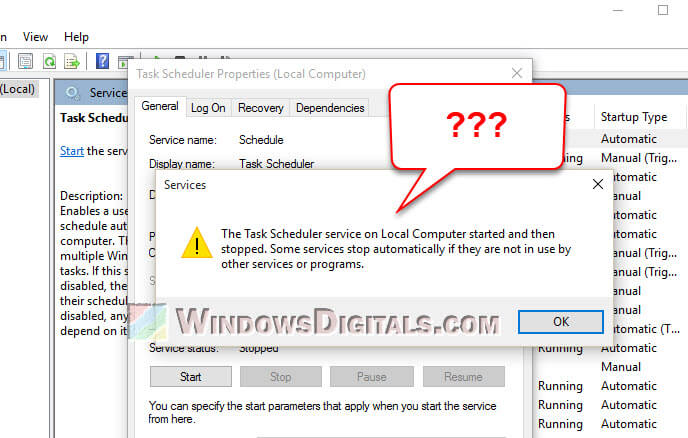
You might see a message that says “The Task Scheduler service on Local Computer started and then stopped. Some services stop automatically if they are not in use by other services or programs.” This guide will show you some solutions you can try to resolve the problem.
Page Contents
How to fix Task Scheduler service started then stopped or cannot be started
Below are the some steps and workarounds you can try to fix the Task Scheduler service cannot be started issue in Windows 11 or Windows 10.
Also see: Services.msc “Startup Type” Greyed Out in Windows 11 or 10
Check the Event Viewer for clues
When you run into issues with Windows services, a good first step is to look at the Event Viewer. This tool records detailed logs of what happens in your system, and it’s likely to have recorded anything wrong with the services.
- Press Win + R to open the Run dialog.
- Type
eventvwr.mscand press Enter.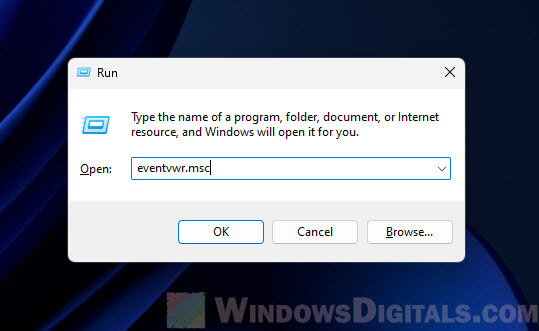
- In the Event Viewer window, go to “Windows Logs” on the left side.
- Click on “System”.
- Right-click on “System” and select “Find…”.

- In the Find dialog, type “Task Scheduler” and start the search.
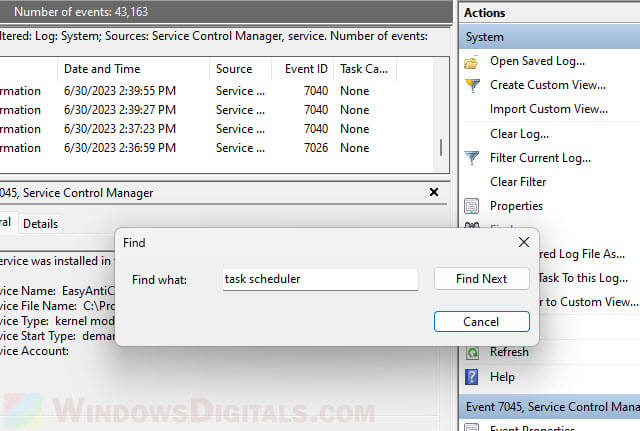
- Look for any recent warnings or errors related to the Task Scheduler. These messages can help you understand why the service isn’t working properly.
What you should look for
Make sure to look for entries where the source is listed as Task Scheduler or it’s mentioned in the description. Any errors or warnings linked to this service are important for figuring out what’s wrong.
Related resource: How to Disable or Enable Startup Services on Windows 11 or 10
Check the registry settings for the Task Scheduler
The Task Scheduler service issues can sometimes come from problems in the registry.
Warning: Changing the registry can be extremely risky if you have no idea what it is. If you do something wrong, it can cause issue as serious as bricking your entire OS. You should create a system restore point before you make any changes. This way, you can go back to how things were if something goes wrong.
- Press Win + R to open the Run dialog.
- Type
regeditand press Enter to open the Registry Editor.
- In the Registry Editor, go to
HKEY_LOCAL_MACHINE\SYSTEM\CurrentControlSet\Services\Schedule. - On the right side, find the “Start” DWORD entry.
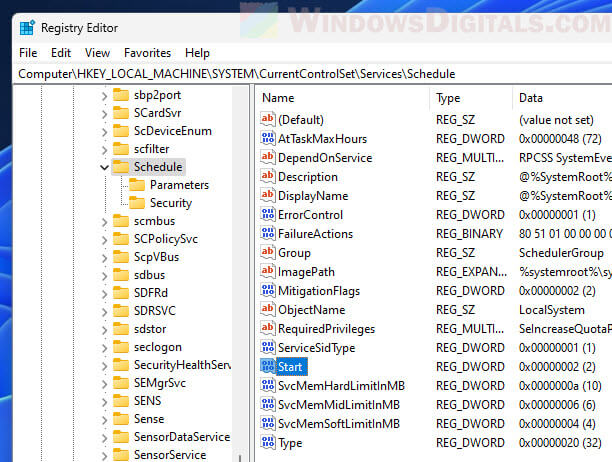
- If its value is not 2, which means “Automatic”, double-click it and change the value to 2.

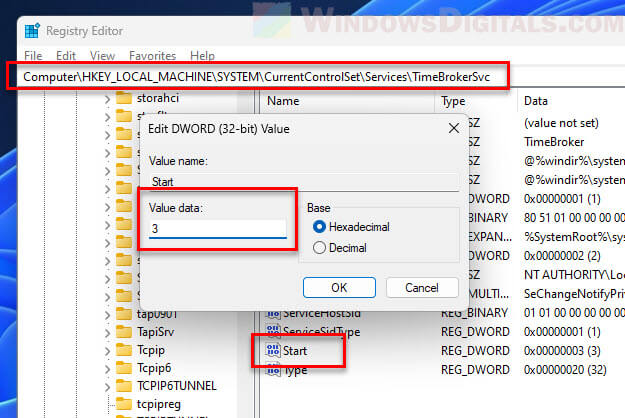
- Check out the “TimeBrokerSvc” settings, which might affect the Task Scheduler.
- Go to
HKEY_LOCAL_MACHINE\SYSTEM\CurrentControlSet\Services\TimeBrokerSvcin the Registry Editor. - Make sure the “Start” value is set to 3. If not, change it.
- After you’ve made the necessary changes, restart your computer to see if the Task Scheduler service is now working properly.
Another way: Use Command Prompt for the changes
If you’re okay with using Command Prompt, the following is a faster way to back up the registry key and change the needed settings:
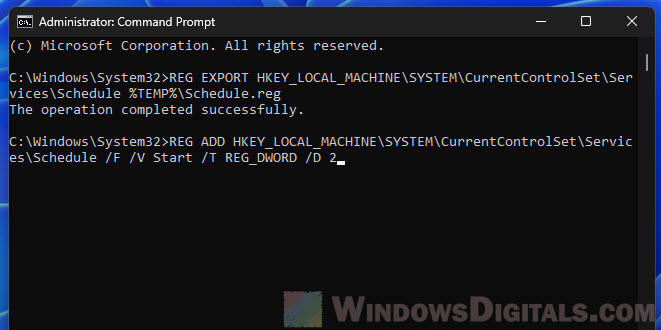
- Open Command Prompt as an administrator: Click the Start menu and type “cmd” in the search bar. Right-click on “Command Prompt” in the search results and select “Run as administrator“.

- Back up the Task Scheduler service entry by typing the following command.
REG EXPORT HKEY_LOCAL_MACHINE\SYSTEM\CurrentControlSet\Services\Schedule %TEMP%\Schedule.reg
This command saves the current registry settings for the Task Scheduler service in a .reg file in the system’s temporary folder.
- Set Task Scheduler to Automatic.
REG ADD HKEY_LOCAL_MACHINE\SYSTEM\CurrentControlSet\Services\Schedule /F /V Start /T REG_DWORD /D 2
This command changes the “Start” value of the Task Scheduler service to “Automatic”.
- For the Time Broker Service (TimeBrokerSvc):
First, let’s back up the registry entry:REG EXPORT HKEY_LOCAL_MACHINE\SYSTEM\CurrentControlSet\Services\TimeBrokerSvc %TEMP%\TimeBrokerSvc.reg
Then, to set its “Start” value to “Manual” (which allows other processes or services that need “TimeBrokerSvc” to start it when necessary):
REG ADD HKEY_LOCAL_MACHINE\SYSTEM\CurrentControlSet\Services\TimeBrokerSvc /F /V Start /T REG_DWORD /D 3
Useful tip: Run CMD, PowerShell or Regedit as SYSTEM in Windows 11
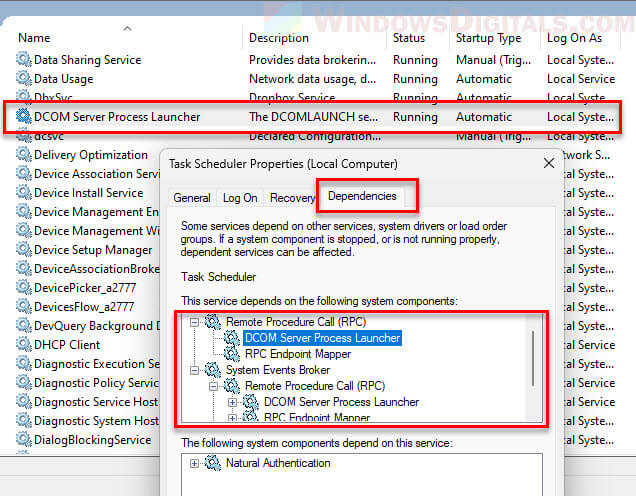
Check the dependencies of the Task Scheduler service
The Task Scheduler service might depend on other services to work right. If these services aren’t running, it could cause problems. Below is how to make sure all the needed services are working.
- Press Win + R to open the Run dialog.
- Type
services.mscand press Enter.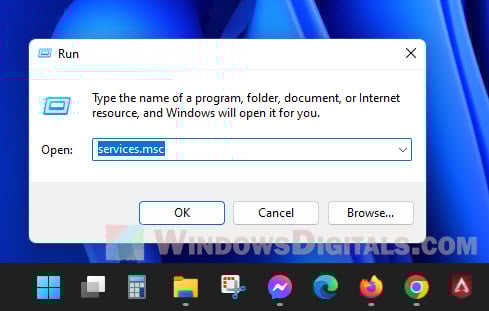
- In the Services window, scroll down until you find the Task Scheduler service.
- Double-click on Task Scheduler to open its Properties.
- In the General tab, make sure the Startup Type is set to “Automatic”. If it’s not, change it.
- While you’re in the Properties window, go to the Dependencies tab.
- Make sure all the services that Task Scheduler needs are running. If they aren’t, it could stop the Task Scheduler from working right.
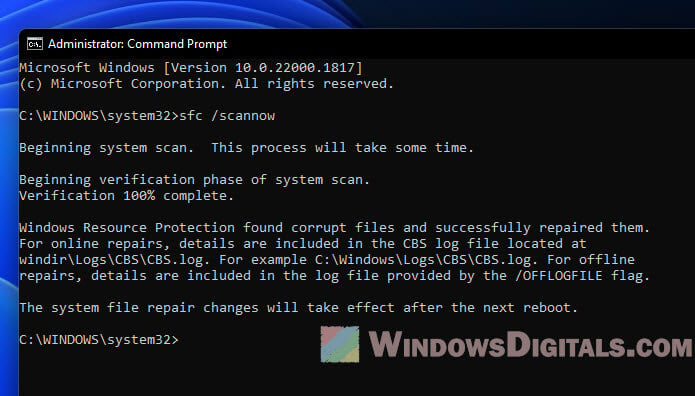
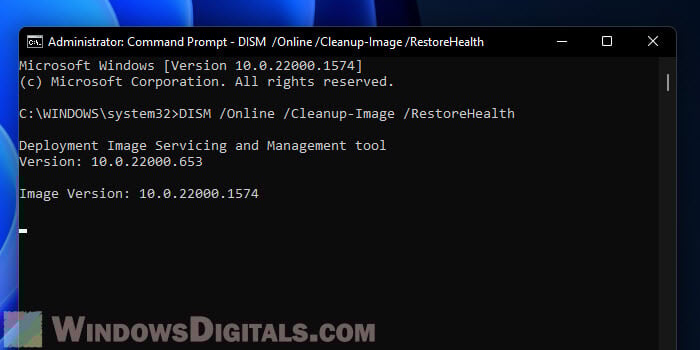
Use System File Checker (SFC) and DISM
Broken system files can cause services like the Task Scheduler to act up. Windows has tools called System File Checker (SFC) and Deployment Image Servicing and Management (DISM) that can find and fix these files.
- Open Command Prompt as an administrator by clicking the Start button, typing “cmd” in the search bar, and right-clicking on the “Command Prompt” search result. Choose “Run as administrator.” Click “Yes” when the User Account Control asks if you’re sure.
- Type the following command and hit Enter:
sfc /scannow
- Wait until the scan is done. If SFC finds and fixes problems, it will tell you what it did once it’s finished.
- If SFC doesn’t fix everything or says some files couldn’t be repaired, move on to DISM.
- In the same Command Prompt, type these commands one at a time, pressing Enter after each:
DISM /Online /Cleanup-Image /CheckHealth
DISM /Online /Cleanup-Image /ScanHealth
DISM /Online /Cleanup-Image /RestoreHealth
- After you run SFC and/or DISM, restart your computer to put any fixes into effect and then check the Task Scheduler service again.
SFC scans for and replaces broken system files with good ones. DISM is a stronger tool, great for when SFC can’t fix everything. It checks for and fixes problems in the Windows component store.
Try with a new user profile
Sometimes, problems with Windows services are specific to a user profile. If there’s something wrong with your profile, it might cause weird behavior. Trying with a new profile can help you figure out if that’s the issue.
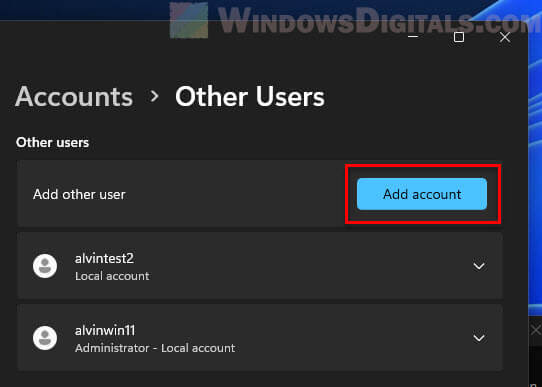
- Go to Settings (from the Start menu or by pressing Win + i).
- Click on Accounts > Other Users.
- Under “Other users”, click on “Add account” and follow the steps to make a new user. Make sure this new user has admin rights.
- Log out of your current profile.
- Log into the new user profile.
- Once you’re in the new profile, try starting the Task Scheduler service to see if the same problem happens.
- If the Task Scheduler works fine in the new profile, your old profile probably has a problem. You might want to move your files and settings to the new profile and start using it instead.
- If the problem is still there even in the new profile, it means there’s a bigger issue with the system, and you should go back to your original profile and keep looking for other possible reasons.
Moving to a new user profile can take a lot of time because you have to transfer your files, reinstall apps, and set things up again. It’s something to think about doing only if other solutions don’t work.