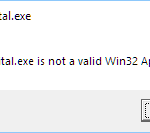
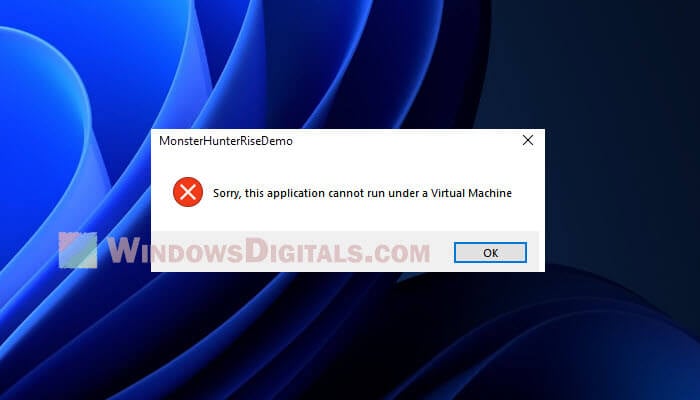
Seeing the “Sorry, this application cannot run under a Virtual Machine” message on Windows 11 can be a real pain, especially if you bump into it while trying to run a game or another app. This message usually pops up when a game doesn’t like being run in a virtual machine, but it can show up in other situations too. This guide will talk about why this happens and how to fix it.
Also see: Force App or Game to Use Dedicated GPU or Integrated Graphics
Page Contents
What’s the deal with the “Sorry, this application cannot run under a Virtual Machine” message?
When a game or app figures out that your computer is using virtualization technology, it might stop working and show you this message. The reason? The app wants to protect its content or make sure it works well, so it doesn’t want to run in a virtual environment.
Virtualization can come from different places, like:
- Hyper-V, which is built into Windows
- VirtualBox or VMware, which are other programs that create virtual machines
- Some antivirus software that uses virtualization for protection
Related resource: How to Close Virtual Desktop in Windows 11
How to fix the error
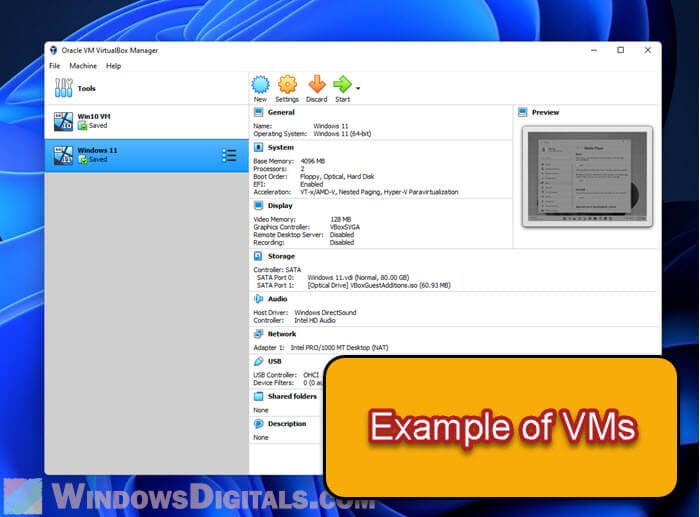
First, see if any virtual machines are running
Before you turn off any virtualization settings, make sure you’re not running any virtual machines like VMware or VirtualBox. Close them if you are.
Try turning off your antivirus
Some antivirus programs use virtualization and might be causing the problem. Turn it off for a bit and see if that helps. If the error’s still there, keep going with the other steps.
Look into Hyper-V
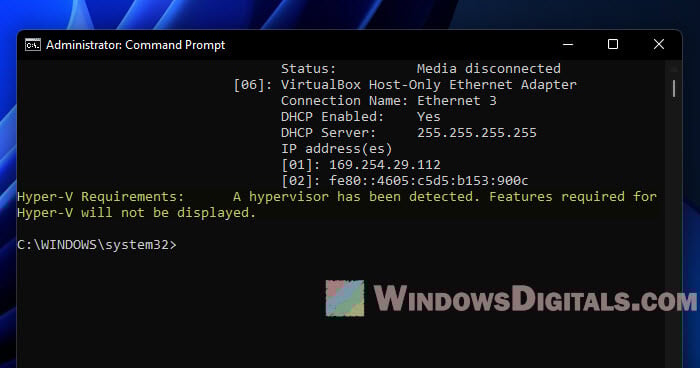
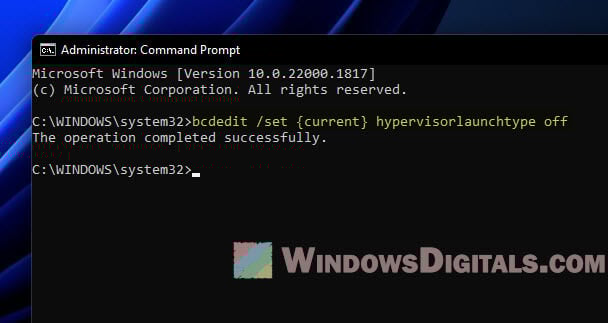
Open Command Prompt as an admin by hitting the Start button, typing “cmd”, and right-clicking on Command Prompt. Then choose “Run as administrator.” Say yes if it asks for permission.

Type systeminfo and hit Enter. Look for the “Hyper-V Requirements” part to see if your computer thinks a hypervisor is running.
Turn off Hyper-V
If your computer is using Hyper-V, type bcdedit /set {current} hypervisorlaunchtype off and hit Enter to turn it off. Restart your computer to see the changes.
Check for other virtualization settings
If you’re still stuck, type “Control Panel” in the search bar and open it. Go to Programs and Features > Turn Windows features on or off.
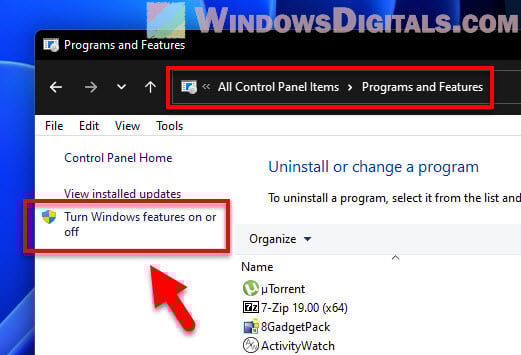
Look for and turn off anything related to virtualization like “Windows Sandbox,” “Windows Hypervisor Platform,” or “Virtual Machine Platform.” Restart your computer one more time.
Linked issue: Turn Windows Features On or Off: “Please wait…”

Turning virtualization back on
If you need virtualization later, here’s how to get it back:
Turning Hyper-V back on
Open Command Prompt as admin again with Win + X and pick Windows Terminal (Admin). Say yes to any permission requests. Type bcdedit /set {current} hypervisorlaunchtype auto and hit Enter.
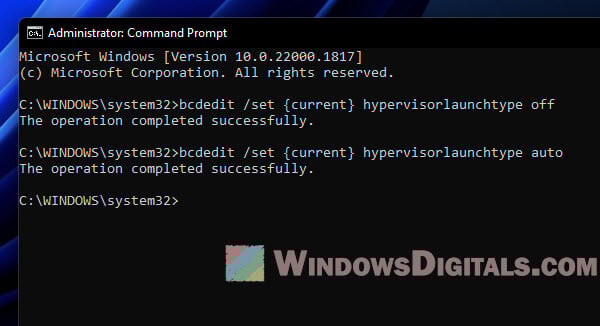
Restart your computer
Don’t forget to restart your computer to apply these changes.
Useful tip: How to Allocate More RAM to a Game in Windows 11 or 10
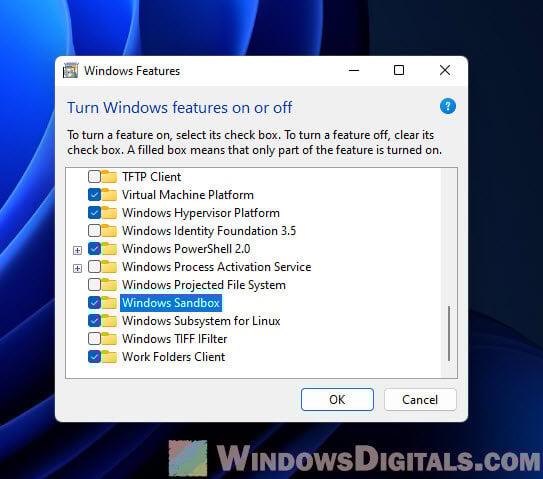
Turn other virtualization settings back on
If you turned off any other virtualization features, go back into the Control Panel to turn them back on.
Don’t forget your antivirus
If you turned off your antivirus, make sure to turn it back on to keep your computer safe. If the antivirus was causing the issue, you might need to find a different one or ask the provider for help.
Other ways to try if those didn’t work
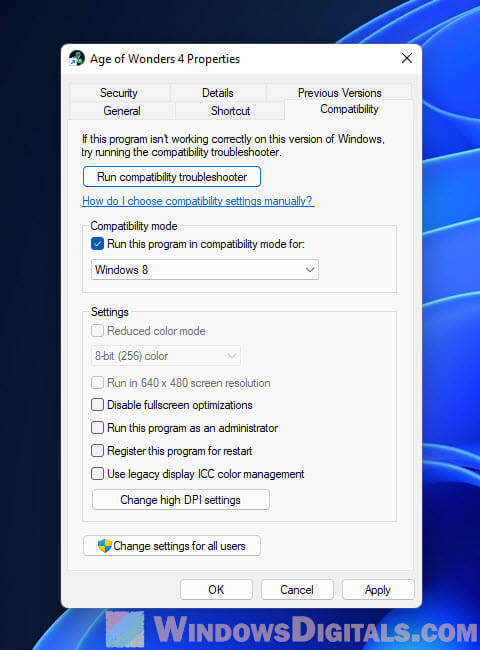
Try compatibility mode
Some apps don’t play nice with Windows 11. To fix this, right-click the app and go to “Properties.” Under the “Compatibility” tab, check “Run this program in compatibility mode for” and choose an older version of Windows. Then, try running your app again.
Update your graphics drivers
Old or wrong graphics drivers can cause problems too. Make sure yours are up to date by checking the manufacturer’s website or using Windows Update.
Reach out for help
If nothing works, it might be time to contact the app or game’s support team for help. They might know about the issue and have a fix or workaround just for you.
The “Sorry, this application cannot run under a Virtual Machine” message can be tough to fix because it involves lots of different complicated settings related to virtualization. But this guide should be able to give you some ideas about what’s going on and get things working again.