Ever felt like cleaning up your music collection by getting rid of the album arts that are not your vibe or just looks out of place? Album art can often make your music collection stands out by adding a visual touch, but sometimes it can just mess things up or feel cluttered.
In this guide, we will show you how to quickly remove the album art from your MP3 files on Windows 11 or Windows 10. This guide will be useful whether you’re super into your musics, just enjoy a good jam now and then, or simply want to keep your music collection tidy.
Page Contents
Why remove album art from MP3 files?
Though album art can spruce up your music collection, there are a few reasons you might want to ditch it:
- Make everything look tidy: Odd or low-quality album art can make your music collection look all over the place. Getting rid of album art can help everything look uniform.
- Personalize your collection: Taking out album art lets you put in your own favorite pictures or keep things simple with no pictures at all.
- Save some space: High-def album art can eat up a lot of storage, especially with lots of songs. Removing it can free up some of that precious space.
Removing album art with File Explorer in Windows 11 or 10
You can easily get rid of the album art from your MP3 files using only the Windows File Explorer, without the need for any extra software. This is preferable method if you don’t want to download more apps or just want to stick with what Windows has. Here’s how:
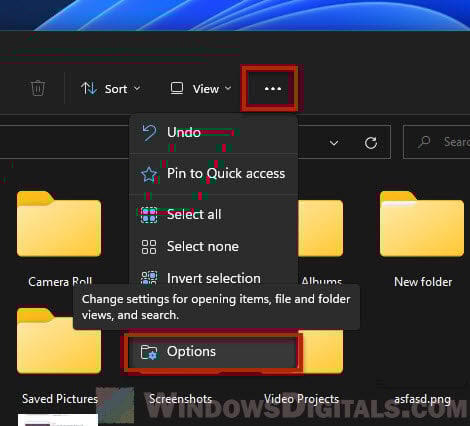
- Open Windows File Explorer and hit the “View” tab on the toolbar.
- Look for the “Show” section and make sure the “Hidden items” box is checked.
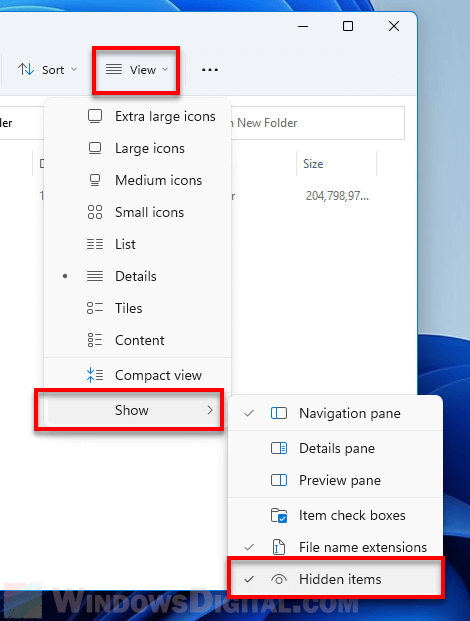
- Click the three dotted icon and select “Options” (or “Change folder and search options” in Win 10) from the menu.
- Switch to the “View” tab in the “Folder Options” window.
- Under “Advanced settings”, find “Hide protected operating system files (Recommended)” and uncheck it. When the warning pops up, click “Yes” to go ahead.
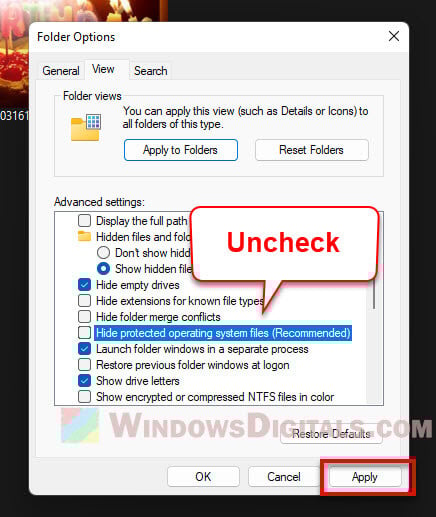
- Hit “Apply” then “OK” to save your changes and close the window.
- Head to the folder with the MP3 file(s) whose album art you want to remove.
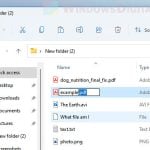
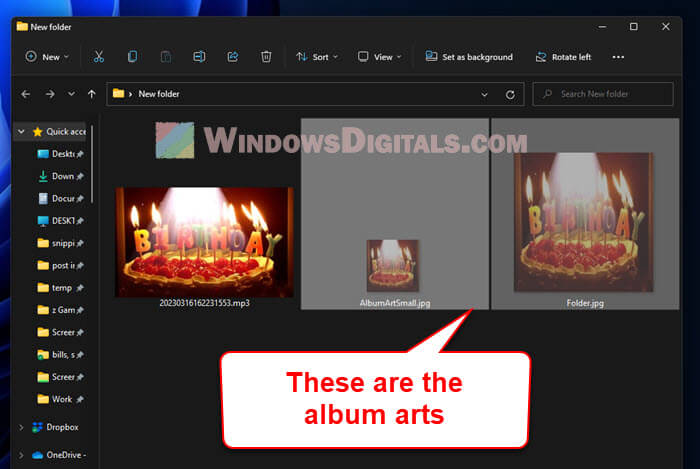
- You’ll now see hidden files that share your MP3 files’ names but end with “.jpg”. These are the album art images.
- Right-click the “.jpg” file for the album art you’re ditching and choose “Delete”. Confirm the deletion if asked.
And just like that, your album art will be gone from the chosen MP3 file. Do the same for any other files you want to change. Once you’re done, it’s a good idea to re-enable the “Hide protected operating system files” box again so that you won’t accidentally delete any sensitive system file.
Removing album art with MP3tag
MP3tag is a very user-friendly tool for changing the metadata and album art in your MP3 files. It allows you to edit multiple files at once, which is great if you have a pretty big music collection. Follow the steps below to use MP3tag to remove album art from your MP3 files:
- Download MP3tag from the official site.
https://www.mp3tag.de/en/
- Open the app and go to the folder with your MP3 files.
- Pick the MP3 files you want to work on.
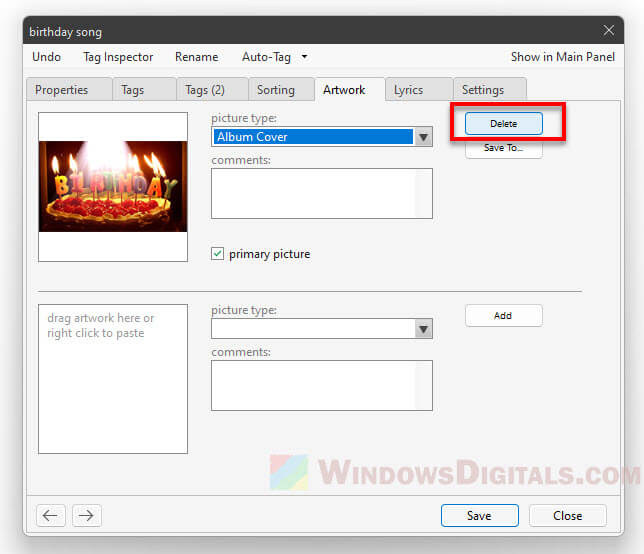
- Look at the bottom left of the window for the album art preview. Right-click it and choose “Remove cover”.
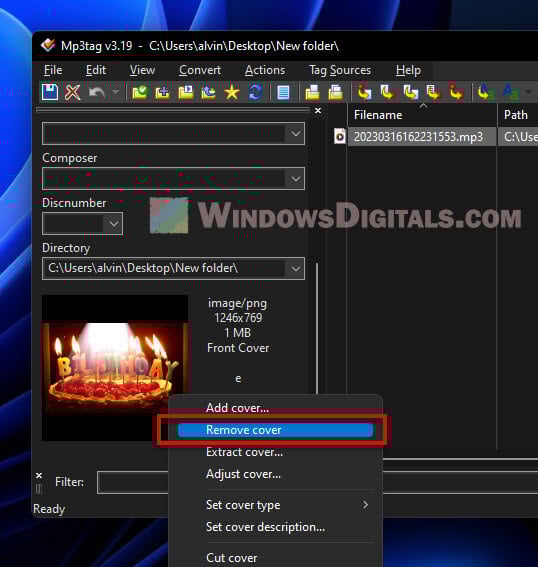
- Hit the “Save” button to keep your changes.
Your album art will then be gone from those MP3 files. Repeat these steps for any others you need to change. MP3tag also has other cool features like auto-renaming files, sharing tag info, and customizing how it looks. Feel free to also try other settings to better organize your music files.
Taking out album art with MusicBee
MusicBee’s a well-liked music player that lets you mess with your MP3’s metadata and album art too. It’s got an easy-to-use interface, so anyone can get the hang of it fast. Here’s how to use MusicBee for album art:
- Download MusicBee from its official site.
https://getmusicbee.com/
- Start up the app and either bring in your music library or go to where your MP3 files are.
- Select the MP3 files you want to edit.
- Right-click the chosen files and hit “Edit”.
- In the “Edit Tags” window, click the “Artwork” tab.
- Press the “Delete” button by the album art preview.
- Click “Save” to apply your changes.
Now the album art’s gone from those MP3 files. Do the same for any other files you want to tweak. With MusicBee, you also get neat features like auto-tagging, syncing with devices, and custom themes, making it a great all-rounder for music management.
Replacing album art in VLC Media Player
VLC Media Player can’t directly remove album art from an MP3, but you can swap the current art for a custom image. By using a small, blank image (like a tiny black square), you can pretty much make the album art disappear. Here’s how with VLC:
- Make a small blank image in a program like Microsoft Paint. Save it as a .jpg or .png file.
- Download and open VLC Media Player.
- Play the MP3 file(s) with the album art you want to change.
- Pause it, then click “Tools” and “Media Information”.
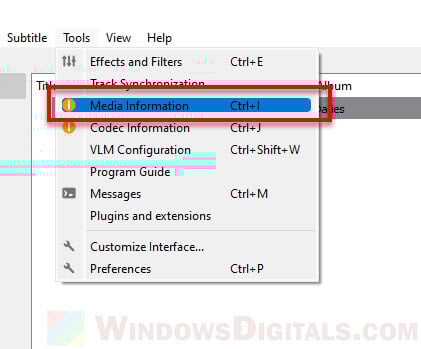
- In the “Media Information” window, hit the “General” tab.
- Right-click the current album art and pick “Add cover art from file”.
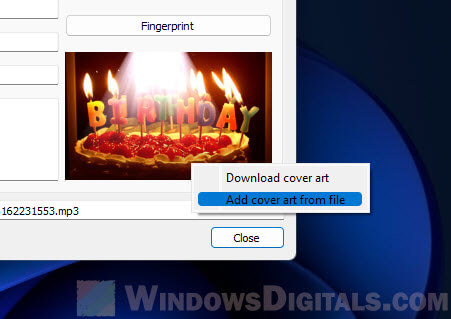
- Find and select the blank image you made. This replaces the old album art.
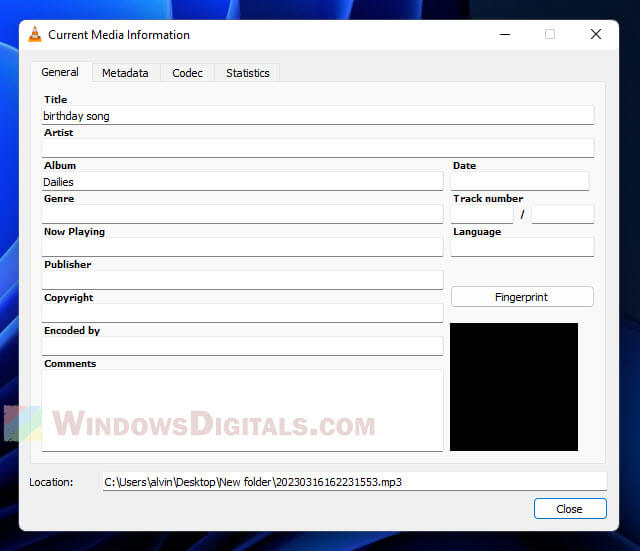
- Hit “Close” to leave the media info window.
- Right-click the MP3 in VLC and choose Save to keep your edited file.
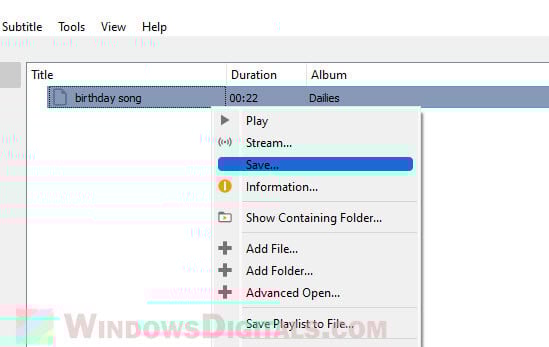
There you go, your MP3 now sports a new, more subtle album art. Feel free to do this for any other files you want to change up.
Frequently asked questions
Nope, removing album art won’t affect how your MP3s sound. Album art is just extra info that doesn’t touch the audio bits.
Yeah, with tools like MP3tag or MusicBee, you can pick several MP3s and get rid of the album art for all of them in one go.
Sure can! You can slap on some new album art using any of the methods and tools we talked about in this guide.