If you are a Windows 10 or Windows 11 user, you might sometimes encounter issues with your sound after updating your system (Windows Update). If you are facing this issue, you can try the following steps to fix the issue.
Page Contents
Check the Volume and Playback Settings
The first and most obvious step in resolving the sound issue in Windows 10 and Windows 11 is to check your volume settings. It is possible that your volume is muted or set too low. Check the sound icon in the taskbar and make sure that the volume is turned up to an audible level. If you’re using external speakers or headphones, make sure they’re properly plugged in and powered on.
If the volume is not the issue, it’s time to check your playback settings. In some cases, the Windows update may have incorrectly selected the wrong playback device or disabled your device entirely.
Select the Correct Playback Device in Sound Settings
In some cases, the Windows update may have incorrectly selected the wrong playback device or disabled your device entirely. Here’s how to check:
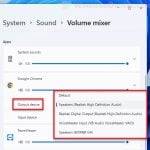
- Click on the speaker icon from the Taskbar.
- Select Sound. See also: How to Open The Old Advanced Sound Settings in Windows 11.
- Go to Playback tab.
- If there are multiple playback devices shown, right-click on your primary audio device and then select “Enable.”
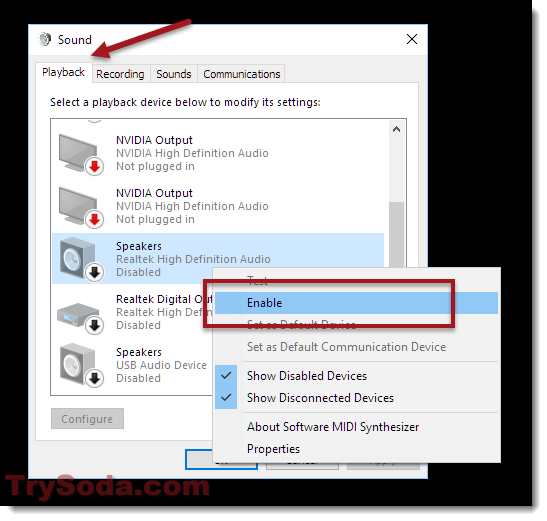 If there is an existing enabled device, try to disable it if it’s not your primary device.
 - If you have multiple devices enabled, right-click on the correct one and select “Set as default device.”
All audio playback devices connected to your computer will be listed in the Playback tab, including those in your monitor, graphics card, etc. You have to know which is the correct one that represents the speaker or headphones you want to use. If you don’t know, try to enable them one by one until the sound works.
If the playback devices tab shows “No audio device is installed“, go to the next solution.
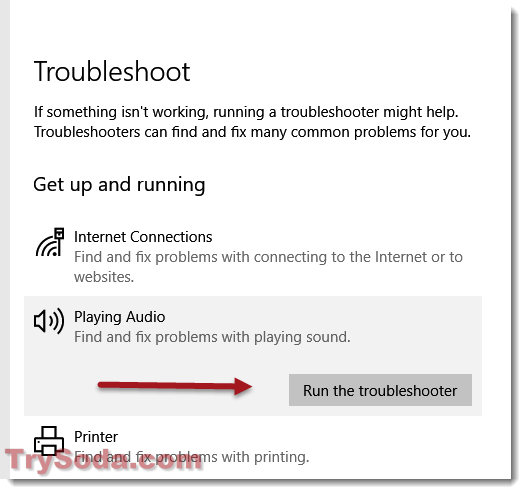
Run the Windows Troubleshooter for Playing Audio
Windows 10 and Windows 11 come with a built-in troubleshooter that can help diagnose and fix audio problems automatically. Here’s how to use it:
- Go to Start Menu.
- Search for “Troubleshoot” and open it.
- Under Get up and running, select Playing Audio.
- Then, click on the Run the troubleshooter button.
- The process may take some time.
When the troubleshooting is completed, restart your computer. Play some music on YouTube to see if the no sound issue is resolved.
Update the Audio Driver
If your sound is still not working, it’s possible that your audio driver is outdated, corrupted, or incompatible with the latest Windows update. Here’s how to update your audio driver:
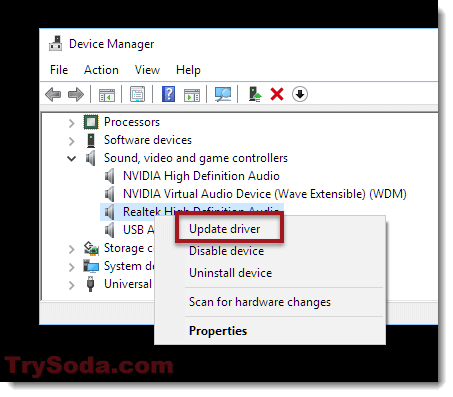
- Go to Start menu. Search for device manager and open it.
- Expand Sound, video and game controllers.
- Right click your audio device and then select Update driver.
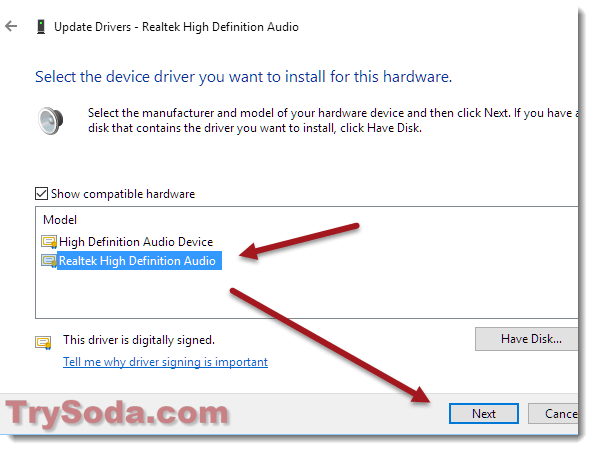
- Select “Update automatically” to allow Windows to automatically find and install the correct audio driver for your device.
- If it can’t find a suitable driver, you will need to manually install the driver by selecting it based on its model (usually we will install the Realtek High Definition audio). Check the post here and scroll to the bottom for detailed instructions on how to do it.
So, the above are a few fixes that might help you solve the no sound problem in Windows 10 and Windows 11. It’s quite important to try these fixes one after the other to find out which one gets your sound back. Also, making sure your computer’s audio settings are set up right can stop this kind of problem from happening again.
If you’ve tried absolutely everything you can and still can’t fix the issue, the last resort would be to reset your PC. Resetting your PC means to revert it back to factory defaults, possibly resolving the issue. However, that also means you might lose some of your installed apps, files, and settings (although it lets you keep some of them). Be sure to back up the files you can’t afford to lose first before doing that.