If your microphone is not working properly after a recent Windows update on Windows 11 or Windows 10, it might be because of some unintended issues that came with the update. Although these updates are meant to make your system work better, they sometimes cause problems, like with your mic.
It can be really discouraging to see that your mic stops working out of a sudden. Here in this short guide, we’ve got some steps you can follow to figure out and fix the microphone issue on your Windows 11 or 10 PC.
Also see: How to Test Microphone on Windows 11 to See If It’s Working
Page Contents
Check the microphone’s driver
First off, let’s make sure your microphone is connected properly to your PC. Here’s how to check if your PC sees the microphone alright:
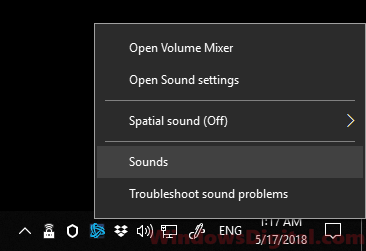
Find the Sound setting by right-clicking the speaker icon on the taskbar, then choose Sound.
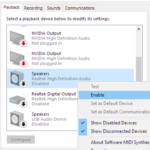
Go to the Recording tab and see if your microphone is listed. If it is, right-click it, hit Enable if it’s not already, click on it again, and then pick Set default. This might just solve your problem.
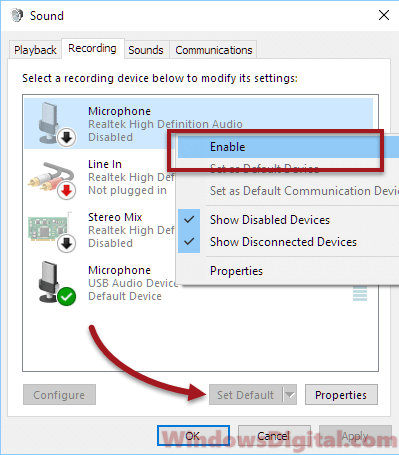
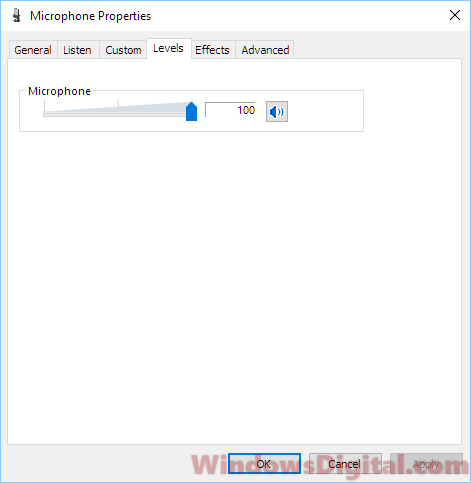
Also, check your microphone isn’t on mute. Select it from the list, hit Properties, go to the Levels tab, adjust the volume so it’s audible, and ensure the mute button is off.
If you don’t see your Microphone listed, you might need to reinstall its driver. If you’ve got a CD for your microphone, pop it in and install from there. If not, do this:
- Open Windows Search.
- Look for Device Manager and open it.
- Find Audio inputs and outputs and expand it.
- Right-click your microphone and choose Update driver.
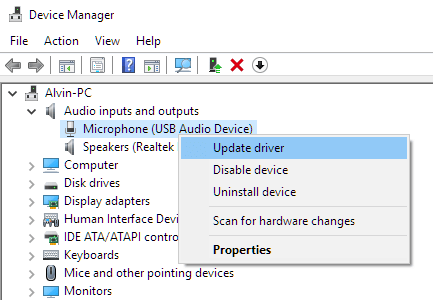
- Pick Search automatically for updated driver.
After installing the driver, restart your computer and try your microphone again to see if it’s working now.
Check app’s permission to allow access to microphone
If it’s not a hardware issue causing your microphone troubles, make sure the apps you want to use have permission to access it, especially after a Windows update that might have changed privacy settings. Here’s how to check:
- Hit the Start menu and open Settings, or press Windows + I.
- Choose Privacy.
- In the left pane, pick Microphone.
- Ensure the Allow apps to access your microphone option is on.
- Look for the app you want to use with your microphone in the list and make sure it’s allowed to use it.
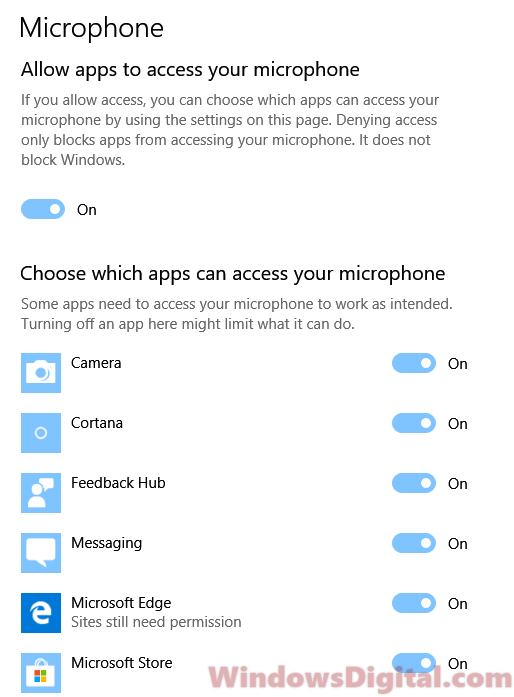
You might have to manually switch on app permissions for your microphone, especially after a recent update.
Check out this page – No sound in Windows 11/10 after update if you’re also having issues with sound and speakers after a Windows update.
Check hardware and physical connections
Sometimes, it’s a simple as checking if your microphone is plugged in right. Try a different USB port or a different cable to see if that fixes it. You could also try plugging the microphone into another PC or device to see if it’s the microphone or your PC that’s the issue.
Run the Windows Troubleshooter
Windows has a built-in tool to help find and fix issues. Try running the troubleshooter for microphone problems like this:
- Click the Start menu and open Settings, or just press Win + i.
- Select Update & Security.
- Choose Troubleshoot on the left.
- Find the Recording Audio troubleshooter and click Run the troubleshooter.
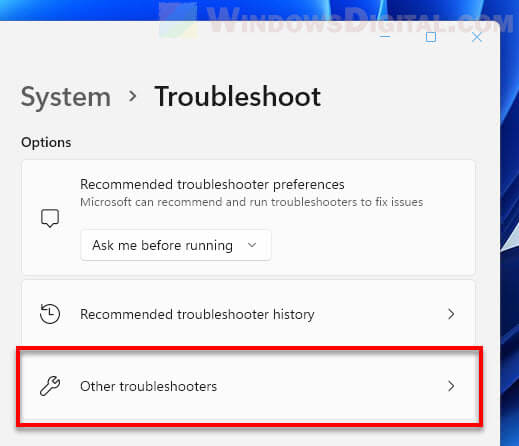
Just follow what it tells you on the screen to try and fix your microphone issue.
Update your Windows
Sometimes, the easiest fix is to just update your Windows. A few folks on Reddit have found that updates they missed were actually causing the microphone issues. It’s because sometimes Windows Update might contain the driver updates for your microphone as well as other devices, which might be required to be compatible with latest Windows builds. After all, it’s just a button away to run Windows Update.
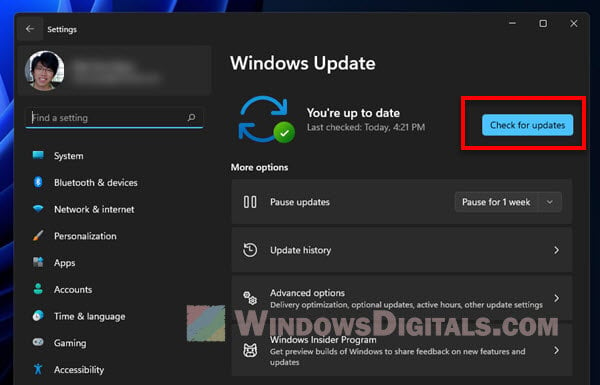
If there are any updates waiting, let them install, restart your PC, and then see if your microphone is back working again. It’s a simple step, but you’d be surprised how often it fixes random problems like this.