If you’re having trouble with your microphone and can’t get a friend to test it for you over Skype, Discord, or in a game, another good way to test if a mic is working is by hearing yourself on the mic. You can easily do this with the help of an option called “Listen to this device” in Windows 11 or 10 microphone properties.
This method should work regardless of whether you’re using an HP, Dell, Lenovo, or any other laptop or desktop PC, as long as it’s running on Windows 11 or Windows 10. It should work on most microphones, whether it’s a headset, headphone, or standalone mic, as long as it is properly connected, detected, and enabled in Windows.
Also see: How to Increase or Boost Microphone Volume in Windows 11
Page Contents
How to test your mic on Windows 11 or 10
Here are the detailed instructions to listen to your own voice from your own microphone to see if your mic is actually working correctly:
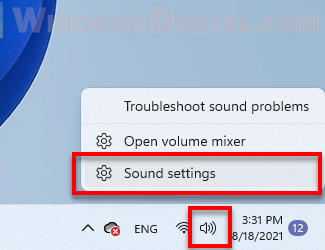
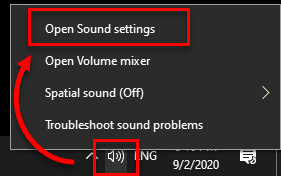
- In the notification area on the taskbar (lower right corner of your desktop screen), right-click on the speaker icon, then click on Open Sound settings. Alternatively, you can open the sound settings by going to the Start menu > Settings > System > Sound.
Windows 11
Windows 10
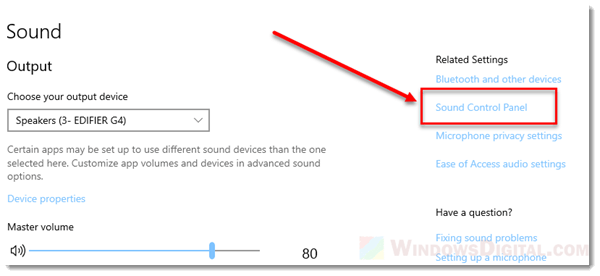
- In the Sound settings window, click on the Sound Control Panel link under Related Settings on the right.

Windows 11
Windows 10
- In the Sound Control Panel window, go to the Recording tab, and then select your microphone that is currently in use. Right-click it and select Properties.
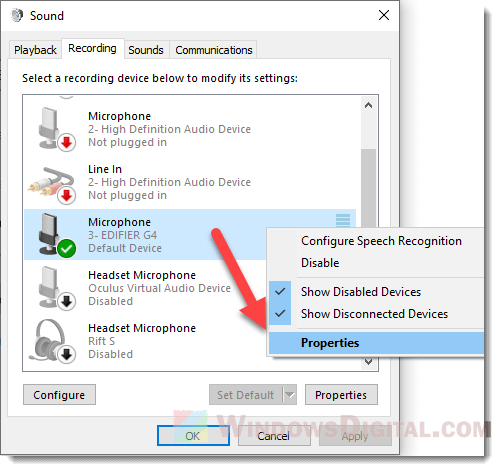
- If you have multiple microphones on the list, you should enable only the one that you are going to use (or set it to “Default device”) and disable the rest if you are not going to use them.
- Some headsets and headphones may come with built-in mics that you may not be aware of. If you have multiple mics enabled when an app or game needs a mic, Windows will simply use the one that was set to be the default device.
- In the Microphone Properties window, go to the Listen tab, and enable the checkbox that reads “Listen to this device.” Click Apply for it to take effect.
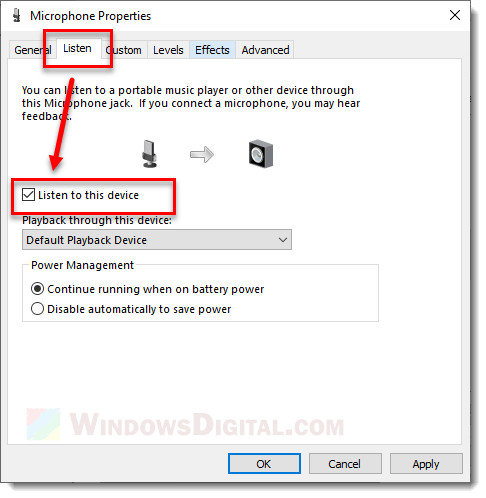
- Now, try to speak into your microphone. You should be able to hear your own voice. It’s recommended that you use a headphone instead of a speaker to avoid echoes.
- Once you have finished testing, be sure to disable the “Listen to this device” option to avoid hearing your own voice all the time.
Related: Windows 11 Mute Microphone Hotkey (How to)
Microphone’s volume too low or hardly can be heard
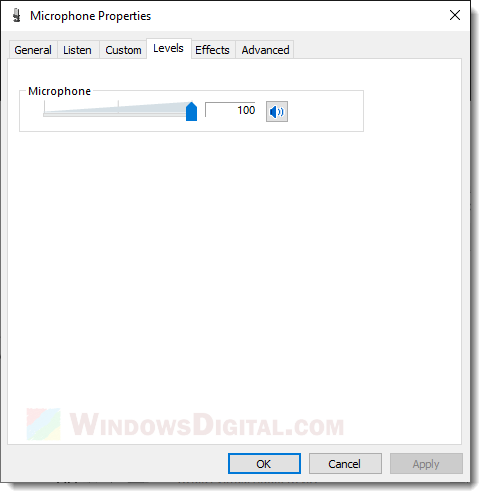
If your microphone’s volume is too low or hardly can be heard, you can adjust the volume level of your microphone in the same Properties window. Follow these steps:
- Go to the Levels tab in the same Properties window.
- Check the volume level of your microphone and increase it to your preference.
- If there is another level called “Boost,” you can also try to increase it to your preference. Boost helps to amplify the input of your mic to pick up even more sound. It’s useful if your mic’s volume is still too low even when its volume is set to 100.
Useful tip: How to Record Voice With Microphone on Windows 11/10
What are some other common causes of microphone issues in apps or games?
When you have several microphones hooked up to your computer, sometimes the app or game picks the wrong one automatically. This means your game is using a mic or any kind of audio input device that is not the one you intend to use. Just go into your app or game settings and choose the right microphone.
There are times when your microphone might be muted right within the app or game settings. Maybe you hit mute by accident or someone else did it. Just make sure that the microphone isn’t set to mute.
If people can’t hear you well, maybe your microphone volume is too low. You can turn up the microphone volume in the app or game settings to see if your problem is resolved.
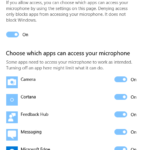
Occasionally, your microphone might not be turned on in Windows, which means it won’t work in any apps or games. To get it working, go to your Windows Settings and make sure the microphone is switched on and selected as the default input device.