Are you looking to quickly record voice and audio on your Windows 11/10 computer without having to install any software? This tutorial will show you how to use the built-in Voice Recorder app to record voice from your microphone.
If you’re looking to record internal audio from apps or games on your computer, follow this guide instead: How to Record Internal Audio on Windows 11/10 (Without Microphone).
If you want to record both voice and screen as a video on Windows 11/10, check out this tutorial: How to Record a Video of Your Screen (with Sound) on Windows 11/10.
Page Contents
Record voice on Windows 11 or 10
Windows 11/10 comes with a built-in app called Voice Recorder that can quickly and easily record any audio that comes from your microphone. Here’s how to use the app to record voices and audio from your Mic on Windows 11/10:
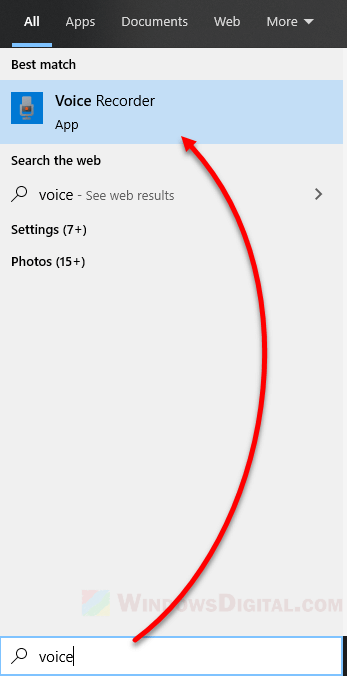
- Go to Start menu.
- Search and open “Voice Recorder“.

Windows 11
Windows 10
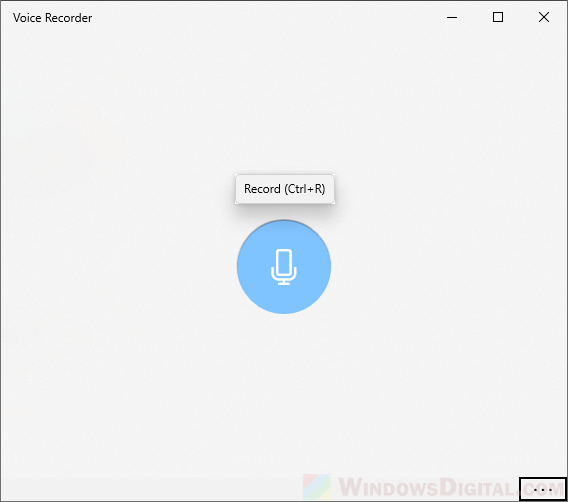
- Click on the blue Record button to start recording voice or audio from your microphone. Alternatively, you can press CTRL+R hotkey to start recording.
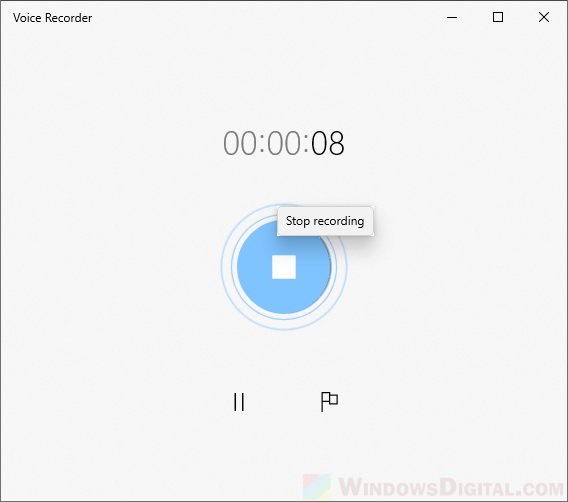
- To stop recording, click on the blue button again.
- To pause the recording, click on the pause button. You can resume the recording anytime by pressing the same button again.
- To add a marker, click on the flag icon, or press CTRL+M keys.
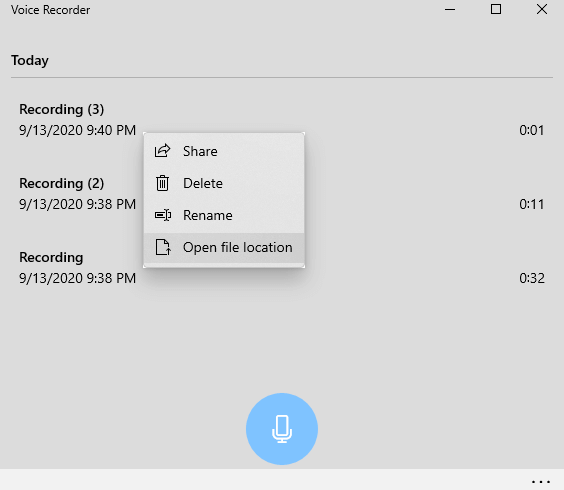
- As soon as you click the Stop recording button, Voice Recorder will immediately save your recording and list it along with all your past recordings on the next screen. From there, you can playback your recordings by left-clicking them.
- By right-clicking any of your recordings on the list, you can share, rename or delete them as you want.
- By right-clicking any of your recordings on the list, you can share, rename or delete them as you want.
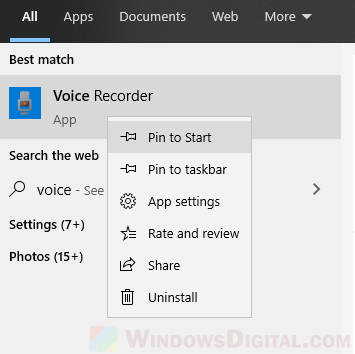
Optionally, you can pin the “Voice Recorder” app to the Start menu or taskbar for quick access so you don’t miss out on any surprise occasion that’s worth recording.
Where does “Voice recorder” save the recording files on Windows 11/10?
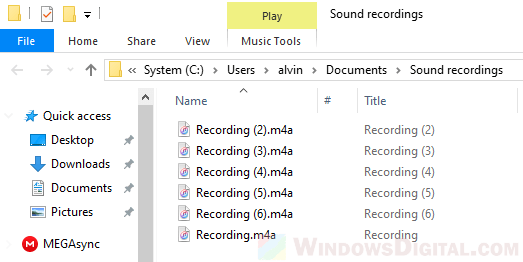
The Voice Recorder app saves all recordings in the following folder path (replace your_username with your actual Windows account’s username):
C:\Users\your_username\Documents\Sound recordings
All your recordings using the Voice Recorder app will be saved as M4A audio file types.
Another way to quickly access this folder is by opening it directly from the Voice Recording app. Right-click any of your recordings on the app, then click Open file location.
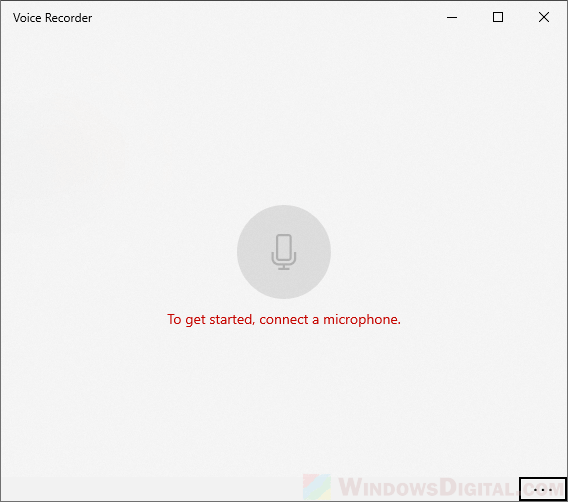
Voice Recorder shows “To get started, connect a microphone”
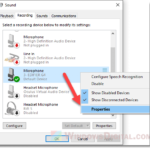
If you see a message that says “To get started, connect a microphone” when you open the Voice Recorder app, it means Windows couldn’t detect a working microphone connected to your PC, or that the app is blocked from accessing your microphone.
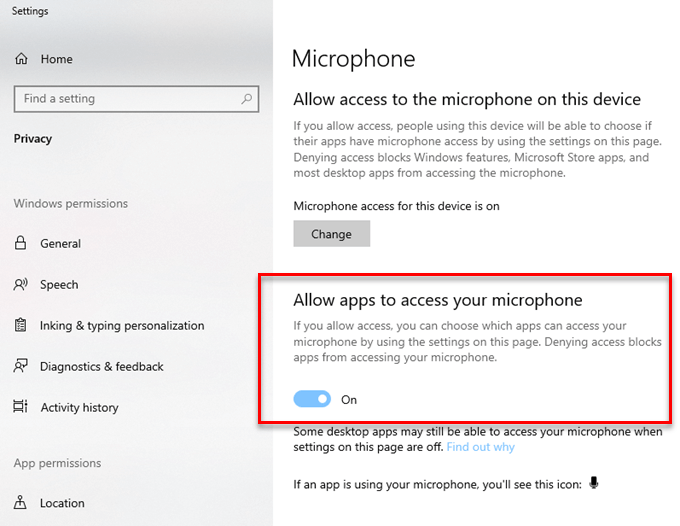
To resolve this issue, ensure that the “Allow apps to access your microphone” option is turned on in Settings > Privacy > Microphone.
If you’re having issues with your connected external or built-in microphone on your laptop or desktop PC, these guides may be helpful:
- How to Test Microphone on Windows 11/10 to see if it’s working
- Microphone Not Working After Windows 10 Update (Solved)
Change recording quality and format
By default, Voice Recorder saves all recordings in M4A format with a bit rate of 96 kbps. However, you can change the recording quality and format by following these steps:
- Open the Voice Recorder app.
- Click on the three-dot menu in the top-right corner of the app window.
- Select Settings from the drop-down menu.
- Under the Recordings section, you can change the Audio quality and Format settings.
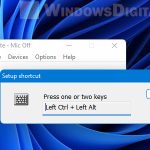
Use a keyboard shortcut to open Voice Recorder
If you use Voice Recorder frequently, you can create a keyboard shortcut to open the app quickly. Follow these steps:
- Right-click on the Voice Recorder app in the Start menu or taskbar.
- Select More > Open file location from the drop-down menu.
- Right-click on the Voice Recorder shortcut in the folder that opens.
- Select Properties from the drop-down menu.
- In the Properties window, click on the Shortcut key field.
- Press the keyboard shortcut you want to use to open the app (e.g. Ctrl+Alt+R).