If you want to record your screen on Windows 11 or Windows 10 without using any third-party software, you can use the built-in tool called Xbox Game Bar. This tutorial will show you a simple, step-by-step guide to record your screen and sound using only the Xbox Game Bar.
See also: How to Record Screen on Windows 11/10 Without Xbox Game Bar
Page Contents
How to record screen on Windows 11/10 with Xbox Game Bar
Xbox Game Bar is a quite useful tool that you can use to capture and record the screen of an app, game, browser, or anything else that appears on your screen, along with audio, and save it as an MP4 video file. The following are a few simple steps to use Xbox Game Bar to record your screen:
- Open the app you want to record, then press Win + G on your keyboard to bring up the Xbox Game Bar overlay.
- If you are in a game, you will see a pop-up that says “Do you want to open Game bar?”. Click on the “Yes, this is a game” checkbox to open Game bar. This is a normal pop up that tries to determine whether you are running Xbox Game Bar in a game or an app.
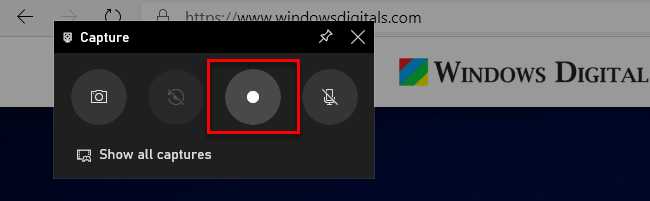
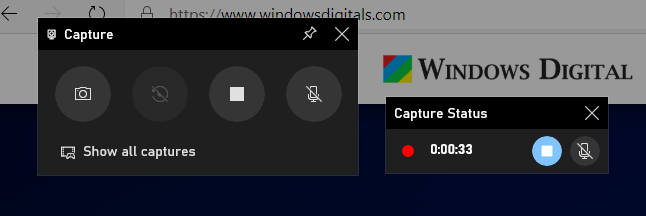
- In the Capture window that usually appears in the top left corner of your screen, click on the “Start recording” button (the circle button) to begin recording your screen.
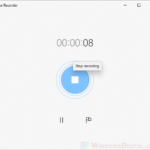
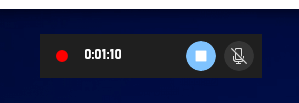
- A recording timer window will appear, indicating that the recording has started and is ongoing.
- To continue your work while recording your screen, press the Win + G keys again to temporarily hide the Game bar overlay. Note that the recording will not capture the Game bar overlay in the video, so you don’t have to worry about the overlay blocking whatever you are recording.
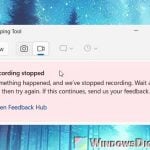
- To stop recording, press the Win + G keys to bring up the Game bar again, then click on the “Stop recording” button (the square button).
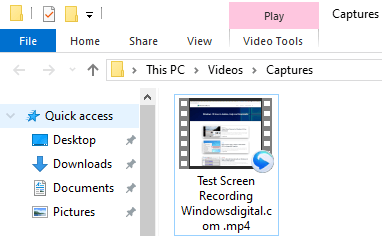
- The recorded video will be saved as an MP4 file in the This PC > Videos > Captures folder automatically.
That’s it! It’s not as difficult as you might have thought earlier, right? If you want to learn more about what you can do with the Xbox Game Bar recording feature, continue to the additional tips below.
How to change the default folder where Xbox Game Bar saves your recorded videos, game clips and screenshots?
To change the location of the default save folder, go to This PC > Videos. Then, move (or Cut and Paste) the “Captures” folder to wherever you want. Game Bar will continue to save future videos and screenshots in that particular folder, no matter where you move it to.
How to change the “audio to record” settings to include or exclude Microphone or other sources of audio?
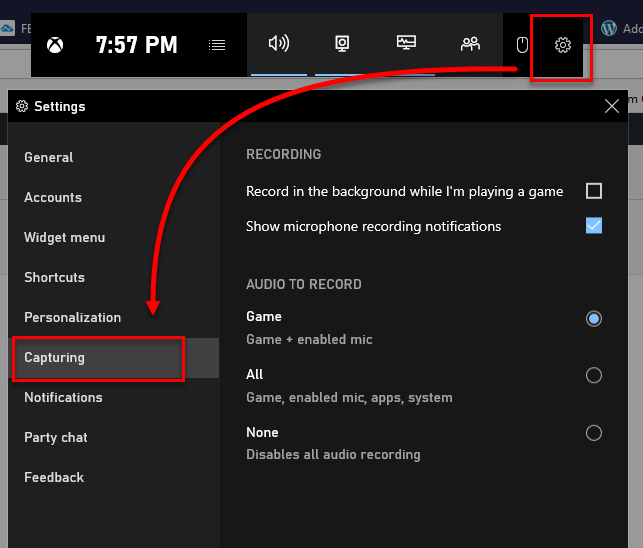
To change the audio settings of your recordings, press Win + G keys to open the Game bar overlay. At the top of the overlay, click on the settings icon (the gear icon). Then, in the left sidebar, click on Capturing. From there, you can select whether you want to include audio from the game, microphone, apps or system, or if you want to disable them all during screen recording.
How to quickly take a screenshot with Xbox Game Bar
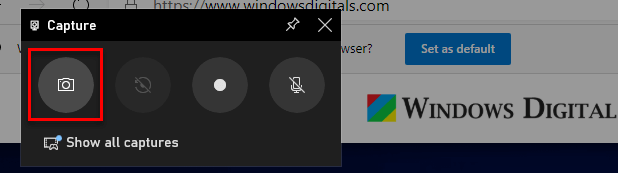
Other than recording your screen, Xbox Game Bar also allows you to easily take a screenshot of your current screen by pressing “Win + ALT + PrtScn” buttons. You can also quickly capture a screenshot by clicking the “Take screenshot” button (button with a camera) in the Win + G Xbox Game Bar overlay. All screenshots taken will be saved to the same “Captures” folder.
Other Xbox Game Bar features that might be useful
The following are some other things that you can do with Xbox Game Bar that you might find useful sometimes.
Keyboard shortcuts
By default, the keyboard shortcut to bring up Xbox Game Bar is Win + G. But, you can actually change this shortcut to a different combination of keys if you want. To do so, go to Settings > Shortcuts in the Xbox Game Bar overlay.
Performance overlay
If you want to keep an eye on your system’s performance while recording your screen or doing anything else like playing your games, you can use the “Performance Overlay” feature. This overlay will show you the real-time data on your CPU, GPU, and RAM usage. To enable the Performance Overlay, go to Settings > Performance in the Xbox Game Bar overlay.
Broadcast settings
If you also want to stream your game live while recording, you can use the Broadcast feature in Xbox Game Bar. It allows you to change the streaming quality and bitrate, and even choose which platform you want to stream to (such as Twitch or YouTube). Just go to Settings > Broadcasting in the Xbox Game Bar overlay to configure the settings and begin streaming.