If you are having issues with Xbox Game Bar and want to record your screen and audio in Windows 11 or Windows 10 without resorting to lesser-known third-party software, you can try using NVIDIA Share (formerly known as NVIDIA Shadowplay). NVIDIA Share is part of NVIDIA GeForce Experience, a must-have companion app for NVIDIA graphic card users.
NVIDIA Share allows you to quickly record your screen and sound and save it as a video file on your PC. It is commonly used among gamers for quick gameplay clips capturing. It also allows desktop capturing, which most other screen recording software, including Xbox Game Bar, don’t.
Also see: Record a Video of Your Screen with Sound in Windows 11/10
Page Contents
Record screen with audio on Windows 11 or 10
The following guide requires you to have NVIDIA GeForce Experience installed. You can download it from here (NVIDIA official site). Once you have GeForce Experience installed, follow the steps below to record your screen.
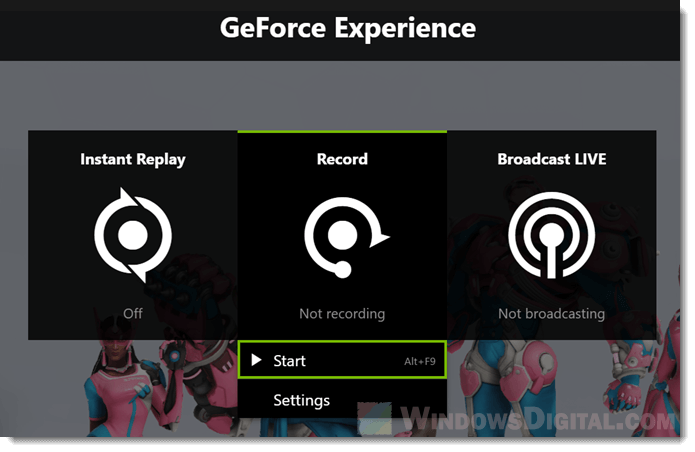
- While you’re in the app or game you would like to record, press “Alt + Z” key to open NVIDIA Shadowplay overlay.
- Click on “Record”, then “Start” to start recording. You can hide the overlay by pressing “Alt + Z” key again and continue doing your stuffs or play the game while it’s recording.
- Another quicker way to do this is by pressing “Alt + F9” keys to start recording right away in your game or app without bringing up the Shadowplay overlay.
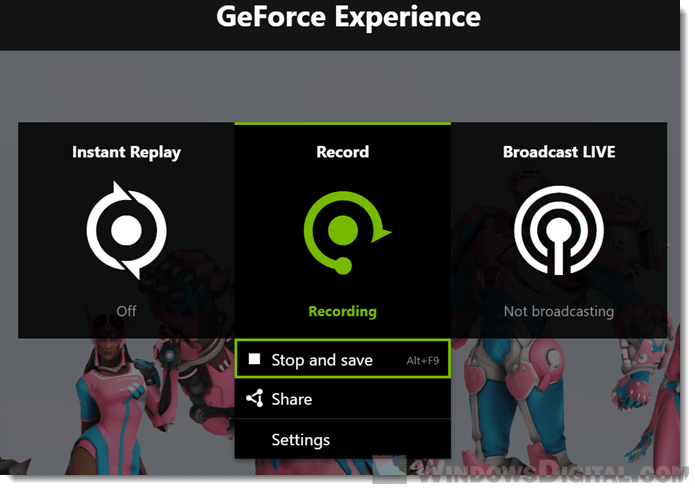
- To stop recording, press “Alt + Z” to open the overlay and then click “Record” > “Stop and save.”
- Or by pressing “Alt + F9” keys to stop recording without opening the overlay.
- The recorded videos will then be saved as a “MP4” video file in a folder with the game’s name in “This PC > Videos”. For example, if you were screen recording league of legends, the recorded video will be saved onto “This PC > Videos > League of Legends”.
- If it’s not a game and you couldn’t find the folder with the name of the app you were recording, try the “This PC > Videos > Desktop” folder.
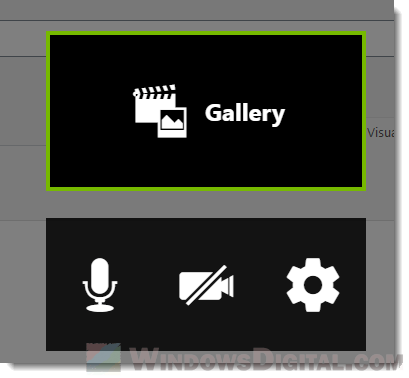
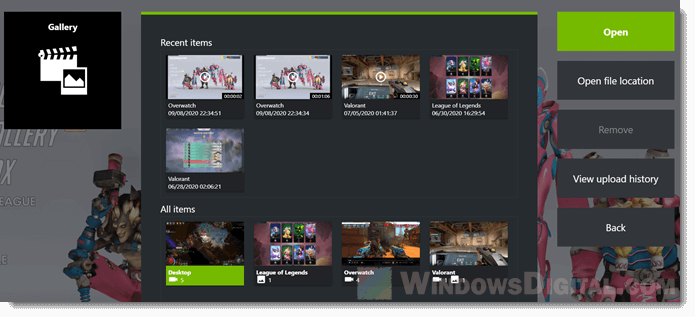
- Another method to locate the recorded video is by going back to Shadowplay overlay (“Alt + Z”), and click on the “Gallery” button. Under “Recent Items”, click on your recorded video, then click on “Open file location” button.
That’s it! You’ve successfully recorded your first video of your screen in Windows 11/10 using NVIDIA Shadowplay. Below are some additional tips about what else you can do with Shadowplay.
How to change the video quality, resolution and frame rate of screen recording in Shadowplay?
To tweak the settings of video capture, press “Alt + Z” to open Shadowplay overlay. Click on “Record > Settings”. From there you can select a general quality for video recording – “Low”, “Medium”, “High”, or “Custom” if you would like to select your own “Bit rate”.
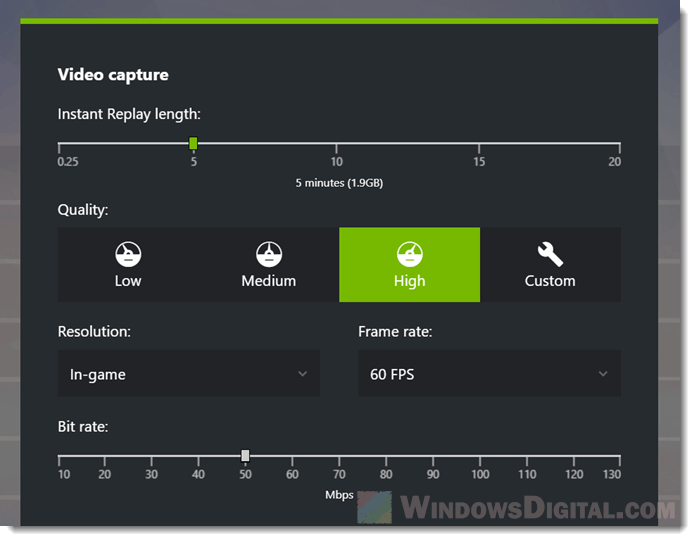
The “In-game” resolution will tell Shadowplay to record the screen with resolution according to your game/app. Selecting other resolutions (1080p, 1440p, 2k or 4k) will force the recording to up-size or down-size your original capturing to the selected resolution, which usually ends up with poor quality video and is not recommended.
How to record last X minutes using Shadowplay’s Instant Replay?
Instant Replay is an amazingly useful feature that makes Shadowplay a better game screen recorder than many others. It allows you to record and save only the last X minutes of your screen, so you wouldn’t miss out on any highlight ever again. Here’s how it works.
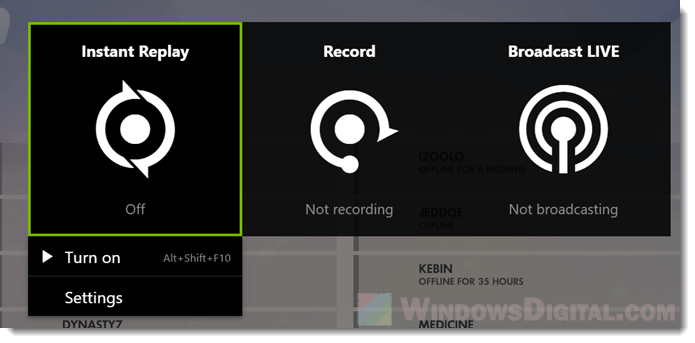
Turn on Instant Replay in Shadowplay overlay by clicking on “Instant Replay > Turn On”. When it’s on, Shadowplay will record your screen continuously. When you hit the “Alt + F10” keys, it will save the last X minutes of whatever happened on your screen as a video in the “This PC > Videos > Desktop” folder. You can set the “X” period of time in the Instant “Replay > Settings”. Under “Instant Replay Length”, you can select as minimum as 0.25 minute, up to 30 minutes of recording.
Don’t worry about the continuous recording though. Shadowplay will smartly overwrite recorded data that is older than a certain period of time and will not occupy any space if no video is saved.