Are you looking for a way to record internal audio from any app or browser on your Windows 11 or Windows 10? This guide will teach you how to do it quickly and easily with an open-source free app called Audacity.
Whether you want to record audio from a YouTube video or any other source, you can save it as an MP3 file with this guide. But, if you’re looking to record your voice or audio from your microphone, you can refer to this guide instead: How to Record Voice or Sound From Microphone on Windows 11/10.
Also see: Record a Video of Your Screen with Sound in Windows 11/10
How to Record Internal Audio on Windows 11/10
Most guides or forums suggest enabling a hidden option called “Stereo Mix” that may or may not appear on your recording devices list. However, this guide will show you an alternative way to record internal audio using Audacity without the need to enable Stereo Mix.
At first, the Audacity audio software may seem complicated and difficult to use. But trust me, it’s easier than you think, and millions of people are already using it for their audio purposes. Best of all, it’s completely free to download and use, and it’s certainly better than many other paid audio recording software.
Without further ado, here’s how you can record any sound coming from your PC and save it as an MP3, WAV, OGG, or any other audio file format of your choice.
- Download and install Audacity audio software for Windows 10/11.
- Once installed, launch Audacity from your desktop or audacity.exe in the zip file if you’ve downloaded the portable version.
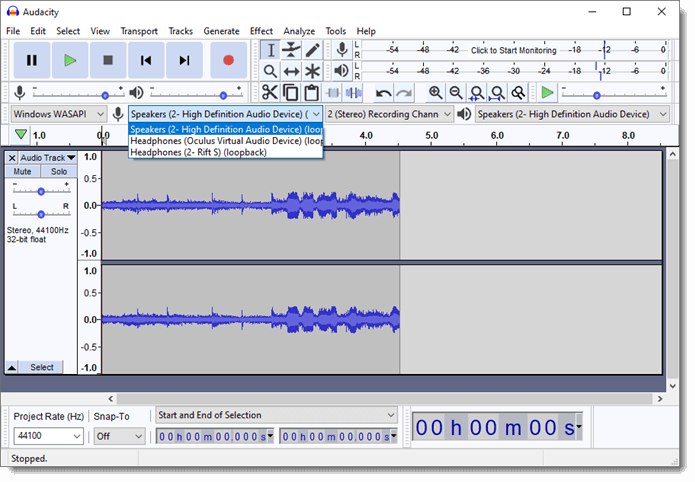
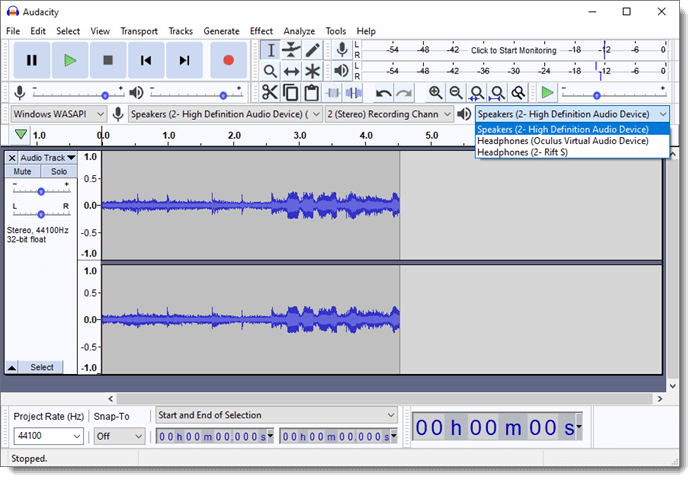
- In the Audacity window, from the first drop down menu at the left, click to select “Windows WASAPI“.
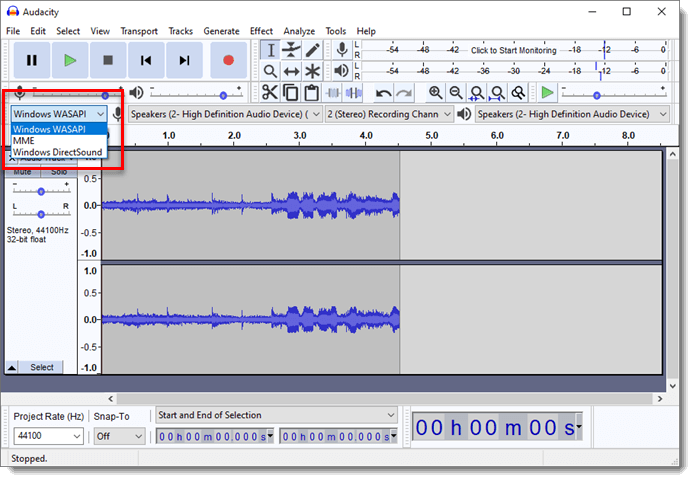
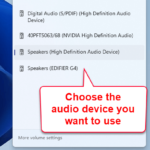
- From the next drop-down menu, select your currently active speaker/headphone device (if you have multiple sound output devices). It’s important to select the right speaker because the recorder will only record sounds that are being heard by the selected speaker/headphone device.
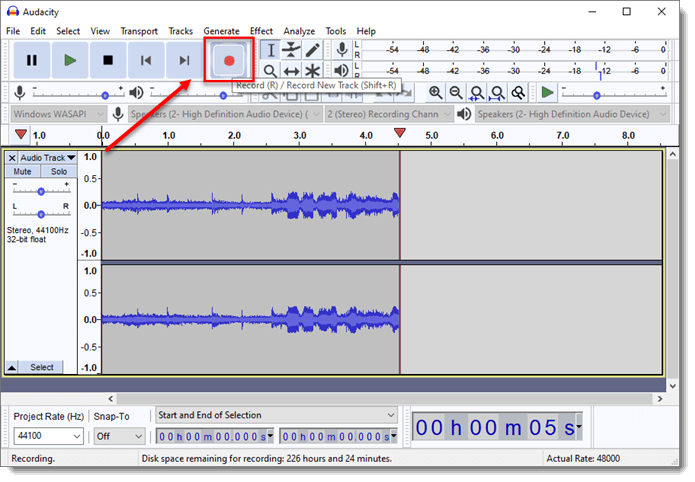
- Start playing audio from whatever source you want. Click the Recording button (Red dot button) on Audacity to start recording.
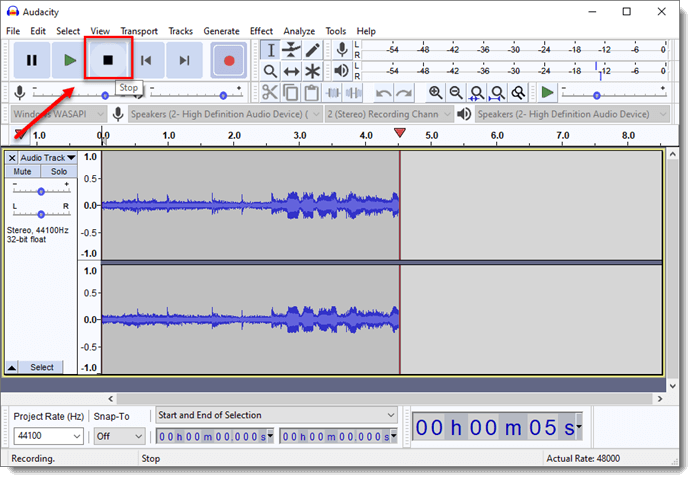
- Click the Stop button (square button) to stop recording.
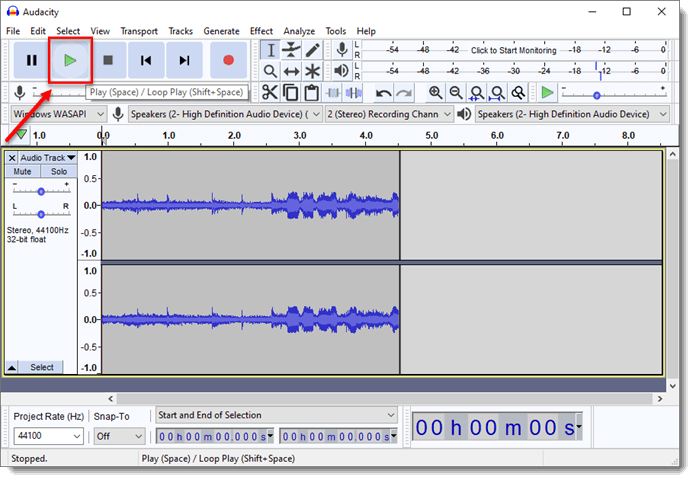
- To preview the audio you’ve just recorded before exporting it, simply click the Play button (the green play button).
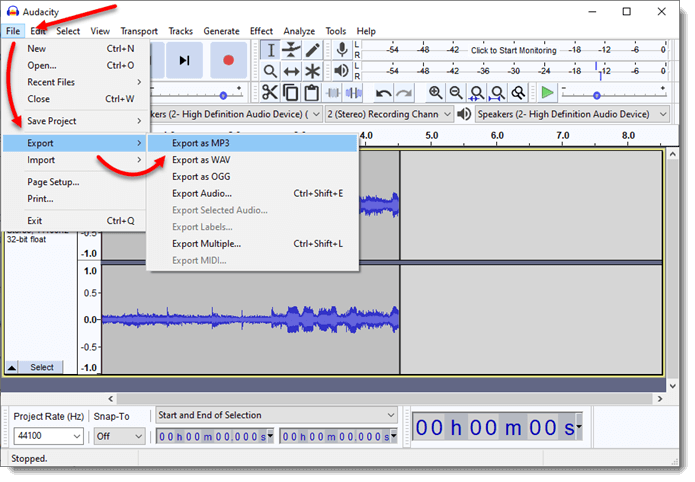
- To save the audio, go to File > Export, then select your preferred audio file type. Browse to where you want the file to be saved, and click Save.
- That’s it! You’ve successfully recorded and created an audio file onto your PC!
It’s not too tough, right? Well, what we talked about is just a small part of what Audacity can do. If you spend time learning and trying the software, you’ll find it even more impressive for what it can handle.
Some common issues when recording audio with Audacity
If no sound is being recorded, check if you’ve chosen the right speaker or headphone in Audacity. Also, make sure the volume on your PC and in Audacity isn’t too low or muted.
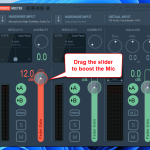
If the sound quality is poor, like if it’s distorted or crackling, try adjusting the recording levels in Audacity. Use the microphone slider in the Mixer Toolbar or the dropdown menu next to the input level meter.
If Audacity crashes or freezes, try updating to the latest version or restart your PC. Adjusting settings in Audacity might help too, like increasing the buffer size or lowering the sample rate.
Pro tips for using Audacity
Audacity isn’t just for recording audio on Windows; it’s a powerful tool for audio editing too. The following are some other things you can do with the app:
- After recording your audio, use Audacity’s tools to edit or enhance the sound. You can adjust volume or tone with the Equalization or Amplify effects, or remove background noise using the Noise Reduction tool.
- Audacity supports lots of plugins and add-ons that boost its features. You can use the LAME MP3 encoder plugin to turn recordings into high-quality MP3 files, or use third-party effects with VST plugin support.
- If you often need to make the same edits on many audio files, use Audacity’s batch processing features to make your work faster and easier.