Hearing your own voice when you talk into a mic, sometimes called “Mic Monitoring” or “Sidetone,” is something a lot of people often do. Whether you’re into making recordings, streaming games, chatting online, or just want to check if your mic works, being able to listen to yourself helps you tweak your mic settings for the best sound. We’ve put together a simple guide to show you how to do this on Windows 11.
Also see: How to Test Microphone on Windows 11 to See If It’s Working
Page Contents
What you’ll need
Before jumping in, make sure you have:
- A computer with Windows 11
- A microphone that works
- Headphones or speakers
Your microphone can be its own thing, or it might be part of something else like a webcam or headset.
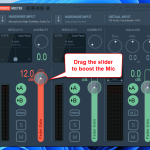
Useful tip: How to Increase or Boost Microphone Volume in Windows 11
Method 1: Using the “Listen to this Device” feature
Step 1: Getting to the sound settings
Windows 11 lets you manage your sound devices, including microphones, through the Sound Settings. Here’s how to get there:
- Hit the Start button on your taskbar.
- Choose the Settings option from the Start menu to open the Settings app.
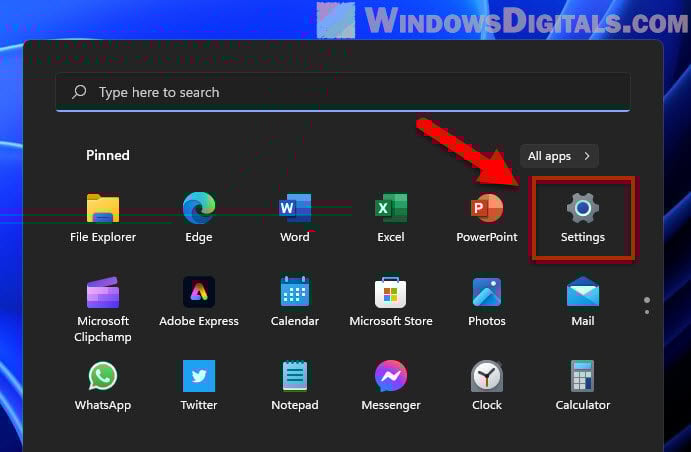
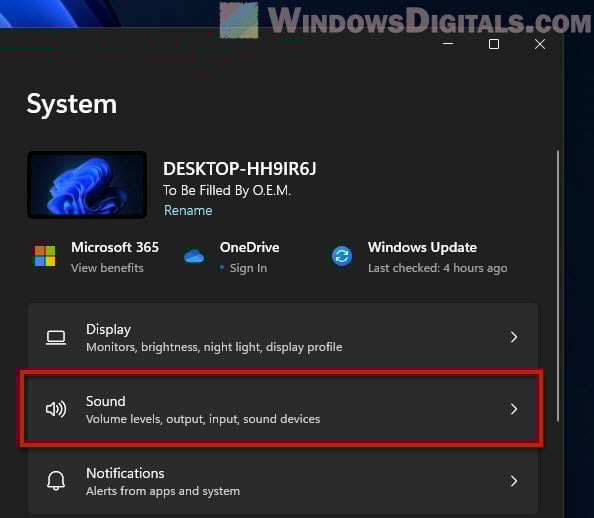
- In the Settings window, pick System from the list on the left.
- Then hit Sound.
Or, just type “Sound Settings” in the search box on the taskbar and click the top result.
Step 2: Picking your microphone
In Sound settings, you’ll see options for input devices (like your mic) and output devices (like speakers or headphones).
- Go down and click on “More sound settings“.
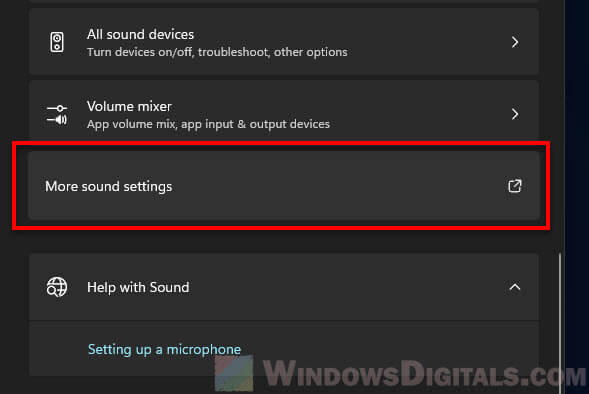
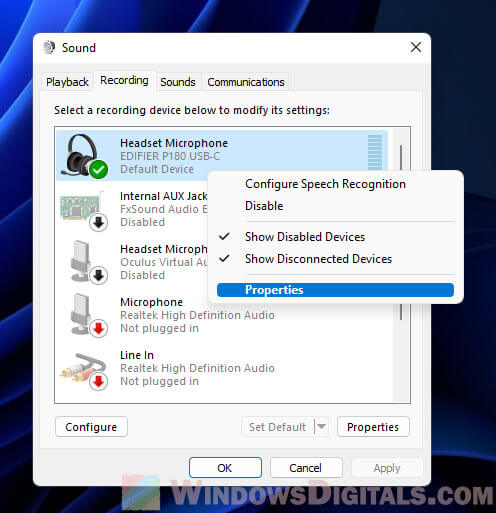
- In the “Sound” window, go to the “Recording” tab.
- Right-click your mic and choose “Properties“.
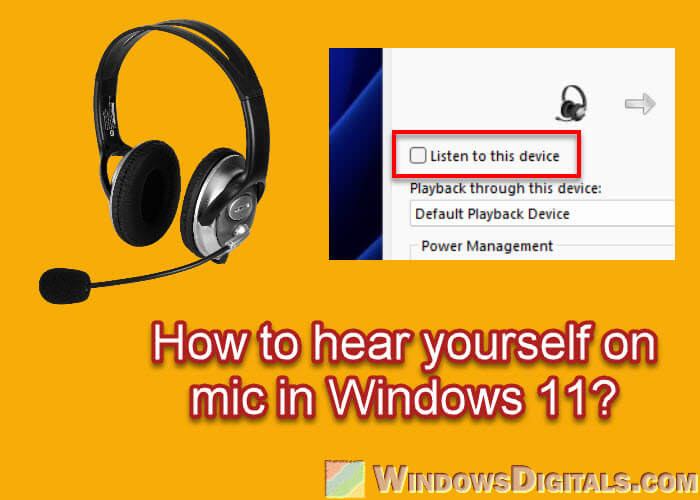
Step 3: Turning on the listen to yourself feature
In the mic properties window, you’ll find different settings for your mic, including how to turn on mic monitoring or the “Listen to this device” feature.
- Go to the Listen tab in the properties window.
- Check the box next to Listen to this device to turn on mic monitoring.
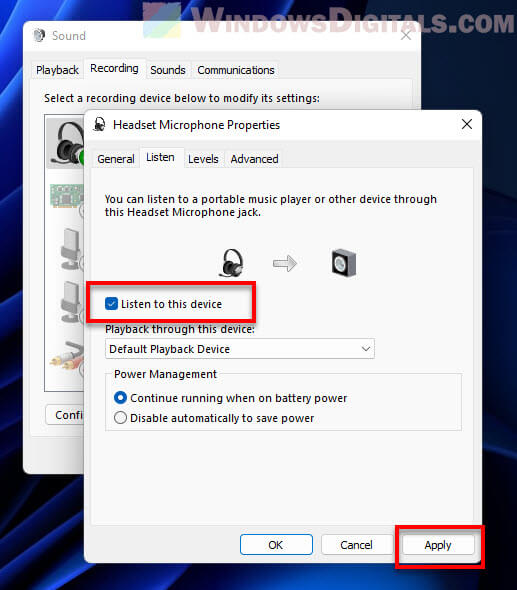
- Choose your output device (like speakers or headphones) from the dropdown menu for playback.
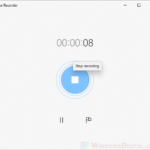
Related resource: How to Record Voice With Microphone on Windows 11/10
Step 4: Applying and testing the setup
After you turn on the “listen to this device” feature, the next steps are to save your changes and then test if you can hear yourself.
- Hit Apply, then OK to close the Microphone Properties window.
- Try speaking into your mic. You should hear your voice through your selected output device.
Keep in mind, this feature might make your voice lag a bit when you hear it. The delay varies depending on your computer. If it bothers you, you might want to look for other ways to monitor your voice with less delay, like using special audio software.
Recommended guide: How to Use Both Speakers and Headphones in Windows 11
Method 2: Using the “Test your microphone” feature
Windows 11 also has a tool to test your mic. Here’s how to use it:
Step 1: Getting to the sound settings
- Click the Start button on the taskbar.
- Choose Settings from the Start menu to open up the Settings app.
- In Settings, pick System from the sidebar.
- Then hit Sound.
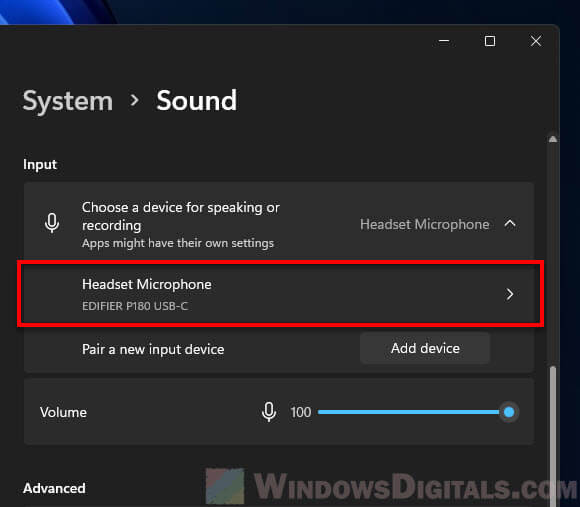
Step 2: Selecting your microphone
- Under the Input section, click the dropdown menu titled Choose your input device.
- Pick the mic you want to check from the list of devices.
Step 3: Testing your microphone
Windows 11 comes with a neat tool for mic testing right under the “Test your microphone” section.
- Just below where you selected your mic, you’ll find the Test your microphone area. Hit the Start test button.
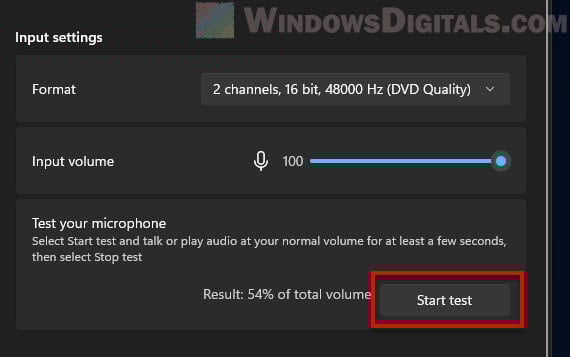
- Start talking into your mic. You’ll see movement next to the mic icon, showing your voice is being picked up.
- When you’re done, click Stop test. It’ll show how well your mic picked up your voice as a percentage of volume.
This way doesn’t let you hear your voice live, like the first method. It’s mainly for checking your mic’s settings and quality. Super useful for when you’re setting up a new mic or tweaking your current setup.
Linked issue: Microphone Not Working After Windows 11/10 Update
One last thing
The tools mentioned above, like the “listen to this device” option, are pretty useful for all sorts of stuff, like recording, streaming, or just fixing mic issues. Just don’t forget to keep the volume at a comfy level to prevent feedback or echo problems.