You open the Riot Client to play League of Legends and the button says “Update” with “Checking size…“. Click it and it shows “Updating” for a few seconds, then flips straight back to “Play”. Click Play and the same thing happens again, so League stays stuck on updating and never opens. This guide will show you what’s usually behind this loop and how to get League to actually launch.
Also see: vgk.sys Blue Screen (Riot Vanguard) in Windows 11
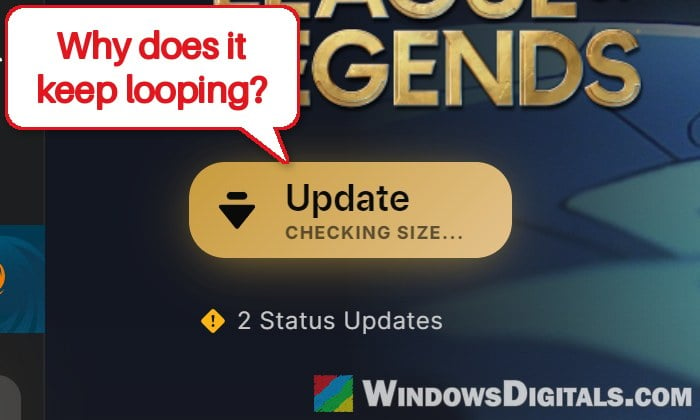
Why does League keep going back to Play?
The loop isn’t new, but a lot more players ran into it right after the League patch of November 17, 2026, many of them on PCs where restarting, repairing and even reinstalling the game changed nothing. There’s been no word from Riot about this wave yet.
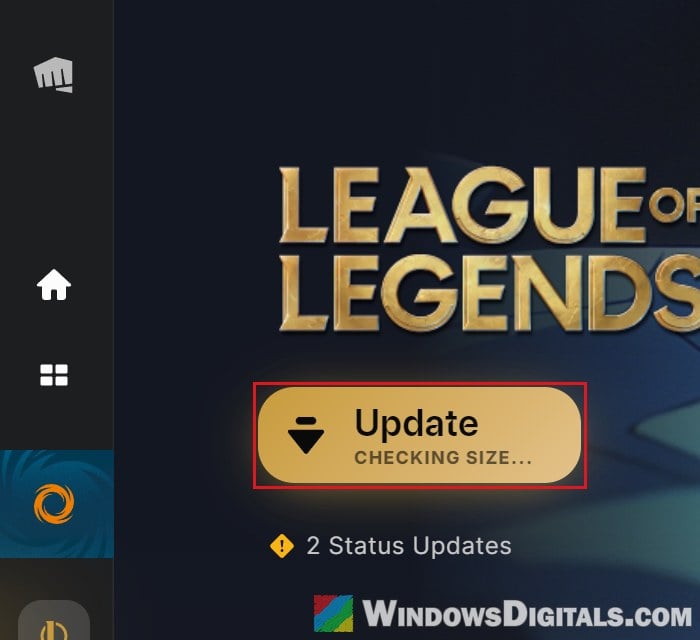
The two causes that come up again and again are:
- Compatibility mode turned on for the Riot Client. With it on, the client thinks it’s running on an old version of Windows, which Riot says can stop it from launching correctly.
- A broken Riot Vanguard install. League needs Vanguard, and when its service can’t start or update, the client keeps asking for an update it can’t complete.
Start with the first one. It’s quick, and it’s what got the most players on Reddit past the loop after the November patch.
Turn off compatibility mode for the Riot Client
With the box ticked on RiotClientServices.exe (the file that runs the client), the client can even think it’s on Windows Vista Service Pack 2. Check it even if you don’t remember turning it on.
- Fully close the Riot Client: right-click its icon in the system tray and select Exit.
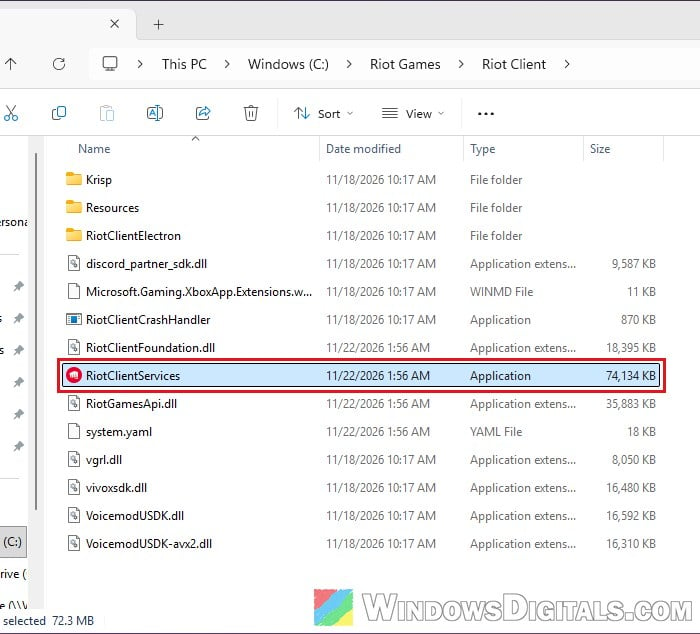
- Open File Explorer and go to
C:\Riot Games\Riot Client(the default install folder). - Right-click RiotClientServices.exe (it may show as just RiotClientServices, type Application) and select Properties.
- Open the Compatibility tab.
- Under Compatibility mode, uncheck “Run this program in compatibility mode for:“.
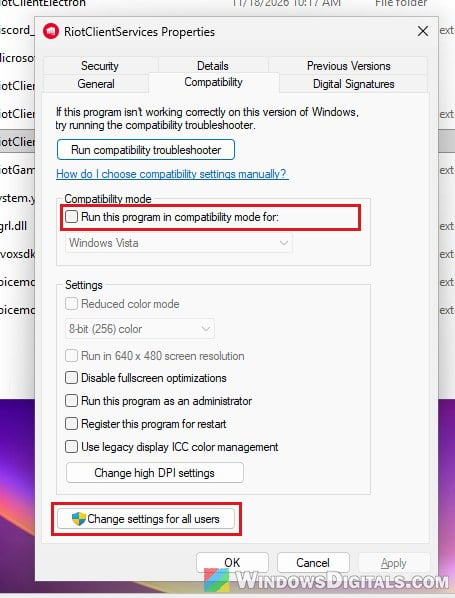
- Click “Change settings for all users” and make sure the same box is unchecked there too.
- Click Apply, then OK.
- Do the same for LeagueClient.exe in
C:\Riot Games\League of Legends(the default League folder).
Open the Riot Client again and click Play. If the box was already unchecked, some players only got past the loop by ticking it, launching the client once, then unticking it and launching again, so that’s worth a try too.
Might be useful: Windows 11 Compatibility With Older Software
Close every Riot process and run the client as administrator
Riot’s first step for client trouble is simply restarting the client, but closing its window doesn’t always close everything. Running it as administrator afterwards has also helped other players get past the loop, especially when an update is waiting.
- Exit the Riot Client from the system tray.
- Press Ctrl + Shift + Esc to open Task Manager and go to the Details tab.
- Right-click RiotClientServices.exe and select End process tree.
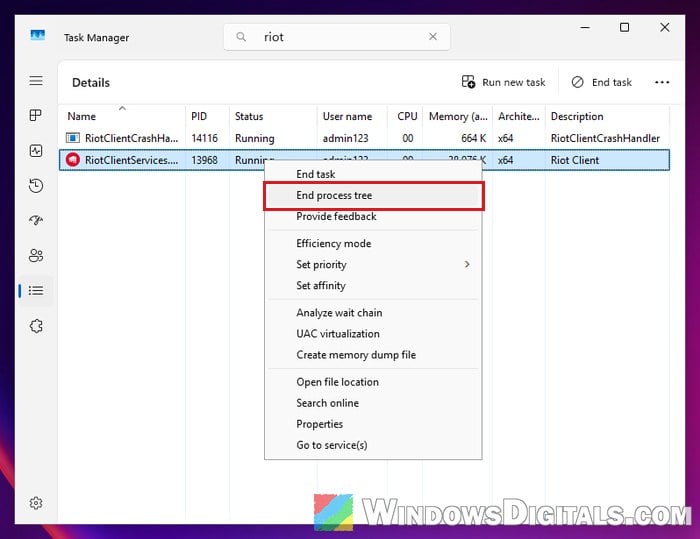
- Search for Riot Client in the Start menu, right-click it and select Run as administrator.
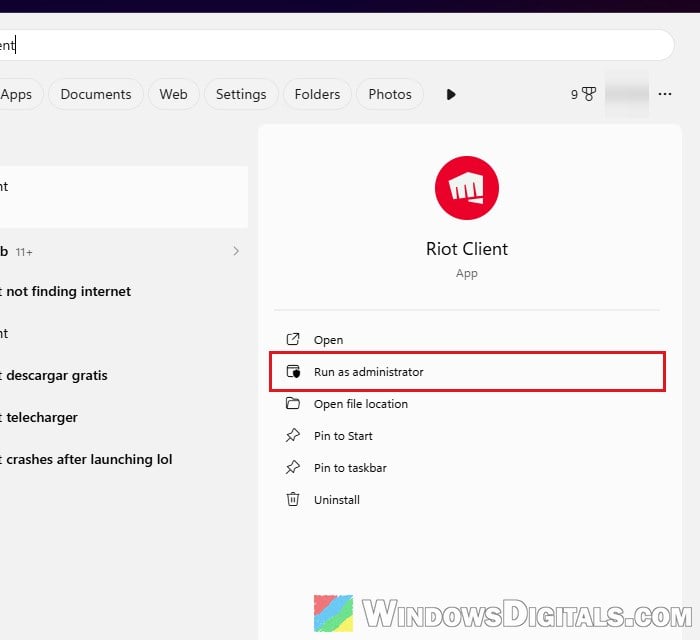
Click Play once the client has loaded. Some players found the loop cleared by itself after an hour or two, so if you can wait, try again later before you start reinstalling things.
Check that Vanguard’s vgc service is set to “Automatic”
Vanguard runs a Windows service called vgc, which also takes care of Vanguard’s updates. If it was disabled, for example during a clean boot or by hand in Services, the client can’t finish the update it keeps asking for. You can skip this if you use the optional Vanguard Pre-Check, which starts Vanguard with the game instead of with Windows.
- Press Win + R, type “services.msc” and press Enter.
- Find vgc in the list and double-click it.
- Set Startup type to Automatic. If the service shows as stopped, click Start.
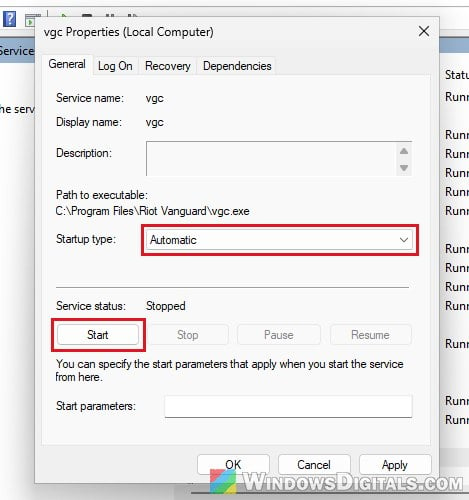
- Click Apply, then OK, and restart your PC.
If there’s no vgc in the list at all, Vanguard isn’t installed. Open the Riot Client and let it install Vanguard (step 4 in the Vanguard section below), then restart.
Related problem: Services.msc “Startup Type” Greyed Out in Windows 11 or 10
Turn your VPN off (or try one)
If you’re on a VPN, turn it off for now, since Riot advises against playing through one. Oddly, a few players who had no VPN on got the update through by connecting to one once, so that’s a quick thing to try too.
Reinstall Riot Vanguard and restart
This was the most common fix for the same loop in earlier patches, and it’s worth trying when the compatibility setting wasn’t the problem. Removing Vanguard makes the Riot Client offer a fresh install of it in place of the Play button.
- Exit the Riot Client from the system tray, then right-click the Riot Vanguard icon there, select Exit Vanguard and click Yes.
- Open Settings > Apps > Installed apps, find Riot Vanguard, click the three dots next to it and select Uninstall.
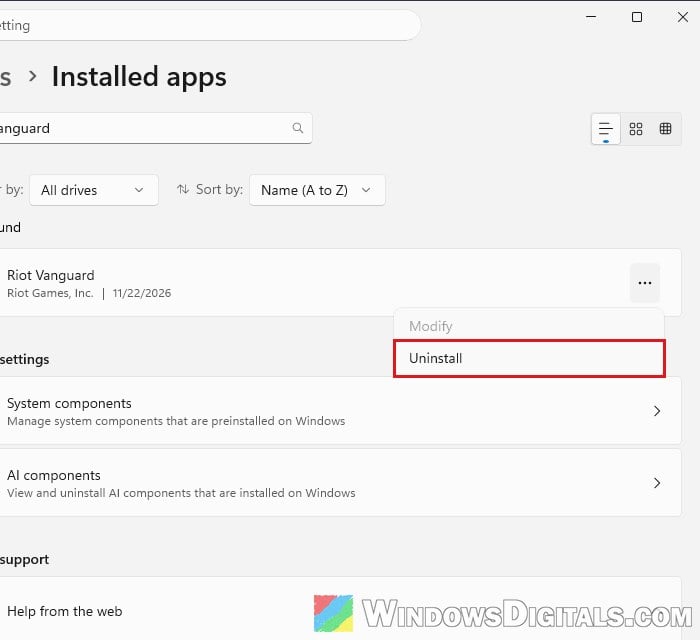
- Open the Riot Client. Where the Play button was, it should now offer to install Vanguard. Let it.
- Restart your PC before you press Play.
If Vanguard won’t uninstall the normal way, run sc delete vgc and sc delete vgk in an administrator Command Prompt, restart, and then delete the Riot Vanguard folder in C:\Program Files. For the full steps, see: Valorant VAN -83 Error and Riot Vanguard Won’t Install.
Repair League, then reinstall it as a last resort
If the client still won’t launch the game, let it check League’s files. Open the Riot Client, click your profile icon in the top right, go to Settings > League of Legends, and under Repair Game Files, click Repair.
A full reinstall didn’t help several players in the November wave, so only do it after the fixes above. The Riot Repair Tool can re-patch and reinstall League for you, and it also collects the logs Riot Support asks for if you end up sending them a ticket. To do it by hand:
- Uninstall League from Installed apps.
- Delete the
C:\Riot Gamesfolder and the Riot Games folder inside%localappdata%.- If you also play another Riot game, delete only the League of Legends folders in those two places instead.
- Restart your PC.
- Download League again from Riot’s website and run the installer as administrator.