In Windows 11, Computer name is the name used to identify your computer when you are connected to a local network, for example, your home network via WiFi or Ethernet. It is the name that will appear on other computers or devices connected to the same network and workgroup, while theirs will also appear on yours, when network discovery and file sharing is turned on.
Workgroup, on the other hand, is a peer to peer network setup using Microsoft Windows. Computers in the same local area network needs to also be in the same workgroup in order to share resources and allow access to each other. For example, if you have two computers connected to the same local network, both needs to have the same Workgroup name in order to share files, printers, etc. with each other.
In this guide, we will show you several methods on how to change the Computer name or Workgroup name in Windows 11 via Settings, System Properties, Command Prompt or Windows PowerShell.
Also see: How to login to Windows 11 without password or PIN
Page Contents
How to change Computer name in Windows 11
Method 1: Advanced System Settings
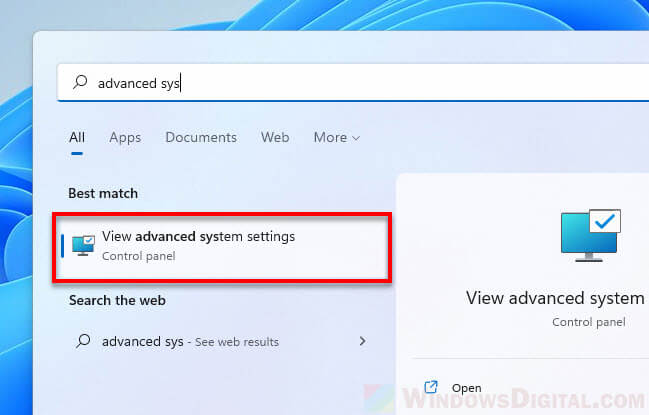
1. Click Start and search for “Advanced system settings”. Select the first result – “View advanced system settings“.
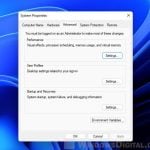
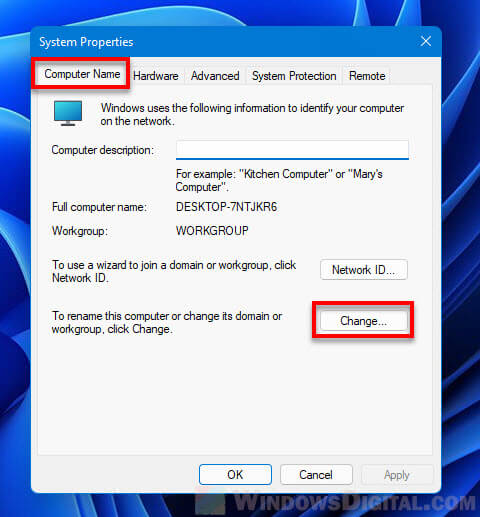
2. In the System Properties window, select Computer Name tab. Then, click the Change button next to “To rename this computer or change its domain or workgroup, click change“.
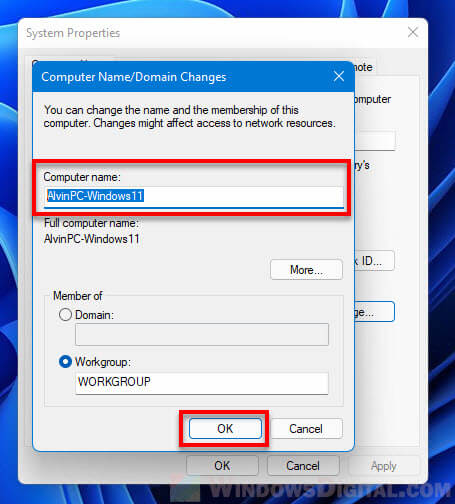
3. In the Computer name field, enter any new name you want and click OK. The computer name is recommended to not exceed 15 characters.
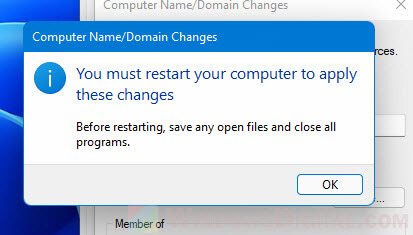
4. You will then be prompted to restart your computer to apply the changes. Restart your computer for the changes to take effect.
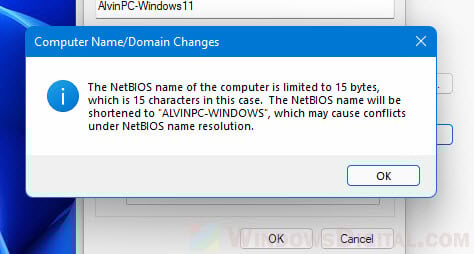
If you enter a name longer than 15 characters, since the NetBIOS name of the computer is limited to 15 bytes, it will try to shortened the name you’ve entered, or you can re-enter a new name not more than 15 characters. To use a longer name, follow method 2 instead.
Method 2: About > Rename this pc
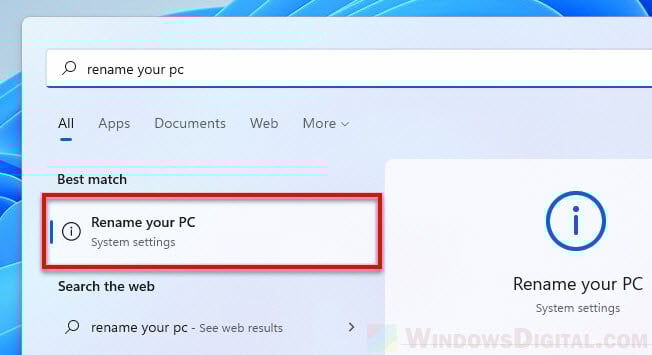
1. Click Start, search for and open “Rename your PC“.
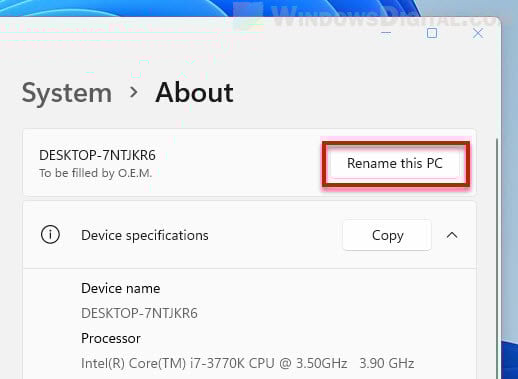
2. In the System > About settings page, click the Rename this PC button next to the current name of your computer.
3. In the Rename your PC window, enter a new name and click Next to proceed.

4. Restart your computer for the changes to take effect.
This method is recommended if you need to use a name longer than 15 characters, or if you are using Microsoft Surface Pro or Windows 11 Tablet Mode.
Method 3: Change Computer name via CMD
To change computer name in Windows 11 via Command Prompt, follow the steps below.
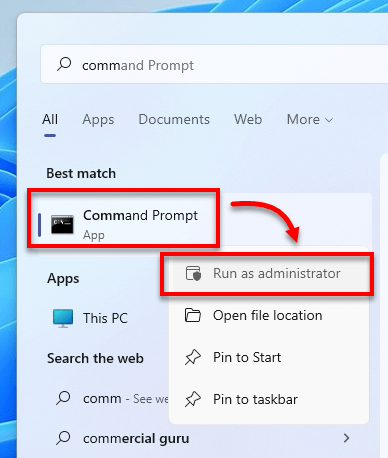
1. Click Start, search for CMD, right-click Command prompt and select Run as administrator. Administrative privilege is required to execute the computer name change command.
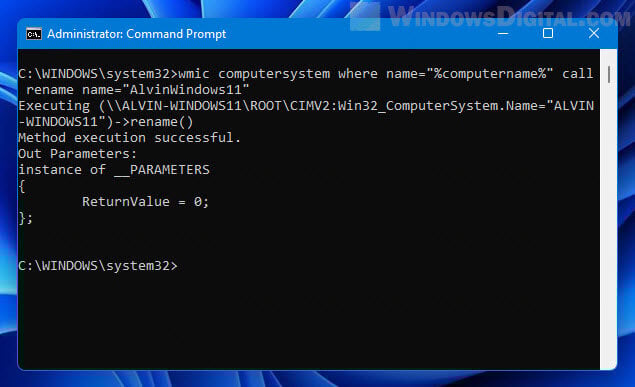
2. In the command prompt window, enter the following command. Replace new-computer-name with the actual computer name you want to change to. Press enter to execute the command.
wmic computersystem where name="%computername%" call rename name="new-computer-name"
3. Restart your computer for the changes to take effect.
Things to consider when assigning computer names
A same network or workgroup should not have two or more computers with the same name. Duplicate computer names will cause problems such as IP conflicts and connection errors. Thus, each computer should have a unique computer name to avoid causing unnecessary conflicts and errors when connected to the same network and workgroup.
Additionally, though the computer name is usually decided when you first setup your Windows during installation, it is safe to change your computer name any time after Windows installation.
How to change Workgroup in Windows 11
Method 1: System Properties
Windows 11 automatically assigns computers to a default workgroup called “Workgroup” when Windows is installed. To change your computer to a different workgroup, follow the steps below.
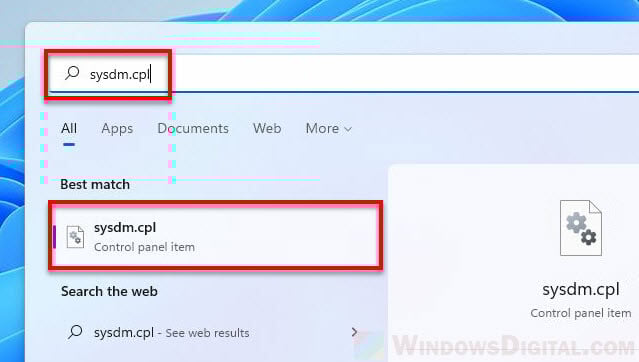
1. Search for and open “sysdm.cpl” (Control panel item) via Start.
2. In the Computer Name tab, click the Change button next to “To rename this computer or change its domain or workgroup, click change“.
3. In the “Member of” section, enter a new name in the Workgroup field.

4. Click OK and restart your PC for the changes to take effect.
Method 2: Change Workgroup via CMD
To change Workgroup in Windows 11 via Command Prompt, follow the steps below.
1. Search for Command Prompt or CMD via Start, right-click the first result and select Run as administrator. Administrative permission is required to execute the command to change your computer’s workgroup.
2. In the elevated CMD window, enter the following command. Replace new-workgroup-name with the actual Workgroup name you want to change to. Then, press enter to execute the command.
wmic computersystem where name="%computername%" call joindomainorworkgroup name="new-workgroup-name"

3. Restart your computer for the changes to take effect.
Method 3: Change Workgroup from PowerShell
To change Workgroup in Windows 11 via PowerShell or Windows Terminal, follow the steps below.
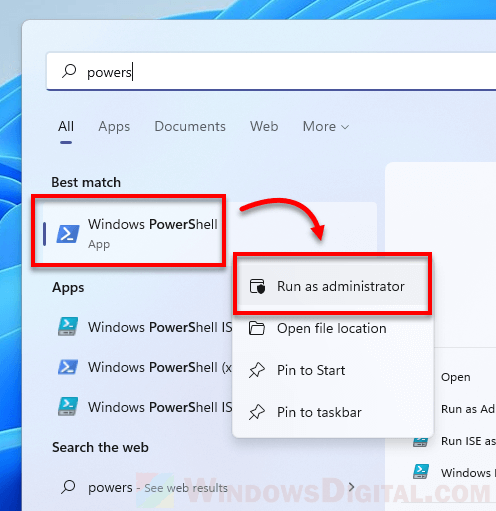
1. Click Start and search for Windows PowerShell. Right-click the first result and select Run as administrator.
2. In the PowerShell window, enter the following command. Replace new-workgroup-name with the actual Workgroup name you want to change to. Then, press enter to execute the command.
Add-Computer -WorkGroupName "new-workgroup-name"
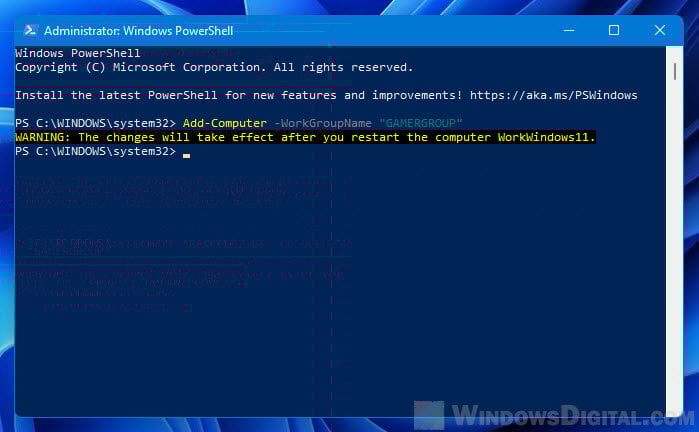
3. Restart Windows for the changes to take effect.