Since the introduction of hard drive cloning technology, backing up drives and upgrading drives (such as upgrading an old HDD to a fast SSD) has become very easy. Usually, people clone their system drive and boot from it. If you are cloning a hard drive not to boot from it but to use it like any other hard drive, in some cases, Windows 11 may not recognize the cloned drive and the drive may not show up in “This PC”.
Don’t worry. This doesn’t necessary mean that the drive is faulty and the issue is pretty common. This problem may be due to the cloned hard disk drive or solid state drive is marked as offline by Windows due to signature collision (we will explain this later).
Also see: How to Format HDD After Cloning Windows 11 to SSD
Therefore, to reactive the cloned hard drive, you only have to make it “online” again. After doing so, Windows will recognize the cloned drive as an individual drive again and you can then see the drive appear in File Explorer.
Page Contents
How to get Windows 11 to recognize cloned hard drive or SSD
First, let’s check the status of the cloned drive via Disk Management. Disk Management is a preinstalled tool in Windows that lets you manage all your storage drives. You can use it to initialize freshly installed hard drive or SSD, format an existing drive, delete or create partitions on a drive, etc.
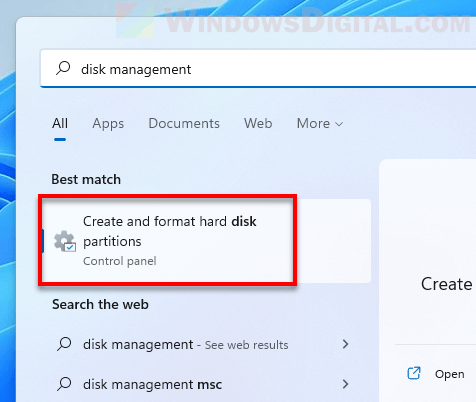
To open Disk Management in Windows 11, search for it via the Start menu and select “Create and format hard disk partitions“. Alternatively, you can open Disk Management by pressing Win + R to open the Run dialog box and then open “diskmgmt.msc“.
Related: How to Hide a Drive in Windows 11
Check if the cloned drive is offline
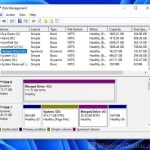
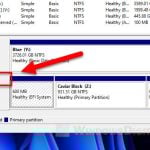
In Disk Management, the bottom section will display all the drives you have on your computer and their respective partitions. In Windows, a drive is called a disk. So, they are listed as Disk 1, Disk 2, and so on. Check if any of the disks is marked as “Offline“.
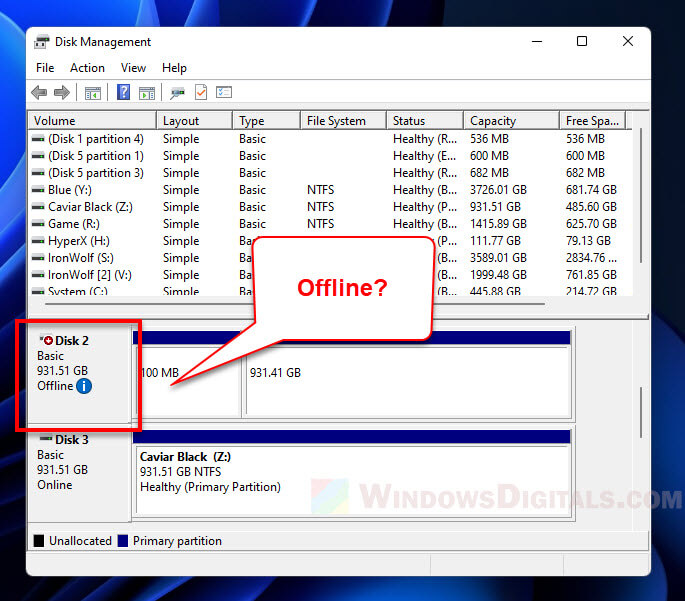
If a drive is marked as “Offline”, you can hover your mouse cursor over the blue exclamation mark icon next to the offline drive to view the description and reason of why the disk is offline. If it is the cloned drive that doesn’t show up after being cloned, the description should show “The disk is offline because it has a signature collision with another disk that is online“.
This basically means that Windows found the newly cloned drive to be an exact copy of an already existing drive, including its signature. Thus, Windows will mark the drive as offline to prevent confusion. This is a common occurrence after cloning drives and booting them together.
Suggested Read: How to Merge Two Drives in Windows 11
How to make a disk drive online again
To resolve the issue of cloned drive doesn’t show up after cloning in Windows 11, you only have to make the drive online again. To do so, in Disk Management, right-click the offline disk and select Online. This will bring the selected disk drive online again.
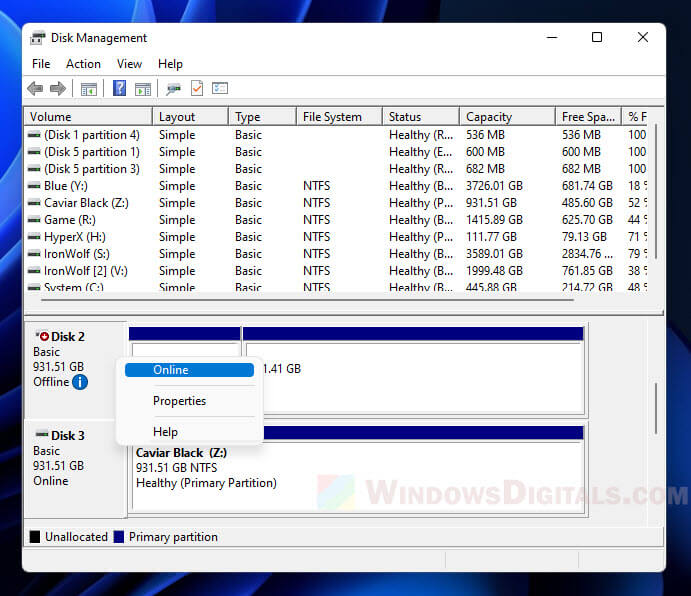
If you don’t see the “Online” option, make sure to right-click the left-most section where the “Offline” status is displayed, not the partition(s). Otherwise, you may see a different context menu if you right-click the wrong item.
After making the drive online, Windows will immediately assign a new drive letter for each available partition on the disk. You can then view the drives from the “This PC” explorer window.
Read next: How to Split Drive in Windows 11 without Formatting
How to change the drive letter of the cloned drive
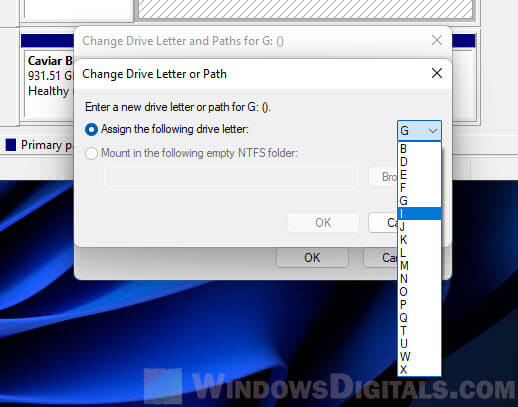
Optionally, you can manually change the drive letter of any partition on the disk by right-clicking the partition of the disk in Disk Management and selecting “Change Drive Letter and Paths“.
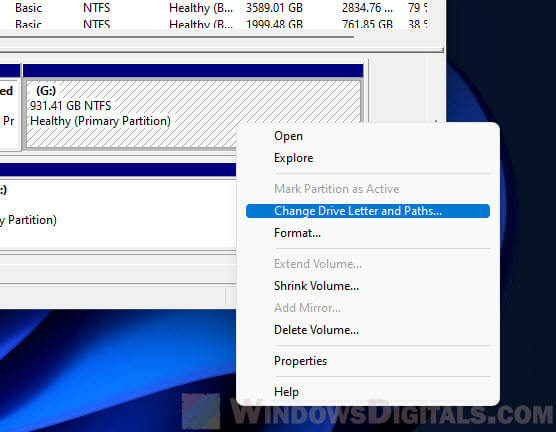
This will open a prompt that allows you to change the drive letter of the selected partition. In the window, select the existing drive letter and click the “Change” button.
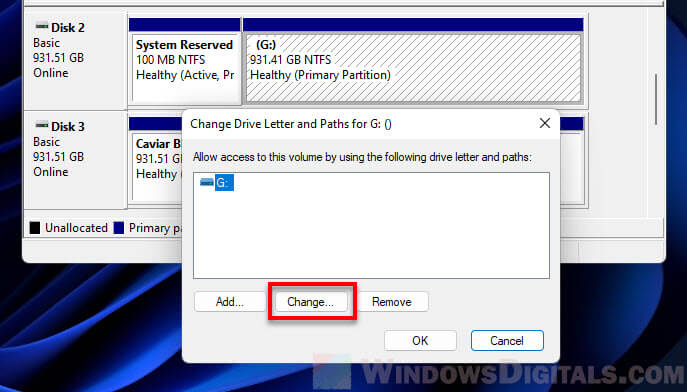
After that, click the drop-down menu next to “Assign the following drive letter” radio button, and select a new drive letter for the partition. Click the OK to save the changes. The changes will take effect immediately.