A volume or a logical drive does not necessary have to be from one single physical drive. In Windows, you can combine multiple partitions from two or more different physical hard drives or SSD to create one single volume.
For example, if you have installed two different hard drives to your computer, instead of making them into D: and E:, you can merge the two drives and make them to be just D:.
This tutorial will show you how to merge two drives in Windows 11 by creating a Spanned or Striped volume from unallocated spaces of two different drives using just the Windows built-in Disk Management tool (without the need of any third party software).
Page Contents
How to combine two different drives in Windows 11
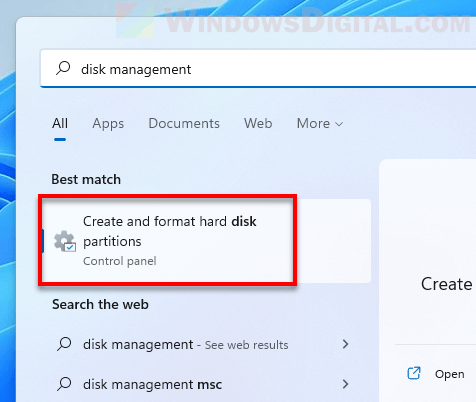
Step 1: Open Disk Management tool
In Windows 11, click Start, search for and open “Disk Management“.
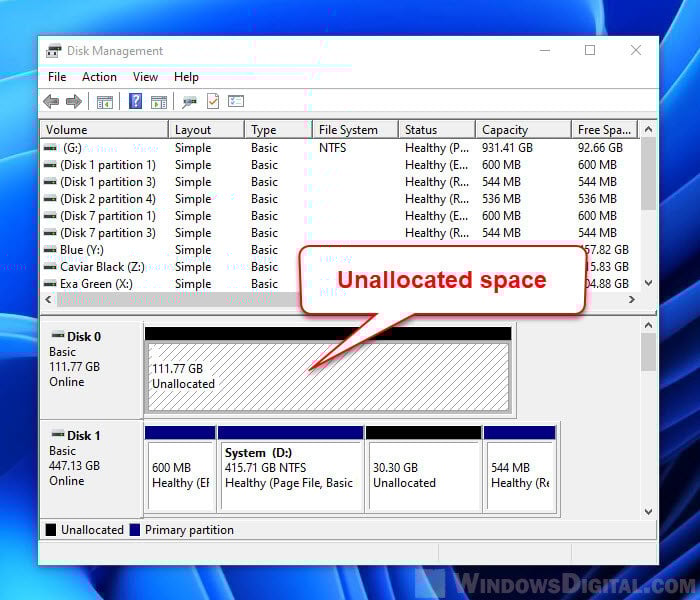
Step 2: Prepare the “Unallocated” disk space
Case scenario 1: The first condition for creating any volume is the drive has to have unallocated disk space ready to be used. An unallocated space is a partition of a disk marked as “Unallocated” that isn’t assigned to a partition. If your drives already have unallocated disk space ready to be merged, proceed to step 2.
Case scenario 2: If your drive is brand new, you need to first initialize the disk by right-clicking the disk in the disk management tool and select Initialize. Once the disk is initialized, the disk space will turn into Unallocated.
Case scenario 3: If you just want to make use of the unused space of your drives that hasn’t already turned into unallocated space (meaning the empty space is still on an already existing volume), you can shrink the volume to squeeze some disk space out to be unallocated space. Follow the instructions (step 1 to 3) in this post: How to split drive in Windows 11, to split and create unallocated space out of an existing volume.
Case scenario 4: If your drive already has an existing volume with no unallocated space left and that you no longer need the volume (if you don’t mind deleting all data in this volume) and wish to include it into the new merged volume, you need to delete the volume first. Warning: Deleting a volume means to completely wipe the volume. All data on the volume will be permanently deleted. Make sure you know what you are doing before clicking the Delete Volume option.
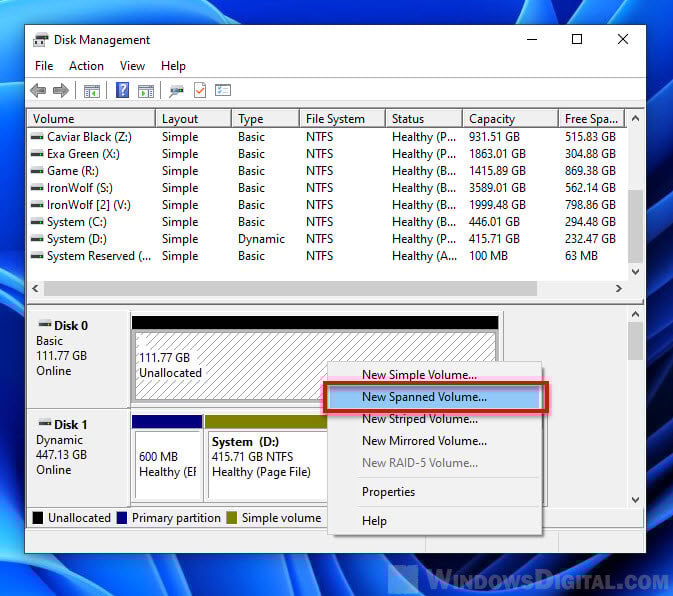
Step 3: Create New Spanned or Striped Volume
Now you need to choose what kind of volume you should create – Spanned or Stripped volume. In Windows 11, both of the two features – Spanned and Striped volumes, offer similar functionality, which is to combine and merge partitions from two or more drives.
You should use Spanned volume to combine two or more unallocated partitions if these partitions have different sizes. On a Spanned volume, data will only be written on the second drive when the first drive is full.
If you have two or more drives with unallocated partitions of the same size, you should use Striped volume instead. Striped volume can only merge partitions with the same size. If a partition has a different size than another when creating a Striped volume, the lowest size space will be used.
For example, if drive A has an unallocated space of 20 GB while Drive B has only 15 GB, when creating a Striped volume, the tool will take only 15 GB from Drive A and merge it with 15 GB from Drive B. On a Stripped volume, data can be written across all combined drives, which results in better performance than Spanned volume.
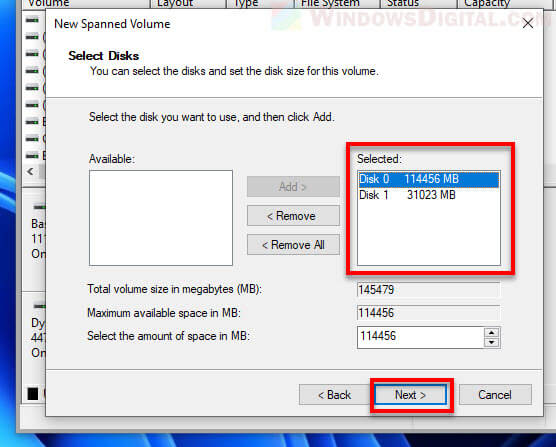
In the example below, I will use Spanned volume because I want to merge 111 GB of unallocated space from Disk 0 with 30 GB of unallocated space from Disk 1.
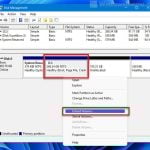
To merge two or more drives in Windows 11, in Disk Management, right-click the unallocated space of one of the drives you want to combine, then select New Spanned Volume or New Striped Volume depending on which one you have decided to use.
Step 4: Select the disks to merge
In the New Spanned Volume wizard, select the disk you want to merge from the left column and click Add to add it to the “Selected” column.
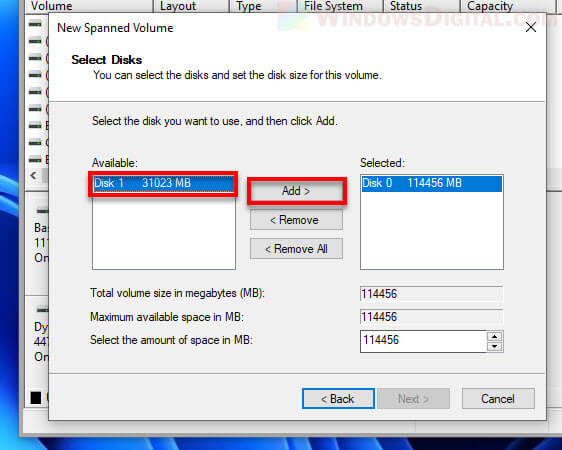
Once all the disks you want to combined are added to the right column, click Next to continue.
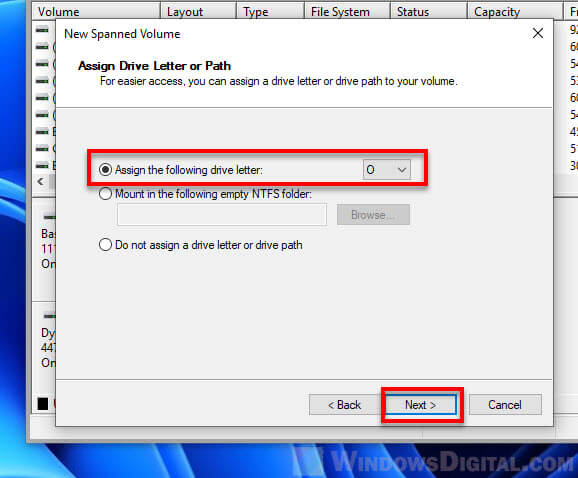
Step 5: Assigned a drive letter and format the volume
In the next step, select Assign the following drive letter, click the drop-down menu and select a drive letter you want to assign to this new volume. For example, C:, D:, E:, etc. are drive letters. Once selected, click Next to continue.
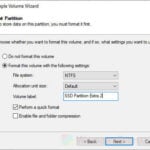
During the format volume step, select Format this volume with the following settings. You can select your own settings but the default settings should suffice (NTFS file system and Default allocation unit size). In the Volume label field, enter any name you want to assign to this volume. This name will be visible when you view the drive in File Explorer or This PC.
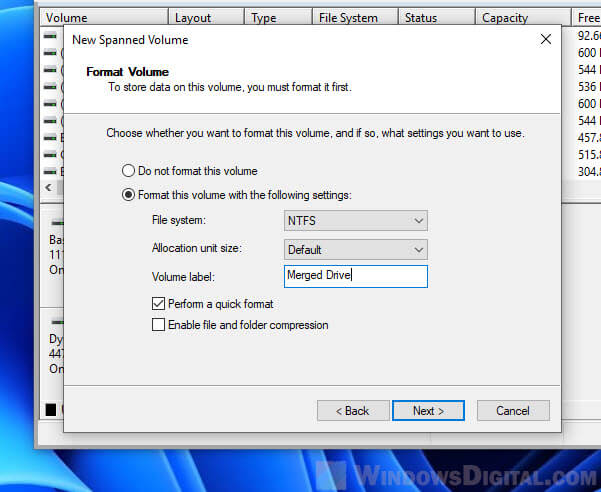
Optionally, select perform a quick format. In short, quick format does not fully erase files on the drive. It overwrites them when new data has to be written on the disk. With the right recovery software, the deleted data on the disk formatted using quick format can be recovered. In the contrary, a full format (without enabling the quick format option) will remove all data on the disk and check the disk for bad sectors. Full format generally takes much longer to complete than quick format.
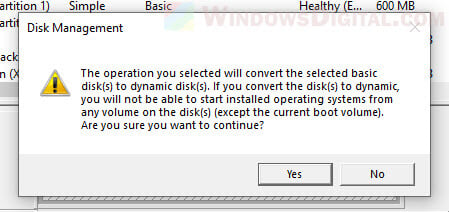
Step 6: Confirm the conversion of drive from basic to dynamic
In the final step after you click Finish, Disk Management will prompt a warning to tell you that the disks need to be converted from basic to dynamic. If the disks you are merging have operating systems such as Windows installed on them, you will not be able to boot them after converting to dynamic disk, except the current boot volume. Click Yes to proceed.
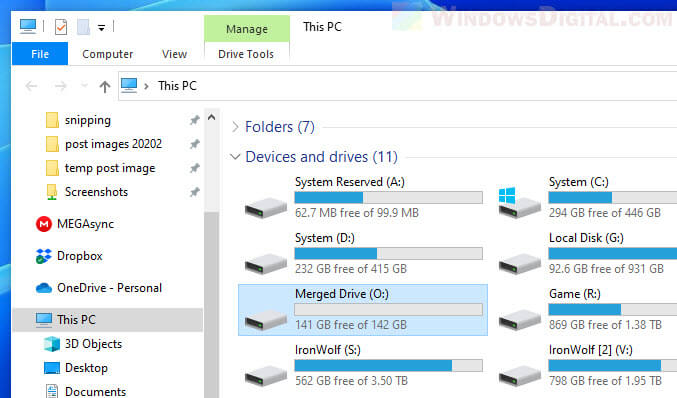
The formatting process may take a while. Upon completion, the final outcome of the merged drive will look like the screenshot below.
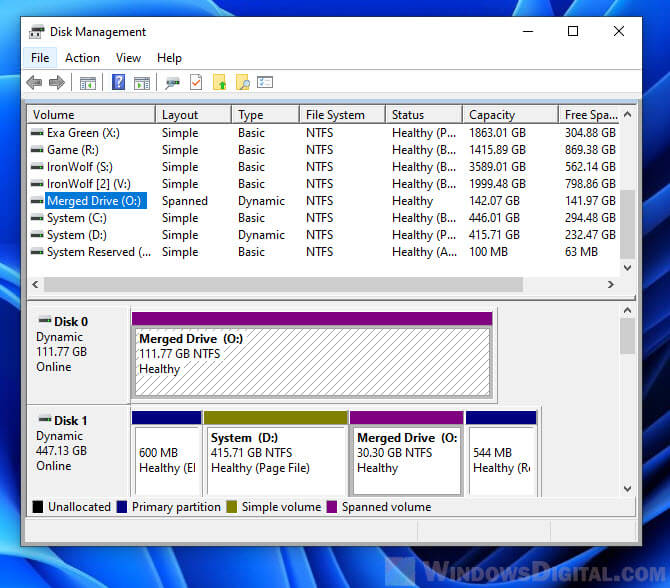
You can start using the merged drive right away by accessing it via This PC or File Explorer.