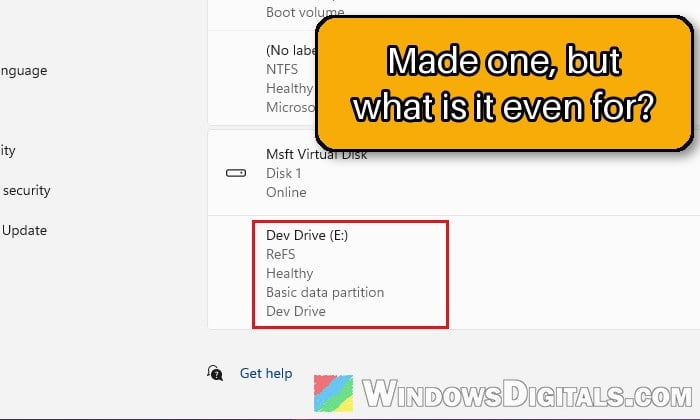
You open Disks & volumes in Windows 11’s Settings, notice a “Create Dev Drive” button and make one out of curiosity, only to end up with a new 50 GB drive that looks and acts like any other drive. This guide will explain what a Dev Drive actually is, whether it really makes anything faster, and what you should (and shouldn’t) put on it.
Also see: How to Open or Delete VHDX/VHD File in Windows 11
What is a Dev Drive?
A Dev Drive is a type of storage volume Microsoft made for developer work: source code, downloaded packages and build files. It looks like a normal drive, but three things are different:
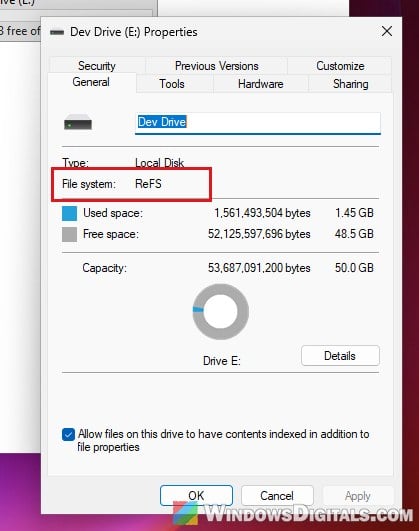
- It uses ReFS (Resilient File System) instead of NTFS. From Windows 11 24H2, a Dev Drive supports block cloning, so a copied file shares the same data on the disk instead of writing it again, which is faster and saves space.
- Microsoft Defender scans it in “performance mode”. A new Dev Drive is marked as trusted by default, and on a trusted Dev Drive, Defender lets a file open first and scans it right after, instead of making the file wait for the scan.
- Fewer filters get in the way. Windows attaches file system filters (small drivers that watch file activity) to normal drives. On a Dev Drive they’re all off by default, except antivirus ones.
You can’t convert an existing drive into one. A Dev Drive is always a new, empty volume, inside a virtual hard disk (VHD) file or on its own partition.
Does a Dev Drive actually make things faster?
For big projects it usually does, but for small ones you might not notice a thing. Microsoft’s Visual Studio team measured an average improvement of about 25% in disk-heavy tasks like cloning, building, copying files and restoring packages, though that’s from their own tests, so don’t expect the same on every PC.
Users on Reddit tell a similar story. Those with large codebases or Rust, Go and .NET builds noticed faster builds, while others felt no difference, especially on a fast NVMe SSD. A big part of the difference is likely how Defender treats the drive, since builds open lots of small files and on a normal drive each one waits for its scan.
Does Defender skip the files on a Dev Drive?
No, Defender doesn’t skip them. It still scans every file, just a moment after it opens. Microsoft says that’s less protection than a normal scan, but much safer than adding a folder as an exclusion, which stops the scanning completely. It only works when Microsoft Defender is your main antivirus with real-time protection on.
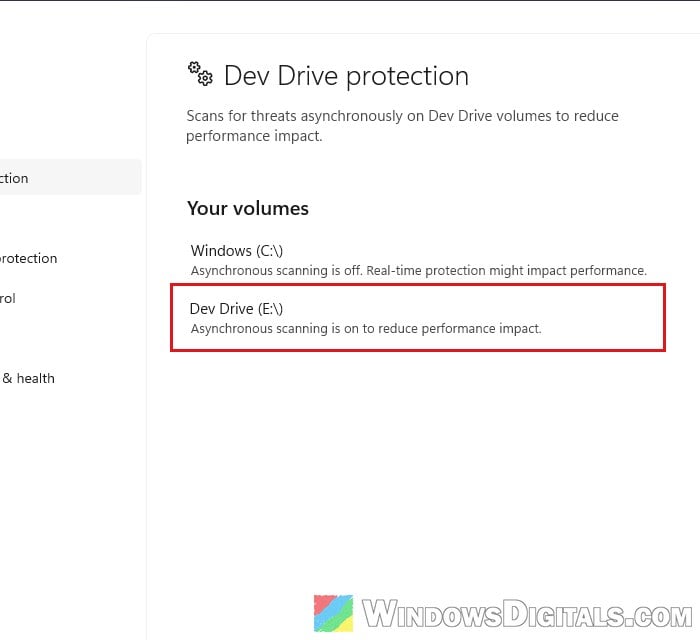
To see which drives have it, open Windows Security > Virus & threat protection, click Manage settings under “Virus & threat protection settings”, and select See volumes under Dev Drive protection. A Dev Drive there says “Asynchronous scanning is on to reduce performance impact“.
You can also check whether a Dev Drive is trusted from a Terminal (Admin) window, with your Dev Drive’s letter in place of E::
fsutil devdrv query E:
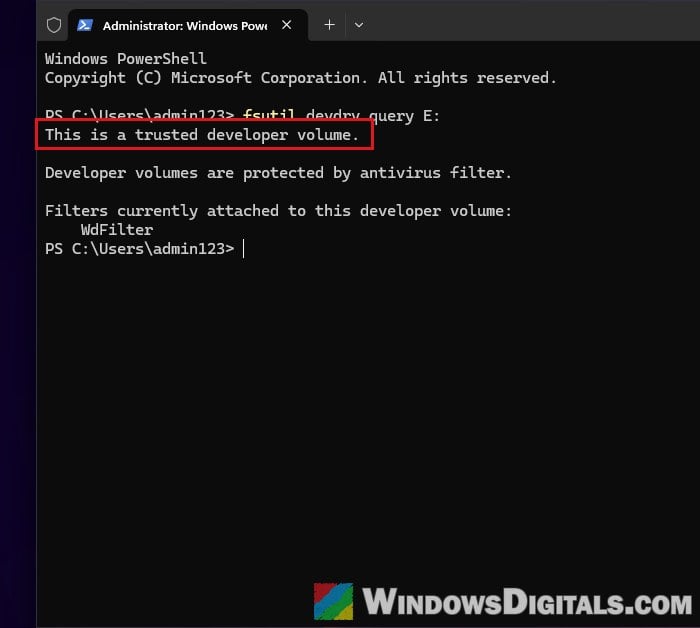
A Dev Drive copied over from another PC isn’t trusted there until you run fsutil devdrv trust E:. Don’t run fsutil devdrv enable /disallowAv, though, since it removes antivirus protection from every Dev Drive on the PC.
What should you put on a Dev Drive?
Microsoft says a Dev Drive is meant for three things:
- Source code repositories and project files
- Package caches (npm, pip, NuGet, Cargo and so on)
- Build output and intermediate files
Visual Studio picks a Dev Drive by itself as the default location when you create or clone a project. Package caches don’t move on their own, though: you point each tool at a folder on the Dev Drive with an environment variable. Here’s how to do it:
- Create a folder for the cache on your Dev Drive, for example
E:\packages\pip. - Open Terminal (Admin) by right-clicking the Start button.
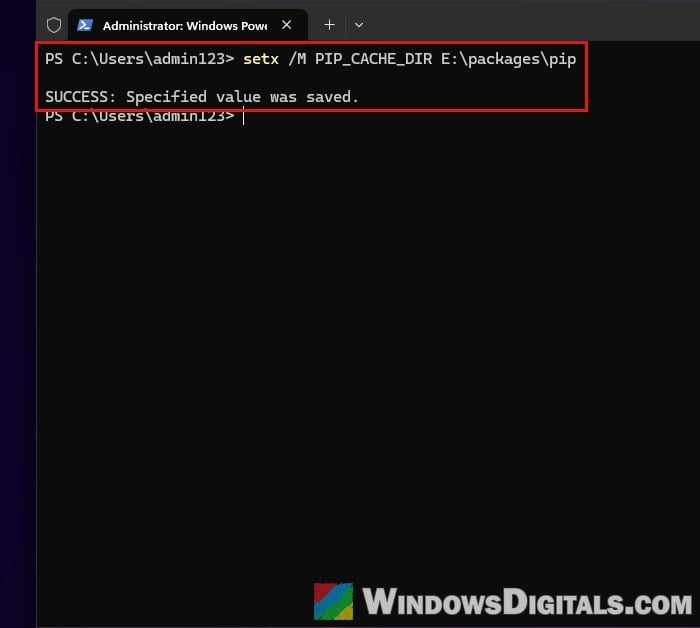
- Set the variable for your tool. Microsoft’s examples, with
E:as the Dev Drive:- pip (Python):
setx /M PIP_CACHE_DIR E:\packages\pip - npm (Node.js):
setx /M npm_config_cache E:\packages\npm - Cargo (Rust):
setx /M CARGO_HOME E:\packages\cargo(Cargo’s own programs move there too, socargowon’t run while a VHD Dev Drive is detached) - NuGet (.NET):
setx /M NUGET_PACKAGES E:\<username>\.nuget\packages
- pip (Python):
- Move what’s in the old cache folder to the new one, for example
%LocalAppData%\pip\Cachefor pip. - Reopen your terminal windows, or restart the PC, so the new values are picked up.
Pro tip: Add Folder to Path Environment Variable in Windows 11/10
What shouldn’t go on a Dev Drive?
Keep these off it:
- Apps and games. Microsoft doesn’t recommend installing applications on a Dev Drive. Developer tools like Visual Studio, MSBuild, the .NET SDK and the Windows SDK should stay on the C: drive.
- Work that needs other filters. Docker containers, Process Monitor and Resource Monitor’s file names need filters a Dev Drive leaves off, unless you allow them.
A Dev Drive also can’t be the C: drive or sit on a USB stick or external drive (nor in a VHD file stored on one).
How to make a Dev Drive (if you haven’t yet)
You’ll need Windows 11 build 22621.2338 or later, an administrator account, at least 50 GB of free space (the smallest a Dev Drive can be) and ideally 16 GB of memory (8 GB at least). On a work PC, your IT admin may have it switched off. Then follow the steps below:
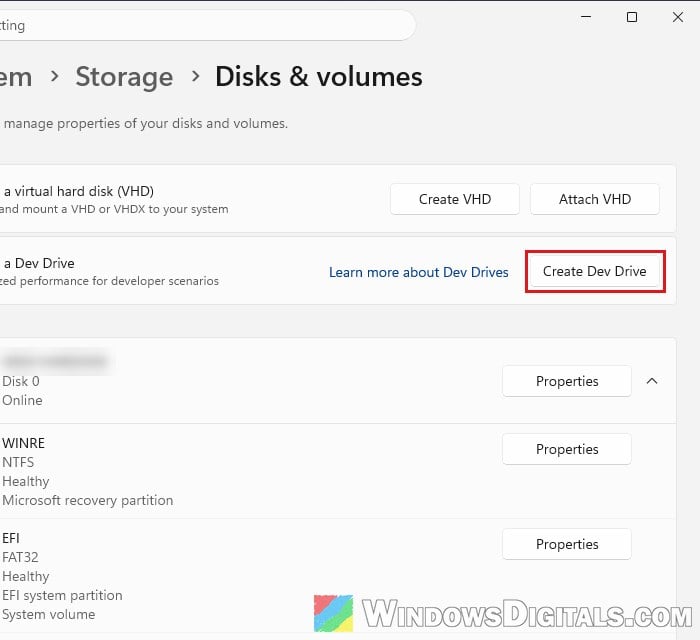
- Open Settings (Win + I) and go to System > Storage.
- Expand Advanced storage settings and click Disks & volumes.
- Click Create Dev Drive.
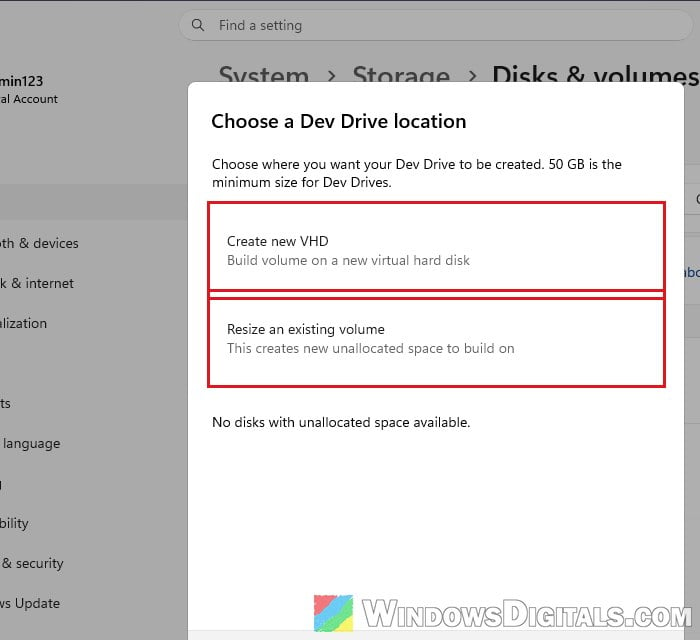
- Pick where it goes. A partition (the other two options) is usually a bit faster but harder to resize later, while a VHD is a little slower but easy to grow, move or back up as one file.
- Create new VHD: builds the Dev Drive inside a new virtual hard disk file.
- Resize an existing volume: shrinks a drive to make room for it.
- Unallocated space on disk: only shows up when a disk already has unallocated space.
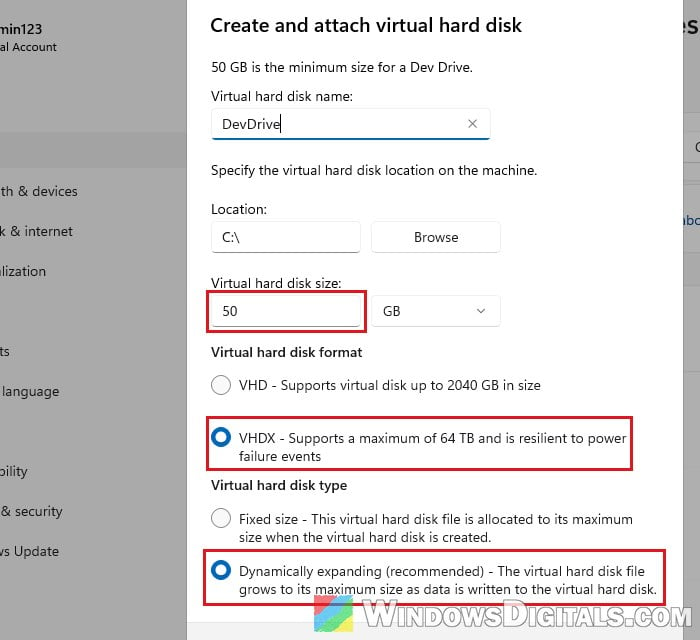
- For a VHD, give it a name and a location, set the size (50 GB or more), and keep VHDX (Microsoft’s pick) and Dynamically expanding (recommended), so the file only grows as you fill it.
- Click Create and answer Yes to the two confirmations.
- Keep GPT and click Initialize.
- Give the new volume a label, click Format and answer Yes.
The new drive then shows up in File Explorer.
Related guide: Partition New, Existing or External SSD in Windows 11/10
How to delete a Dev Drive you don’t need
You can remove one in Settings. Be warned: this wipes everything on it. Here’s how:
- Go to Settings > System > Storage > Advanced storage settings > Disks & volumes.
- Click Properties next to the Dev Drive.
- Under Format, click Delete and confirm.
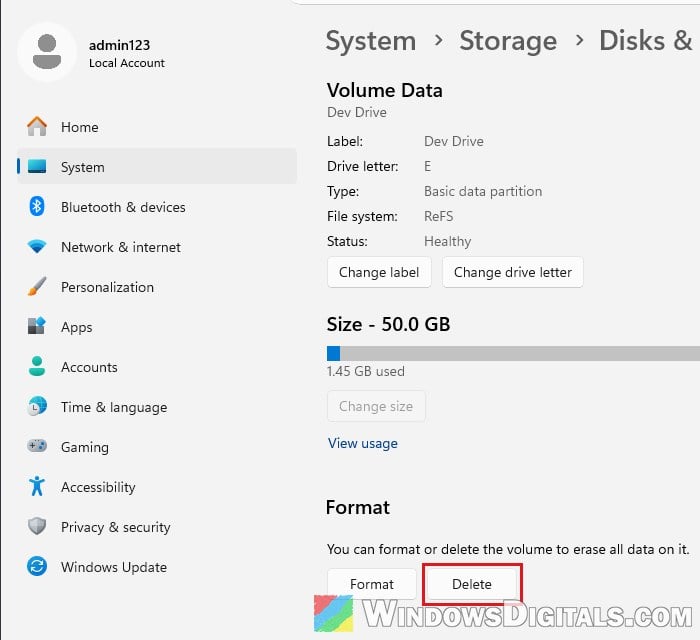
For a Dev Drive made as a VHD, the file still takes up its space after that. Note where the file is first (if you’ve forgotten, run diskpart, then list vdisk, in Terminal (Admin)). Then open Computer Management, select Disk Management, right-click the Dev Drive’s disk (Disk 1 in the picture below, not the volume) and choose Detach VHD.
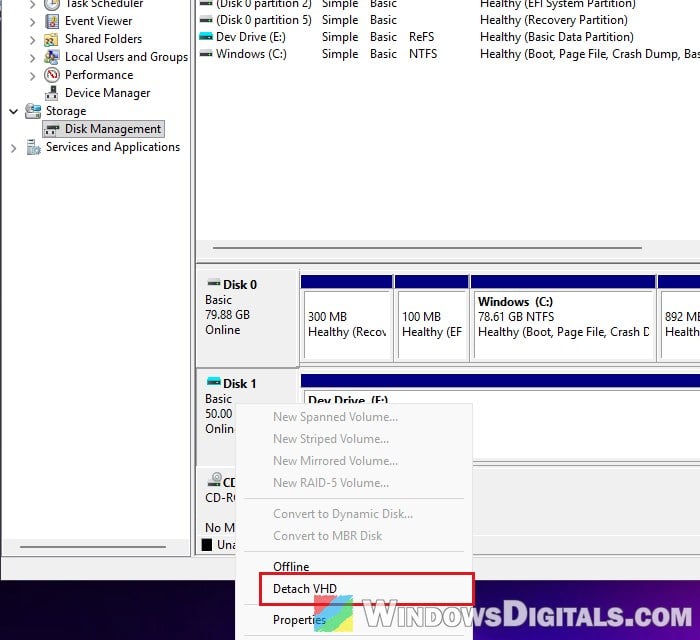
Once it’s detached, delete the .vhdx file to get the space back.