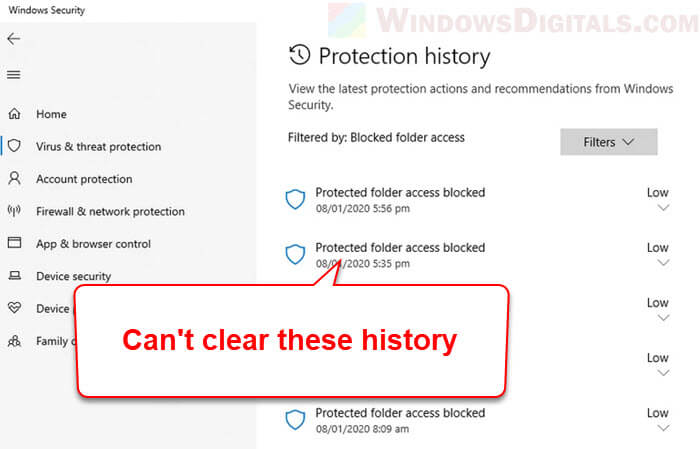
If you have come across a section in the Windows 11 or Windows 10 Settings called “Protection history“, it is just a record of scanned files and activities done by Microsoft Defender, the built-in Windows’ antivirus solution. When you’re thinking about clearing the protection history, you might run into some issues, like the option being not clickable or that it just doesn’t respond. In this guide, we’ll talk about this problem and how you can fix it in order to successfully clear the protection history.
Also see: How to Clear Timeline Activity History in Windows 10 or 11
Page Contents
Clear Windows Defender protection history using File Explorer
The Windows Defender protection history is normally kept in a specific folder on your PC. To delete it, you need to go to this folder and remove its contents. Follow the steps below to do so.
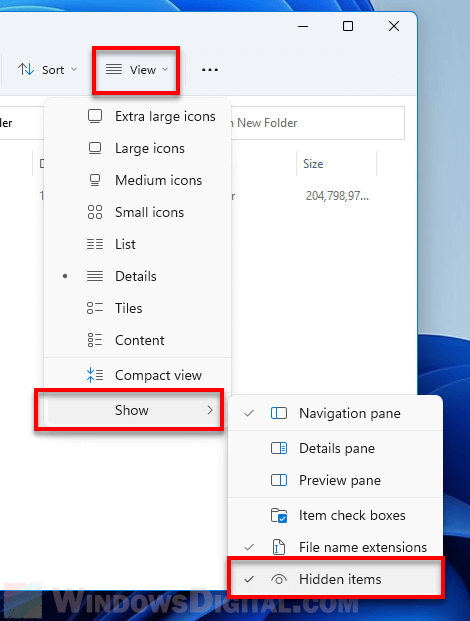
Step 1: Show hidden files and folders in File Explorer
Some system files, like the Windows Defender protection history files, are hidden to prevent you from accidentally deleting them. But in order to delete them, you need to make them visible first.
- Open File Explorer by pressing the Windows key + E or clicking the File Explorer icon on your taskbar.
- Click on the “View” tab at the top of the File Explorer window. It’s next to the “File” tab.
- In the “Show” area of the ribbon, there’s a checkbox for “Hidden items.” Click this box to show hidden files and folders.
Learn more: How to Unhide a File or Folder in Windows 11
Step 2: Delete Protection History files from the “Service” directory
Now that you can see hidden files, you can now delete the files related to the Windows Defender protection history:
- Open File Explorer again if it’s not already open.
- Go to the directory below either by copying and pasting it into File Explorer’s address bar or by browsing through the folders:
C:\ProgramData\Microsoft\Windows Defender\Scans\History\Service
- In the “Service” folder, you’ll find files related to Windows Defender’s protection history. Select all these files. You can press Ctrl + A to select all quickly.
- After selecting, right-click on the files and choose “Delete” from the context menu.
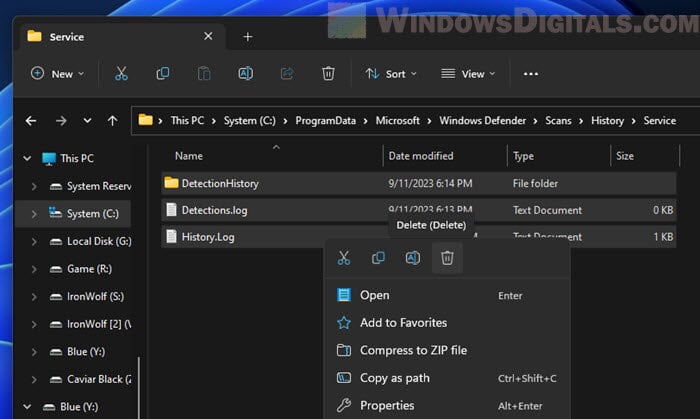
- If a confirmation prompt appears, click “Yes” to delete the files.
- Close File Explorer after deleting the files.
Related resource: How to Reinstall Windows Defender in Windows 11
Clear Windows Defender protection history using Event Viewer
If you find it tough to clear the Windows Defender protection history using File Explorer or if you prefer another method, try Event Viewer.
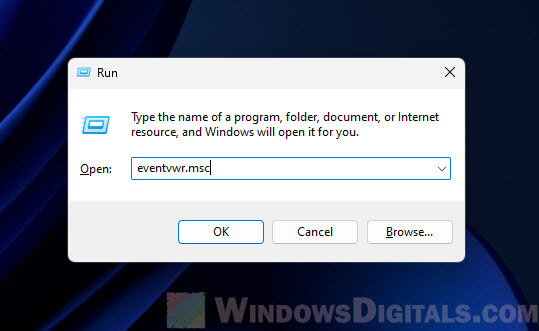
- Open the Run dialog by pressing Windows key + R.
- Type “eventvwr.msc” and click “OK” to open Event Viewer.
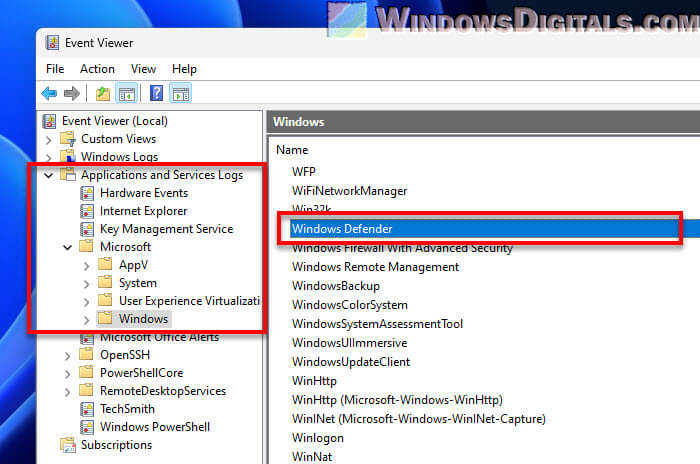
- In Event Viewer, click on the “Applications and Services Logs” folder to expand it.
- Click on the “Microsoft” folder to see more options.
- Find and click on the “Windows” folder under “Microsoft.”
- Double-click on the “Windows Defender” folder. You’ll see different folders for Windows components.
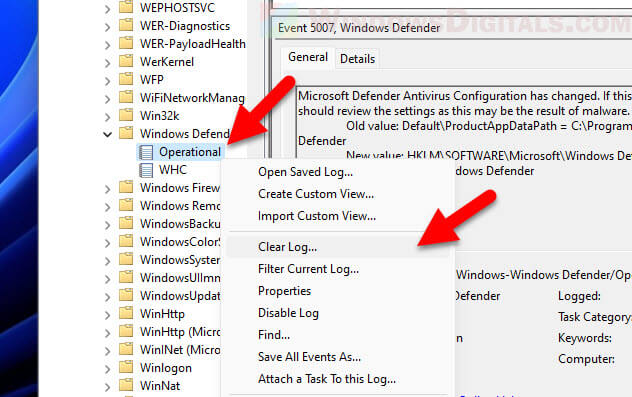
- In the right pane, find “Operational” under Windows Defender logs. Double-click it.
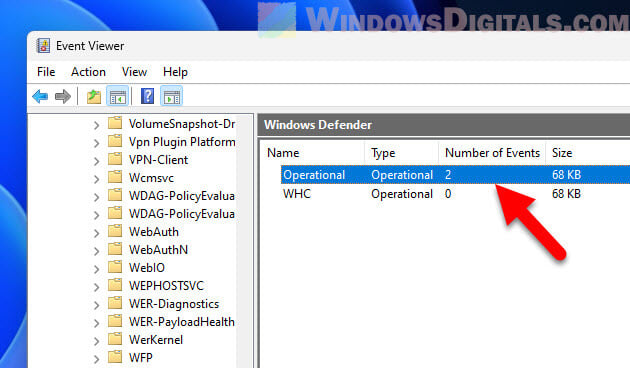
- To clear the history, right-click on “Operational” on the left pane and select “Clear Log…” from the context menu.
- When a dialog box pops up asking if you want to clear the log, click “Clear.”
This will remove all the Windows Defender protection history logs. The next time you check the Windows Defender Protection History section, it should show nothing or only the new things that has happened after you clearing it.