If you can’t open Windows Defender or access any of its settings, or if you have accidentally uninstalled Windows Defender, this guide will show you how to reinstall Windows Defender in Windows 11 via PowerShell command lines.
Although Windows Defender has always been the default antivirus software that comes preinstalled with Windows, some users may find the app missing after certain events such as after updating Windows or after installing or uninstalling certain third party antivirus software.
When the problem occurs and you try to open Windows Defender, Windows may prompt you the “You’ll need a new app to open this Windows Defender link” pop up that ask you to find a compatible app from Microsoft Store to open Windows Defender related link or setting. This indicates that Windows Defender is either missing or corrupted in Windows 11.
Page Contents
Reinstall Windows Defender in Windows 11
You can reinstall Microsoft Windows Defender in Windows 11 by executing a single line of command through PowerShell or Windows Terminal. However, you will need administrator rights to be able to execute the command.
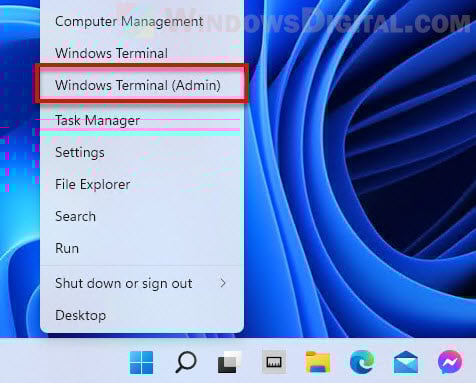
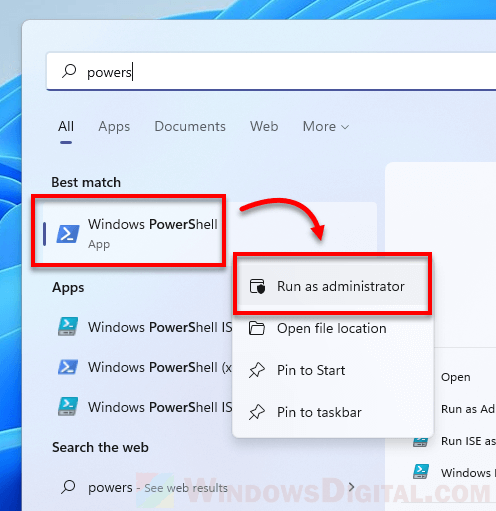
Thus, you will need to first open Windows Terminal or PowerShell with admin rights. To do so, right-click the Start button on the taskbar and select “Windows Terminal (Admin)“.
Alternatively, you can search for PowerShell through Start menu. Then, right-click Windows PowerShell from the search result and select Run as administrator.
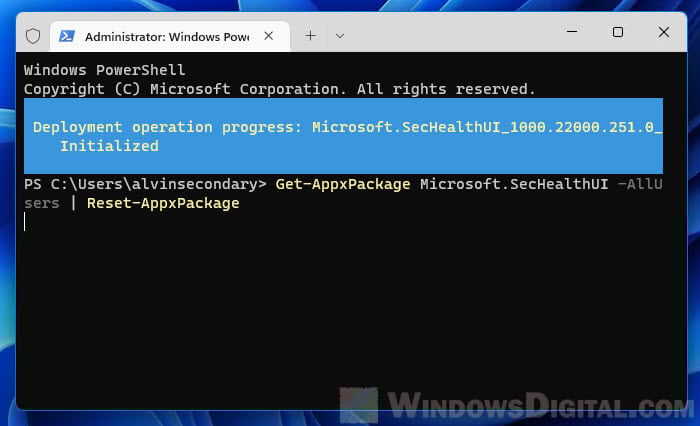
Once you have an elevated (admin) Windows Terminal or PowerShell window opened, enter the following command to reset and reinstall Windows Defender in Windows 11.
Get-AppxPackage Microsoft.SecHealthUI -AllUsers | Reset-AppxPackage
After executing the command, Windows Terminal will begin to reset Windows Defender and show a progress message that says “Deployment operation progress”. It may take a while for the process to complete.
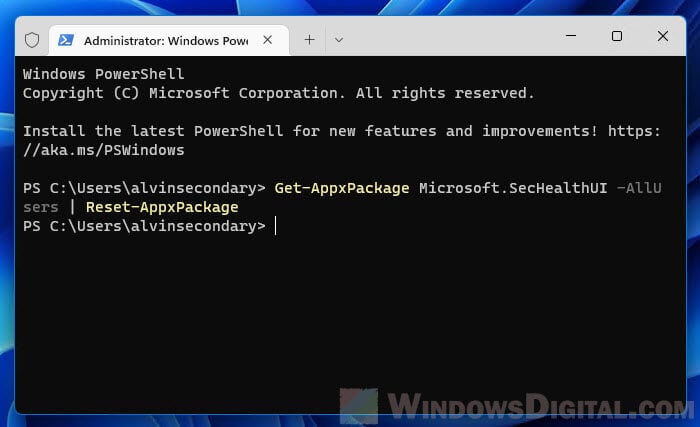
Once completed, the progress message will disappear and Windows Terminal will start at a new line, which indicates the previous command has been executed.
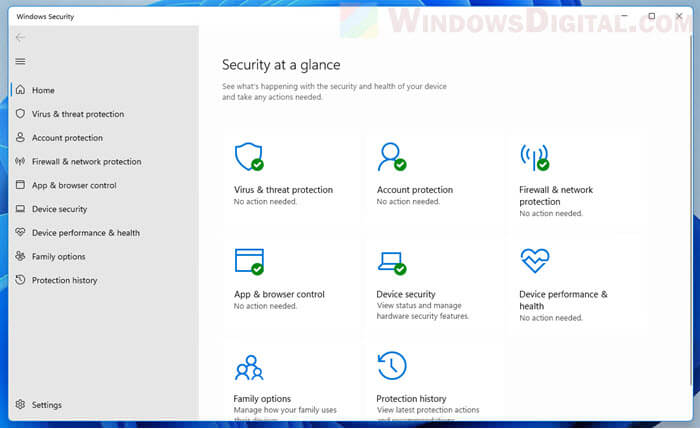
Now, you can press Win + i keys to open Settings and go to Privacy & security > Windows Security. This should open up the Windows Security (Windows Defender) settings like it used to.
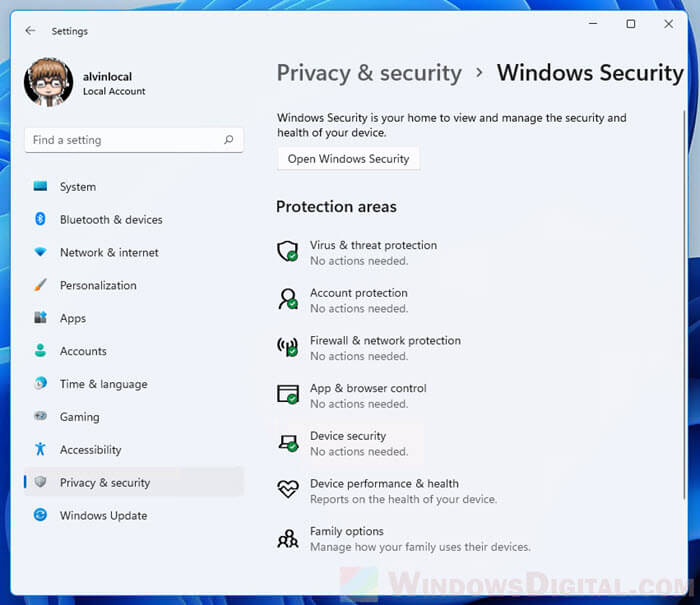
To further verify if Windows Defender is successfully installed, click on the “Open Windows Security” button to open the Windows Security window. From there, you can manage your computer’s security such as virus protection, firewall, network protection, browser control, etc.
PowerShell shows errors when executing the command
If the command above doesn’t work or if you receive errors when you execute the command, try the following commands instead to reinstall Windows Defender in Windows 11.
In an elevated (admin) Windows Terminal or PowerShell window, enter the following commands in the following order.
Set-ExecutionPolicy Unrestricted
Get-AppXPackage -AllUsers | Foreach {Add-AppxPackage -DisableDevelopmentMode -Register "$($_.InstallLocation)\AppXManifest.xml"}
Set-ExecutionPolicy Default
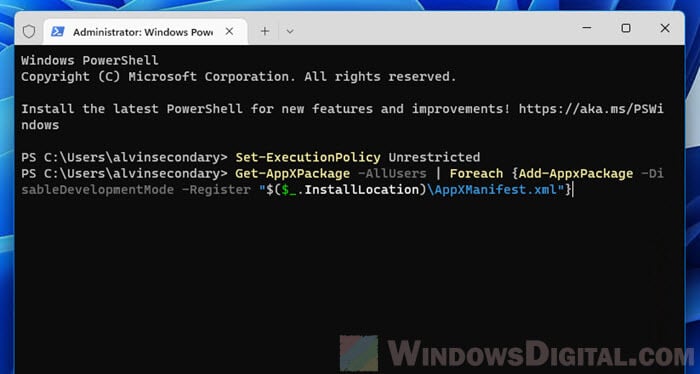
Since the command requires execution policy to be set to unrestricted in order to be executed successfully, you should set the execution policy back to its default (by running the third line of command as shown above) after the Get-AppXPackage process is completed.
If you receive an error that says “Access is denied”, it indicates that you do not have the rights to run the command. As mentioned above, you need to open Windows Terminal or PowerShell as administrator in order to execute the command successfully.
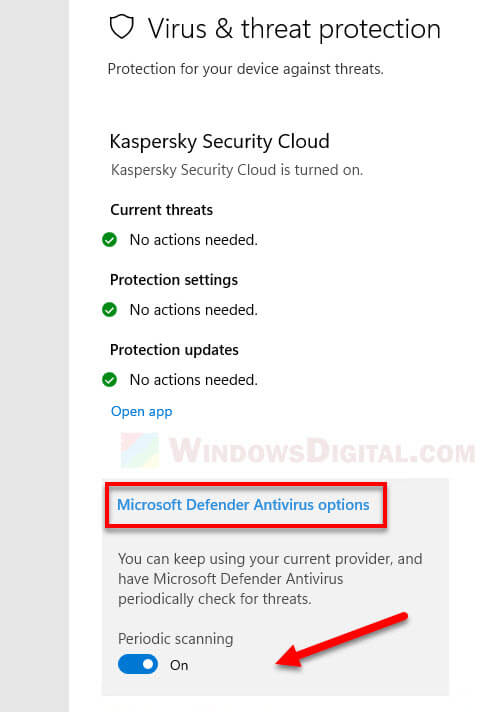
How to enable Windows Defender if you already have an existing antivirus software
If you already have an existing third party antivirus program actively running and protecting your PC, Microsoft Defender Antivirus will be disabled. However, you can re-enable Microsoft Defender periodic scanning to have it periodically check for threats in conjunction with your other antivirus software.
To enable Windows Defender with periodic scanning when you are already using an existing third party antivirus software, open Settings and navigate to Privacy & Security > Windows Security, then click the Open Windows Security button.
Next, select Virus & threat protection and click Microsoft Defender Antivirus options. This will expand the setting and you should then be able to see a toggle option. Toggle on the Periodic scanning option to enable Windows Defender periodic scan while also using your other antivirus software.