A number of people using Razer Synapse 4 on Windows 11 or 10 have run into a problem where the profile linked to a game never switches on when the game starts, so the mouse, keyboard or headset just stays on its default profile and you have to change it by hand every time. Sometimes Synapse doesn’t seem to detect the game at all, or it won’t even let you add the game to Linked Games. This guide will walk you through why this happens and how to get your game profiles switching again.
Also see: Razer Synapse Not Detecting Keyboard, Mouse or Headset
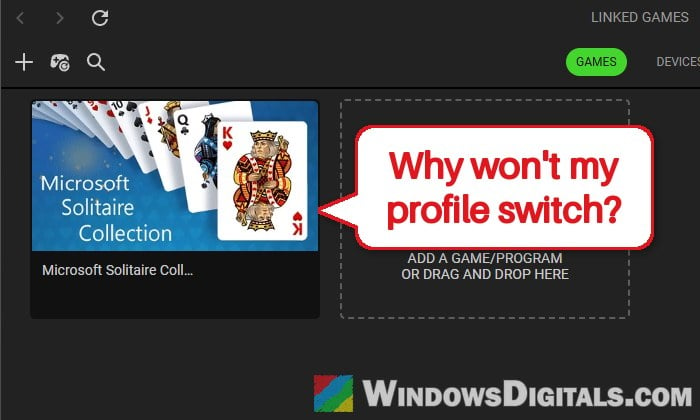
Synapse might be watching the launcher, not the game
In Synapse 4, a profile switches on automatically when a game listed under Linked Games is in the foreground. The catch is that Synapse doesn’t always link the right file. When it finds a game by itself, it often picks the game’s launcher instead of the program that actually runs while you play. Your profile then only switches on while the launcher is in front, not once the game itself opens.
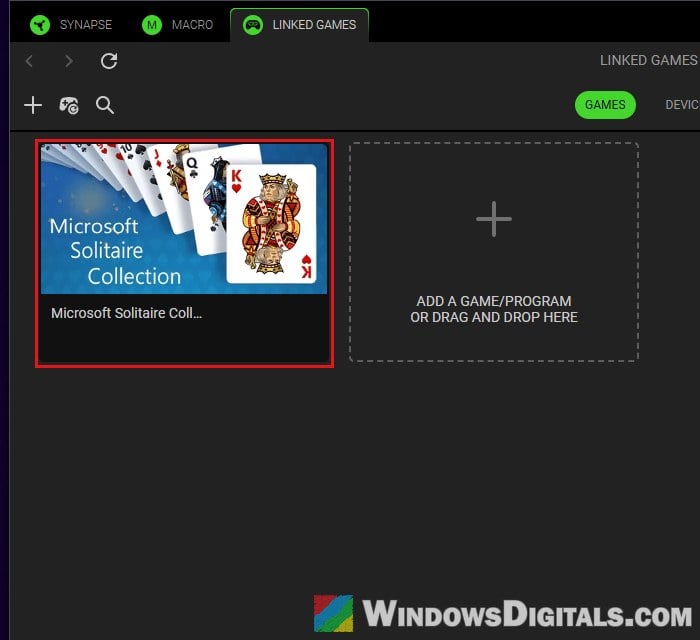
You can check which file a game is linked to. In Synapse, click the “LINKED GAMES” tab at the top of the window, then click the game’s tile. The “LOCATION” line shows the file Synapse is watching for that game.
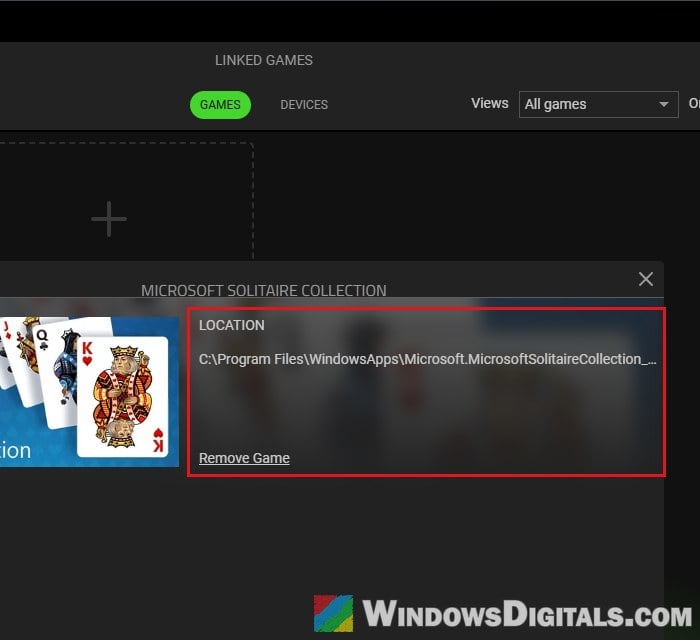
If it points to a launcher, remove that entry and add the game’s real .exe file yourself. This is the fix that has worked for most people on Reddit and Razer’s own forum, so it’s worth doing first. To find out which file is the right one, follow the steps below:
- Start the game, and once it’s running, press Alt + Tab or minimize it to get back to the desktop.
- Press Ctrl + Shift + Esc to open Task Manager.
- In the “Processes” tab, find the game, right-click it and select “Open file location“. If the game shows as a group with a number next to it, expand it first and right-click the entry inside, since the option is grayed out on the group itself.
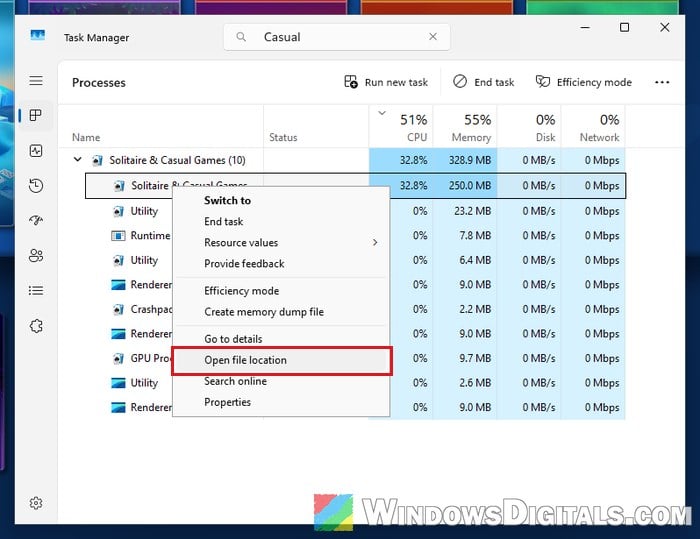
- File Explorer opens the folder with the game’s .exe file selected. That’s the file Synapse needs, so leave this window open.
Now link that file in Synapse:
- In the “LINKED GAMES” tab, click the game’s tile and select “Remove Game“. Don’t skip this, since adding the right file while the old entry is still there may not work.
- Drag the game’s .exe file from the File Explorer window onto “ADD A GAME/PROGRAM OR DRAG AND DROP HERE“, or click that area and browse to the file.
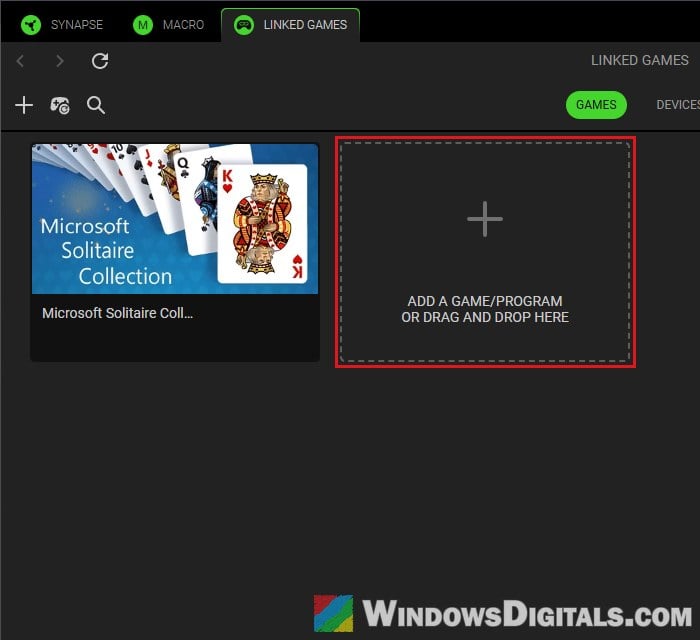
- Link the profile you want to the newly added game for each device (mouse, keyboard or headset).
Start the game and see if the profile switches on now. With WoW Forever, for example, the file to link is the WoW.exe in the _forever_ folder inside the World of Warcraft folder.
What if two games use the same .exe name?
Synapse 4 only accepts one linked game per .exe file name, even when the two files are in different folders. This trips up people who play both WoW Retail and WoW Forever, or Star Citizen’s LIVE and PTU versions. The game already in the list wins, and the second one either won’t be added or won’t switch.
For now, the only clean way around it is to keep just the one you’re playing in Linked Games. Remove the other entry, add the one you need as above, and swap them back when you go back to the other game.
What if the game still doesn’t switch?
Some games run through more than one .exe file. Ark Survival Ascended, for instance, has both ArkAscended.exe and ArkAscended_BE.exe. In that case, try adding both files to Linked Games and linking the same profile to each.
Pro tip: How to Use Razer Hypershift on Keyboard or Mouse
Remove all linked games, fully close Synapse, then add them back
Linked games can quietly stop working after a Synapse update even though they’re still listed. Razer’s support has suggested removing and relinking them, and fully closing Synapse in between has worked for some people, though not for everyone. Here’s how to do it:
- In the “LINKED GAMES” tab, click each game and app and select “Remove Game“.
- Close Synapse completely. Closing its window isn’t enough, since it keeps running in the background. Open Task Manager (Ctrl + Shift + Esc), right-click “RazerAppEngine” (the process behind the Synapse window) and select “End task“.
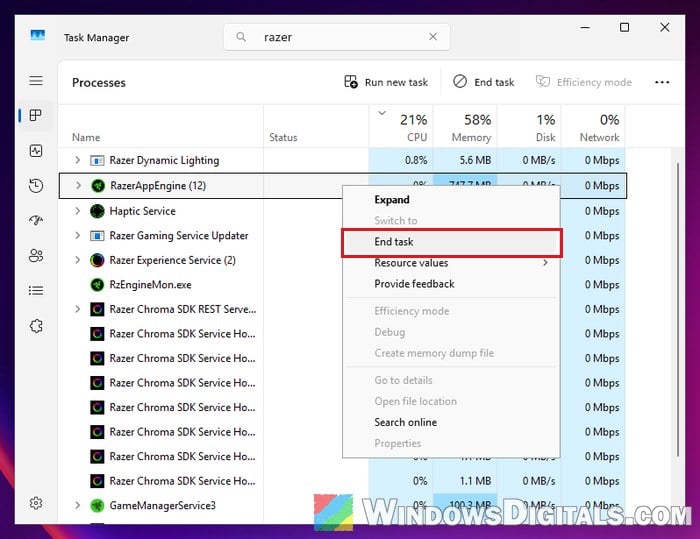
- Open Razer Synapse 4 again.
- Add your games back one by one, using each game’s real .exe file as shown in the first section, and link your profiles to them.
Start one of the games and check whether its profile switches on.
Might be useful: How to Remap Mouse Buttons in Windows 11
Reinstall Razer Synapse 4
If clicking the add button in Linked Games does nothing at all, or a game you browse to never shows up in the list, Synapse’s installation itself might be broken. Older guides point to a Repair option, but in the current Synapse 4 “Modify” doesn’t open one, so reinstall it instead:
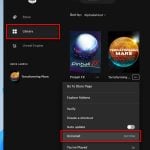
- Right-click the Start button and select “Installed apps“.
- Search for “Razer“, click the three-dots icon next to “Razer Synapse” and select “Uninstall“.
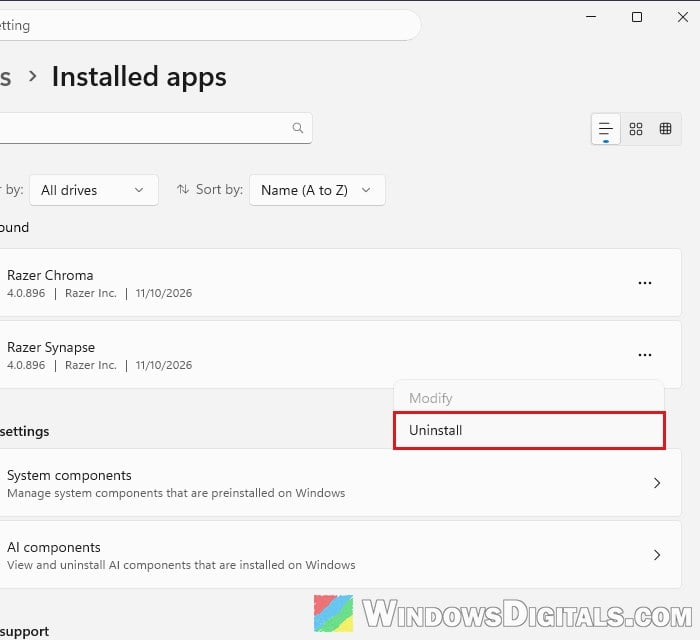
- Follow the prompts to remove it, then restart your computer.
- Download the latest Razer Synapse 4 installer from Razer’s official website and install it again.
Reinstalling more than once has helped in some cases, though it doesn’t fix it for everyone.
Browsers and other apps won’t switch at all?
If it’s Chrome, Edge, Firefox, VS Code, Teams or a similar app that won’t switch profiles, rather than a game, that’s partly by design. Razer’s support told users in early 2026 that profile switching in Synapse 4 was redesigned to work with recognized games, and that switching for browsers isn’t available. Razer later said an update fixed this, though people still report mixed results, so try linking the app again first.
If that doesn’t help, there’s a workaround: Synapse keeps a plain text list of program names it ignores, and removing an app’s name from it can bring its profile switching back. In the November 2026 version of Synapse 4, this list still has explorer.exe, chrome.exe, firefox.exe, opera.exe, msedge.exe, Code.exe, Teams.exe and slack.exe in it. This isn’t an official fix from Razer, and a Synapse update can put the list back, so keep a copy of the original file.
Related guide: Access Denied When Editing Hosts File in Windows 11/10
Here’s how to edit the list:
- Close Synapse completely by ending “RazerAppEngine” in Task Manager, as shown above.
- Open File Explorer, then copy and paste the following path into the address bar and press Enter:
C:\Program Files (x86)\Razer\Razer Services\GMS3
- Copy the “blacklist.xml” file to your desktop as a backup. It shows as just “blacklist” if File Explorer hides file extensions.
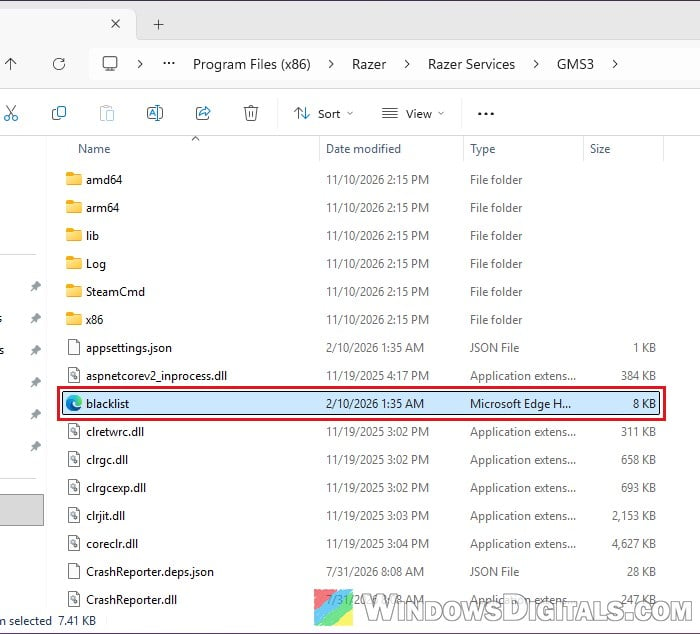
- Search for “Notepad” in the Start menu, right-click it and select “Run as administrator“. Then open “blacklist.xml” from the folder above (set the file type to “All files” to see it).
- Delete the line with the app’s .exe name, for example
<string>msedge.exe</string>for Edge or<string>chrome.exe</string>for Chrome.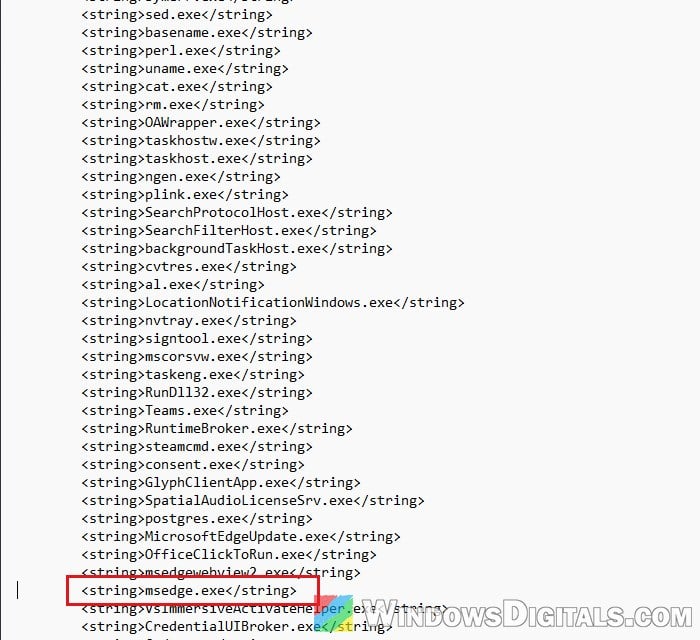
- Save the file and restart your computer.
After the restart, link the app in Synapse if it isn’t linked already, and switch to it to see if the profile changes. If it stops working after a Synapse update, check the file again.