There is a quite common problem when building or upgrading a PC where a small screw, like the one holding the motherboard’s CPU cooler bracket, the M.2 SSD or a part inside a laptop, gets stripped and the screwdriver just spins in it. This guide explains how to get it out, starting with tricks that can’t hurt the board and ending with cutting or drilling it.
Also see: All Motherboard Slots and Connectors Explained
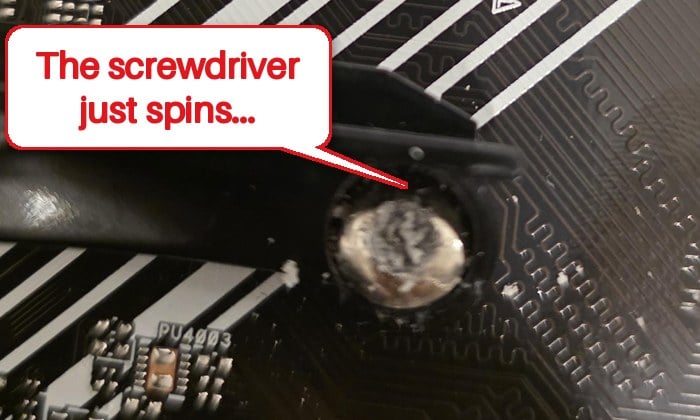
Why do screws inside a PC strip so easily?
Most stripped screws in PCs and laptops come down to the wrong screwdriver bit. A bit that doesn’t fill the screw head entirely won’t sit properly, so it slips and rounds the head out. Phillips (PH) and JIS bits also look alike, but they aren’t the same shape, so a Phillips bit in a JIS screw can strip it.
The screws don’t help either. Cooler and bracket screws are often fairly soft, and some come very tight from the factory or get stuck after many rounds of heating up and cooling down. So if the bit doesn’t catch the screw right away, stop, because every slip makes the head rounder.
Turn off and unplug the PC (or the laptop battery) first
Before trying anything below, make sure there’s no power in the board.
- Desktop PC: Shut it down and unplug the power cable.
- Laptop: Shut it down, unplug the charger, open the bottom cover and disconnect the battery cable from the motherboard. Dell’s service manual for the Alienware m15 R6, for example, then has you hold the power button for 20 seconds to drain the leftover power.
On a desktop, taking the motherboard out of the case first can help, so it’s supported from behind while you press down on the screw.
Suggested read: All SSD Connectors Types Explained (SATA, M.2, NVMe, etc.)
Try a screwdriver bit that fits better
A slightly damaged screw often comes out with a bit that fills what’s left of the head. M.2 SSD screws usually take a PH0 (Phillips #0) bit, sometimes a PH1.
- Try a bit one size smaller or one size larger than the one you used.
- If the screw might be JIS rather than Phillips, try a JIS bit of the same size.
- Press the bit down firmly into the screw while you turn it slowly counterclockwise.
- If the head is rounded out, press a Torx bit firmly into it, or wedge a small flathead across the cross. Either one can sometimes bite.
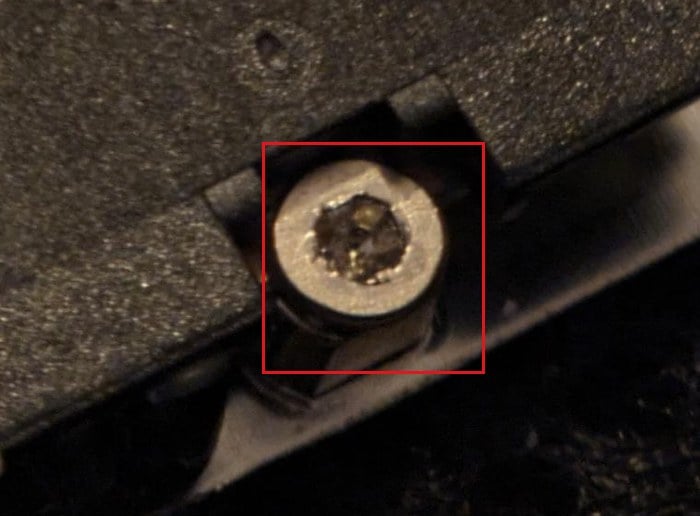
If none of them catch on the first try, move on instead of grinding the head further.
Put a rubber band or tape between the bit and the screw
This is the trick most people on Reddit suggest first. The rubber fills the gaps in the stripped head and gives the bit something to grip.
- Lay a rubber band flat over the screw head. A couple of layers of tape or a thin piece of fabric also work.
- Line up the screwdriver with the screw first, then push it into the head through the rubber.
- Press down hard and turn slowly counterclockwise.
It doesn’t always work, so if the bit keeps slipping, move on to the next method.
Grip the screw head with pliers
If the screw head sticks up even a little, you can turn it from the outside.
- Needle-nose pliers or small locking pliers can grip the edge of the head and break it loose. Then finish with a screwdriver.
- Screw extractor pliers (sold under names like Vampliers) have notched jaws made to grip round screw heads, including from the top.
- Wrap the plier tips in electrical tape so they don’t gouge the board, and mind the tiny components around the screw.
Glue a screwdriver bit to the screw
When there’s nothing left to grip, you can glue a bit into the screw head so the two turn as one piece.
- Put a tiny drop of superglue (or two-part epoxy) on the screw head, so nothing drips onto the board.
- Press the screwdriver bit into the head and hold it straight while the glue sets.
- Let it dry fully, a few hours if you can.
- Press down firmly and turn the screwdriver counterclockwise.
- Clean the dried glue off the bit afterward, or use an old bit you don’t mind losing.
Hot glue is another option, and it peels off the bit and the screw afterward.
Might be useful: Can you use old Thermal Paste? Does it expire?
Cut a slot for a flathead screwdriver
Be warned: Cutting near a motherboard creates metal shavings, and a single one in the wrong place can short the board. Only do this if everything above failed, and if you’re not comfortable with a rotary tool, get someone who is to do it.
With a rotary tool (like a Dremel) and a thin cutting disc, you can cut a slot across the screw head and turn it with a flathead.
- Cover everything around the screw with tape or a sheet of plastic, leaving only the screw head showing.
- Put on safety goggles and fit a thin cutting disc to the rotary tool, making sure it’s tight.
- On a low speed, make one thin cut across the screw head, just deep enough for a flathead.
- Turn the screw out with the largest flathead that fits the slot. If it doesn’t fit, widen the cut a little at a time, since cutting off too much leaves nothing to grip.
- Blow the shavings off with compressed air, then remove the tape or plastic and give the area several more bursts before you power anything on.
A small file can do the same job more slowly, if you’d rather not use a power tool near the board.
Drill it out or use a screw extractor (last resort)
A screw extractor is a bit with a reverse thread that bites into a small hole drilled in the screw and turns it out counterclockwise. Small extractor sets are made for tiny screws too.
The pilot hole has to be small and right in the center, or the extractor just slips. Use a tiny drill bit (around 1/16 or 3/32 of an inch), and test the extractor by hand before putting it in a drill. Protect the board, wear goggles and blow out every bit of metal afterward, just like with cutting.
Some people skip the extractor on a motherboard, since extractors often need to be tapped in to grip. They drill off just the head, remove the part it was holding, and turn the leftover stub out with pliers.
Replace the screw, or let a repair shop do it
Once the screw is out, use a new one of the same size. A laptop’s service manual lists each screw by size (Dell’s Alienware m15 R6 manual, for example, lists M2x4 screws). Next time, use the bit that fills the head completely and press down while turning.
If the head is already gone, the screw sits among tiny components, or you don’t have the tools, take it to a repair shop. If your laptop is still under warranty, contact the manufacturer before you cut or drill anything inside it.