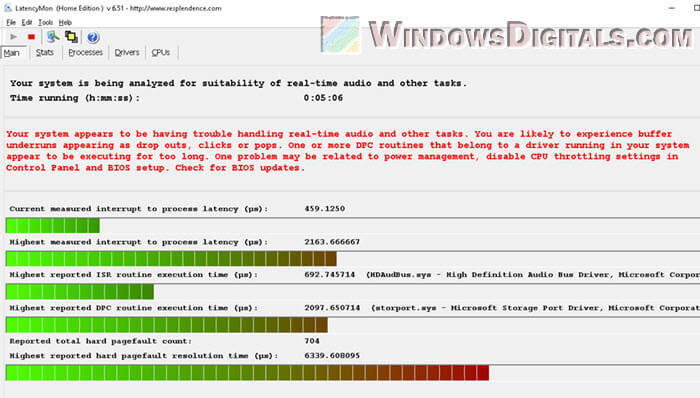
DPC (Deferred Procedure Call) latency affects how quickly Windows systems respond. High DPC latency can cause quite a variety of problems like audio glitches, system freezes, or even a blue screen of death. When you use tools like LatencyMon to find out what’s wrong, you’ll often end up with a driver file called storport.sys, which is Microsoft’s Storage Port driver. This driver works with devices like hard drives and SSDs. In this guide, we will show you how to fix high DPC latency issues with the storport.sys driver in Windows 11 or 10.
Also see: How to Fix Game Stuttering on Windows 11
Page Contents
What’s the problem with storport.sys high latency and BSOD?
The storport.sys driver is the Microsoft Storage Port Driver that deals with SATA and NVMe storage devices in Windows. When this driver has problems, it can slow down how fast your computer deals with hardware signals and cause high DPC latency. This can cause audio glitches, system freezes, or even a blue screen of death.
Some common symptoms:
- Audio glitches and dropouts which may sound like crackling or popping during playback.
- System freezes or doesn’t respond well.
- Sudden blue screens with error codes like “WDF_Violation“.
- Delays in sound during video game scenes or other programs.

How to fix the storport.sys high DPC latency issue
High DPC latency often comes from storage drivers or system settings related to storage devices. By understanding how your system’s hardware and software interact, you can usually fix the problem without drastic steps.
Switch from RAID to AHCI or NVME in BIOS
Many systems start with RAID (Redundant Array of Independent Disks) mode on for performance or backup benefits. But not all systems need RAID, and it can cause issues, including high DPC latencies with storport.sys. Switching to AHCI (Advanced Host Controller Interface) or NVME, standard for SATA drives, can often fix these latency issues.
Important precaution: Switching from RAID to AHCI might make Windows unbootable. If this happens, a clean installation of Windows may be needed. So, make sure to back up all important data first.
Step 1: Back up your data
Before changing your system’s BIOS or UEFI settings, back up your important data. This is vital as changing modes might make Windows unbootable without a new installation.
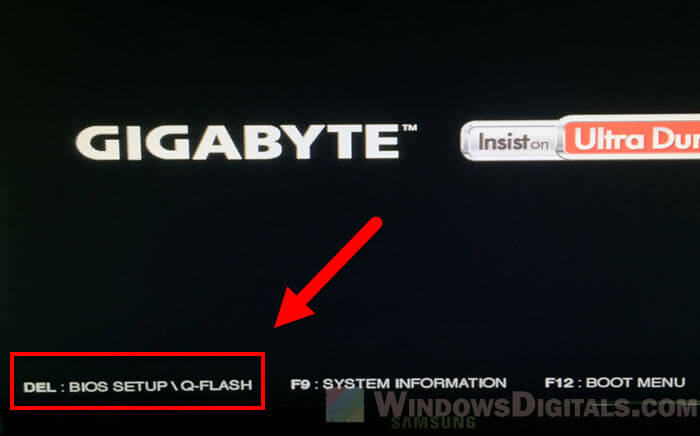
Step 2: Accessing BIOS/UEFI settings
- Restart your computer.
- As your computer starts, press the specific key to get into the BIOS/UEFI settings. This key is different for each manufacturer but often is F2, F10, F12, DEL, or ESC. You’ll usually see a message like “Press [key] to enter setup” on the boot screen.
Step 3: Locate storage configuration
- Inside the BIOS/UEFI, use the keyboard to navigate (your mouse might not work).
- Find the storage settings section, often called “SATA Configuration” or “Integrated Peripherals“.
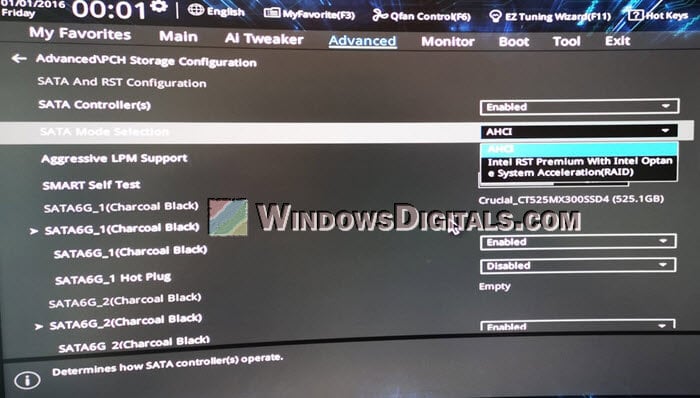
Step 4: Change the mode
- In the storage configuration section, look for an option labeled “SATA Mode” or “SATA Operation“.
- If it’s on “RAID“, switch it to “AHCI” or “NVME“.
Step 5: Save and exit
- After changing the setting, go to the exit section of your BIOS/UEFI, save the changes, and restart.
If you switch from RAID to AHCI, Windows might not start up right. If that happens, you’ll need to install Windows again. That’s why backing up first is so important.
Check and update the Intel Rapid Storage Technology
The Intel Rapid Storage Technology (RST) helps manage and boost the performance of SATA drives, especially in RAID setups. But sometimes, it can cause problems, including high DPC latencies. Below is what you can do if Intel RST might be causing issues:
Step 1: Determine if Intel RST is installed
- Go to “Control Panel”.
- Click on “Programs and Features”.
- Look for “Intel Rapid Storage Technology” or something similar in the list of installed apps.
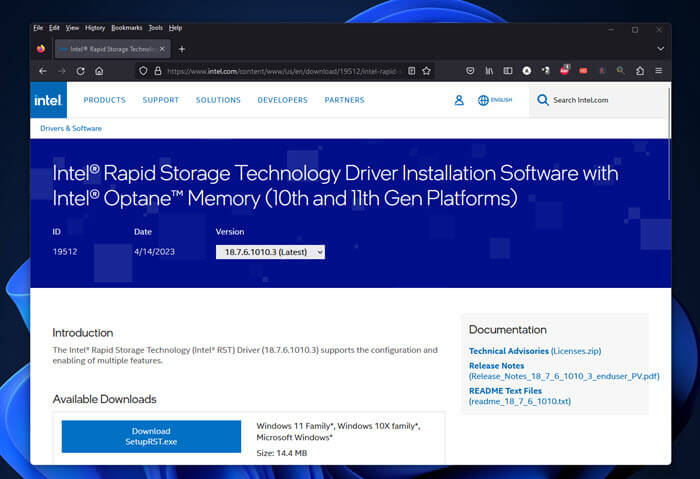
Step 2: Update Intel RST
- Visit Intel’s official website.
- Go to the downloads or drivers section.
- Look for the latest “Intel Rapid Storage Technology” drivers and download them.
- Follow the prompts to install the new drivers.
- Restart your computer after the installation.
Step 3: Consider uninstalling Intel RST
- Go back to “Control Panel” > “Programs and Features”.
- Find “Intel Rapid Storage Technology” on the list.
- Click on it and then click “Uninstall”.
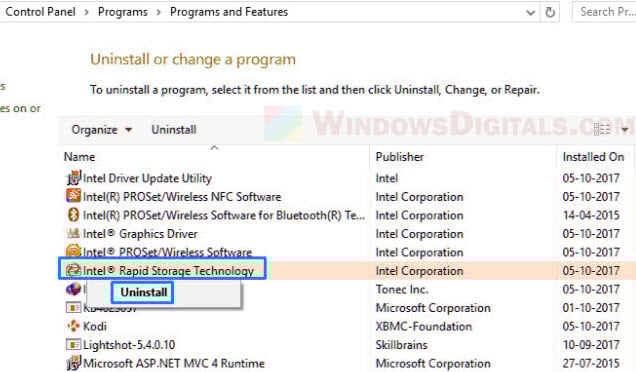
- Follow the steps to remove the software.
- Restart your computer afterward.
Intel RST can help with performance and backup on older systems or those using RAID. But on newer hardware or systems not using RAID, what it provides might not be worth it. Think carefully before you uninstall.
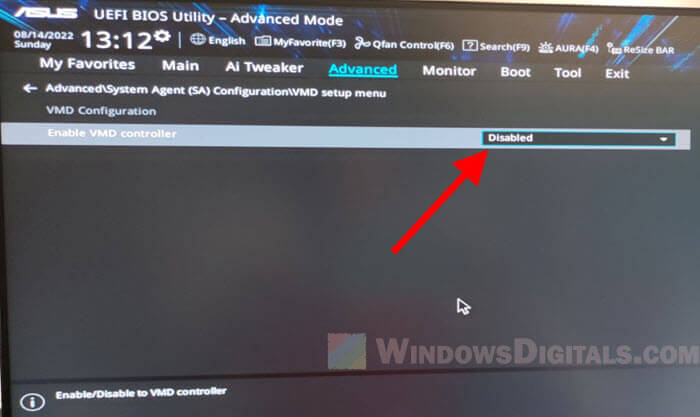
Disable VMD Controller in BIOS/UEFI
For some computers, especially those with NVMe SSDs on Intel platforms, the VMD (Volume Management Device) controller can cause high DPC latencies.
Step 1: Backup your data
Always back up important data before changing settings in the BIOS or UEFI, as some changes can make your system unbootable.
Step 2: Accessing BIOS/UEFI settings
- Restart your computer.
- As it starts, press the key to enter the BIOS/UEFI settings. This key is often F2, F10, F12, DEL, or ESC. Look for a message like “Press [key] to enter setup” on the boot screen.
Step 3: Locate the VMD Controller setting
- Use the keyboard to navigate through the BIOS/UEFI.
- Look for the PCIe/Storage settings or similar.
- Find the option for “VMD Controller” or simply “VMD”.
Step 4: Disable VMD Controller
- Set the VMD option to “Disabled”.
- If there are multiple VMD settings (like for different M.2 slots or PCIe lanes), turn all off, especially if you’re not sure which one affects your drive.
Step 5: Save and exit
- After making the changes, go to the exit menu, save your settings, and restart.
Note: Not every PC has VMD settings. This tip is more for newer Intel setups with NVMe SSDs. Make sure it applies to your system before changing anything.