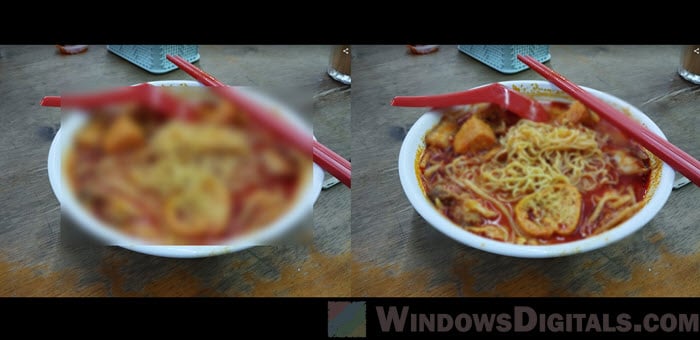
Ever seen a photo or video with some parts hidden by a blur or mosaic? People use this effect to hide things like faces, license plates, sensitive stuff, or to cover up parts of the image. But there are times when you might want to try clearing up that mosaic, maybe you’re working on an old photo or you’ve got the okay to fix a censored image.
This guide will talk about some basics of mosaic and how you can remove some of these mosaics from pictures and videos.
Page Contents
Some basics about mosaic in pictures and videos
What is mosaic?
A mosaic, or pixelation, is when part of a photo or video is blurred to hide details. This makes it hard to see what’s under these blocks of color. Although it’s done on purpose, sometimes you need to see what’s behind that blur.
The purpose of mosaic
Mosaics are mainly used for privacy or to block out things we shouldn’t see. They help content creators follow privacy laws and platform rules. But sometimes, you might need to remove these mosaics, especially if the privacy reasons are no longer relevant or if you have the rights to the image.
How removing or reducing mosaic actually works
How hard is de-mosaicing?
Getting rid of mosaics isn’t easy like clicking a few buttons. It involves rebuilding the hidden parts of the image, which can take a lot of work and might not always turn out perfect. The main challenge is that the detail isn’t just hidden; it’s actually removed.
Techniques used in mosaic removal
To remove mosaics, you can use some smart methods like.
- Interpolation – This guesses the hidden parts based on what’s around them.
- Machine learning – This uses computers to learn from clear images to guess what’s behind the mosaic.
- Manual editing – This involves someone drawing over the mosaic by hand.
Each method has its pros and cons and works best for different difficulties.
What about using AI to remove mosaic?
The main tools for removing mosaics today use AI and deep learning. They look at the covered parts, guess the hidden details, and try to rebuild them. This isn’t about simple guesses; it’s about using complex patterns and lots of data to predict the hidden content accurately.
AI models learn from many different pictures and videos which helps them get good at guessing the right details. Generally, the better the original picture or video quality, the more details the AI has to work with, and the better it can fix the image.
What are some software that can reduce mosaic on photos and videos
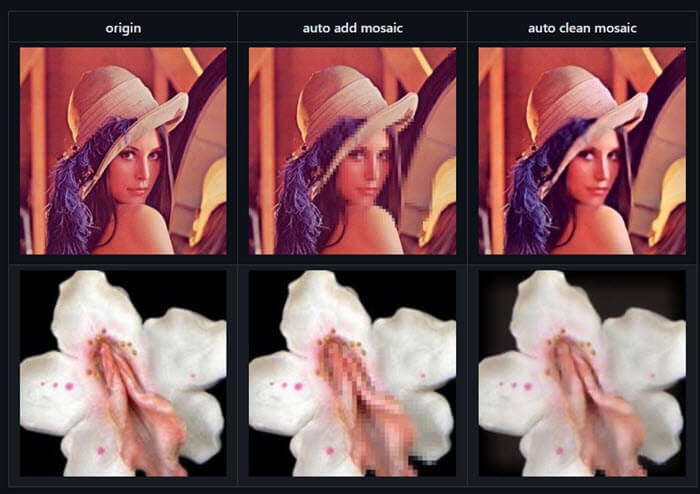
HypoX64/DeepMosaics
HypoX64/DeepMosaics (https://github.com/HypoX64/DeepMosaics) is a tool on GitHub that can either remove or add mosaics to images and videos. It’s built using computer vision and deep learning tech, with Python, to smartly figure out and fix the underlying image details.
Related resource: How to Edit Video (Trim, Merge, Split, Etc.) in Windows 11
Media.io AI object remover
Media.io offers a tool called AniEraser that makes it easy to take out unwanted parts from photos and videos. It uses AI to make sure the original quality stays the same while removing things you don’t want.

For videos
AniEraser lets you upload videos and pick out the mosaic or other unwanted parts to clear them up. It’s simple to use and helps bring back the original look of your video.
For photos
The same goes for photos. You can paint over the mosaic with a brush tool, and the AI will remove it and any other distractions, leaving a cleaner image behind. This is great for photographers or designers who need to clean up their work.
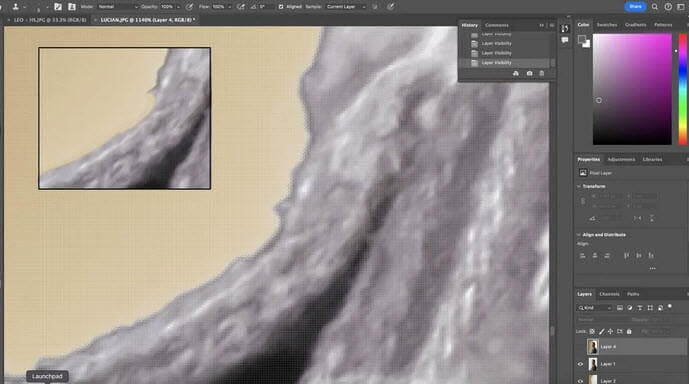
Remove mosaic from photos with Adobe Photoshop
You can use Adobe Photoshop to soften mosaic effects, although it might need some manual work.
- Load your photo into Photoshop.
- Find the layer with the mosaic and work on it using the Layers panel.
- Try different tools like the Noise Reduction, Clone Stamp Tool, and Healing Brush to carefully take out the mosaic. You can use the Noise filters like Despeckle several times to smooth out rough spots, and the Clone Stamp Tool lets you copy parts of the image to cover the mosaic.
- Use Sharpen filters to bring back details and lessen the blur that remains after removing the mosaic.
This will definitely take some patience and skills in Photoshop because of how difficult and complicated it can be and all the features the software provides. The main goal is to keep the image looking natural while removing the mosaic, which might take some experimenting with different settings and techniques.
If you’re new to Photoshop or just want to get better at removing mosaics with it, there are plenty of online tutorials and tips to help you learn more. Just go over to YouTube and search for some Photoshop mosaic removal tutorials.
Remove mosaic from videos with Adobe Premiere Pro
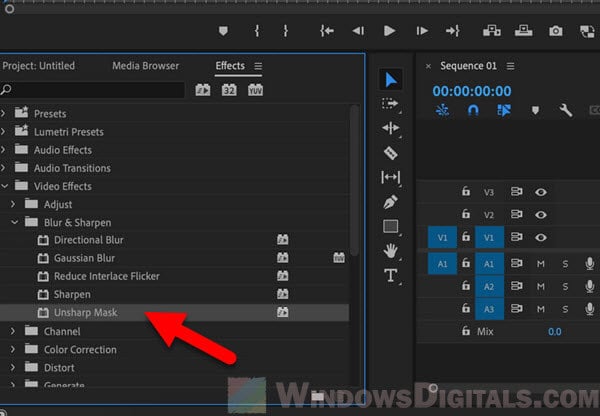
For videos, Adobe Premiere Pro has a tool called “Unsharp Mask” that can help sharpen blurred parts and reduce the look of mosaic.
- Start a new project in Adobe Premiere Pro and add the video you want to work on to the timeline.
- Look for the “Unsharp Mask” effect in the Effects panel and drag it to your video on the timeline. This sharpens the blurred parts and might help make the mosaic less noticeable.
- Adjust the effect settings to get the right amount of sharpening and target the mosaic. Try to find a balance so your video looks clear but not overdone.
- When you’re happy with how it looks, you can save your video in the format you like.
Note that some really deep mosaics or heavily pixelated areas might not fully go back to their original look because of the lost details.
Also, removing mosaics, if you don’t have the right to do it, can get you in troubles with privacy and owning the content. Thus, always make sure you’re allowed to make those changes.
Other paid software solutions
There are also other paid tools like HitPaw Watermark Remover and iMyFone MarkGo that can remove mosaics and watermarks easily. These tools are usually quite user-friendly and can handle different levels of mosaics and watermarks with just a few clicks (but know that there is no tool that can ever be perfect for removing mosaics).
Things you need to know when you want to remove mosaics
When you’re looking to remove mosaics from videos or images, it’s very important to think about the ethical and legal sides. Mosaics are often there to protect privacy or hide sensitive info. Taking them off without permission can break privacy rules and get you in legal troubles. Always make sure you have the right or permission to change and use the content before you start removing mosaics from it.