If you want to do some simple video editing such as trimming a video, splitting a video into multiple parts, merging/combining two or more videos together, etc. without buying a video editor software, you can easily do so using the Windows 11 built-in Video Editor – which is part of the Photos app and is also free to use. This tutorial will show you how to edit videos in Windows 11 using Video Editor in Photos app.
This guide is intended for users who are looking to do quick and simple video editing for free which can be done using the Windows 11 built-in Photos app. If you are looking for advanced video editing, you may need a more professional video editing software such as Adobe Premier Pro which requires a subscription.
How to edit video in Windows 11 using Video Editor
Video Editor is a built-in feature in the Windows 11 Photos app. It allows you to perform simple video editing such as trimming a video, splitting a video into multiple clips, merging two or more videos together, changing video speed, adding background music or custom audio to a video, adding motion or 3D effects, adding captions, and more.
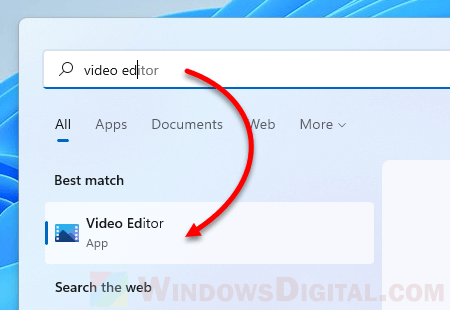
To open Photos app’s Video Editor in Windows 11, go to Start, search for and open “Video Editor“.
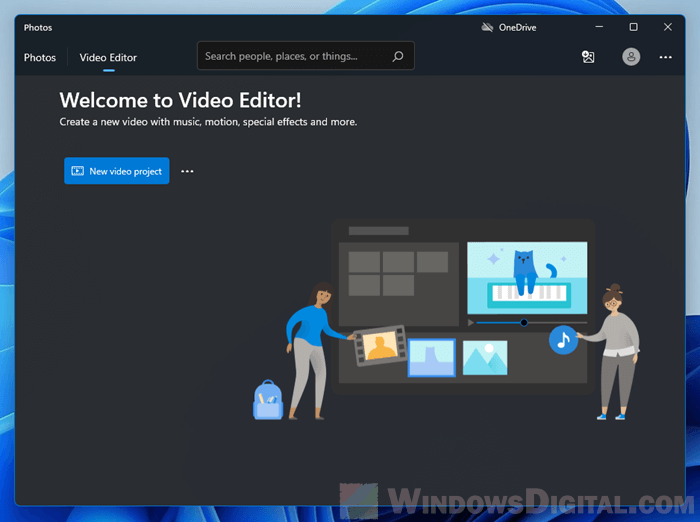
In Video Editor, click on New video project to create a new project, and name your video project.
Next, add the video(s) you want to edit by simply dragging and dropping the videos to the Project library section. Optionally, you can click on Add > From this PC to add videos to the library.
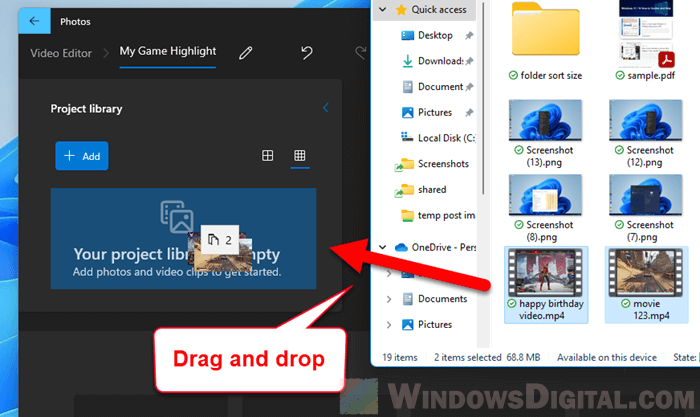
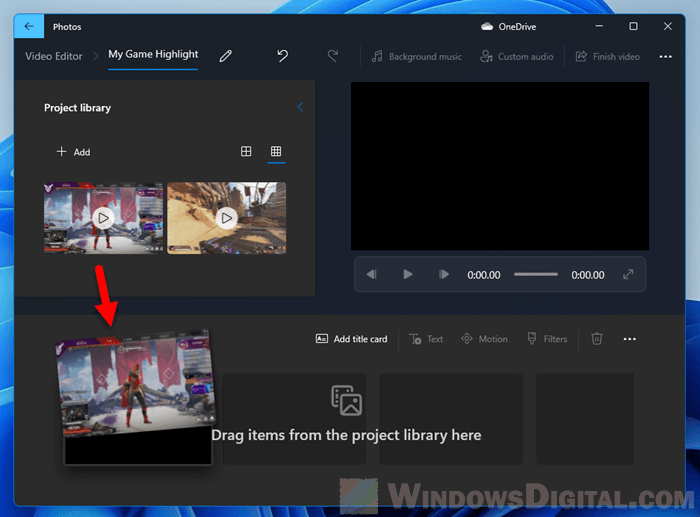
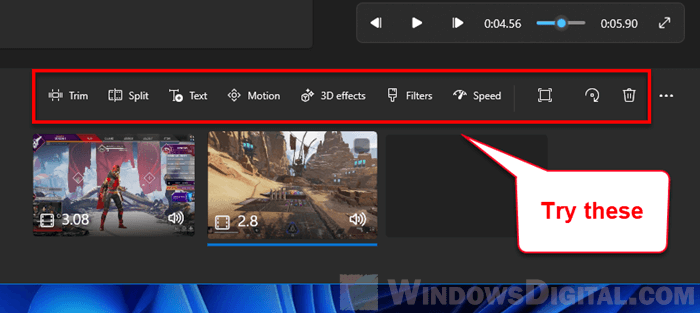
Once you have added the video(s) you want to edit to the project library, to start editing a video, pull the video from the library to the section where it says “Drag items from the project library here“.
Depending on what type of editing you want to do, here’s a list of guides for different editing.
Page Contents
How to trim a video
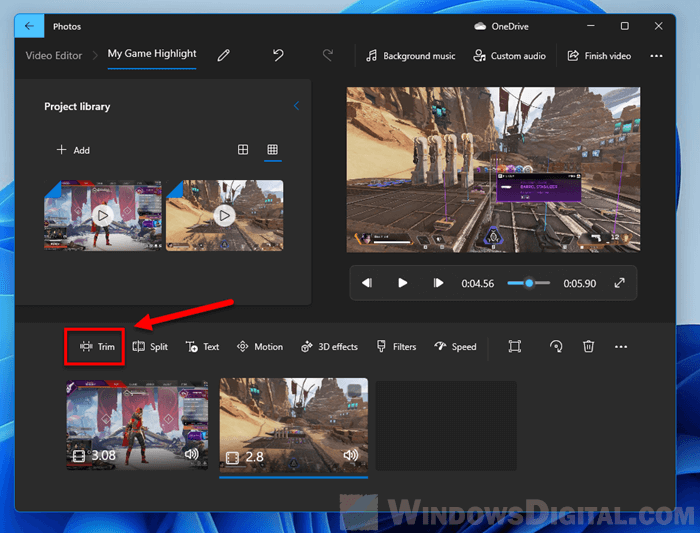
Trimming or cutting a video usually means to remove part of the beginning and/or the end of a video to create a clip out of a video. To trim a video, pull the video from the project library to the bottom section if you haven’t already done so, then click on the Trim option.
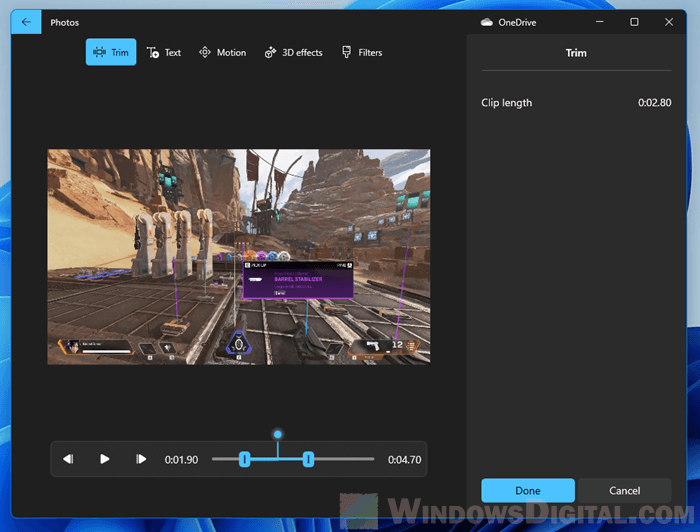
In the trimmer window, drag the start and end sliders to where you want to cut the video. The blue portion of the video will be the outcome of the trimming. Click Done to trim the video.
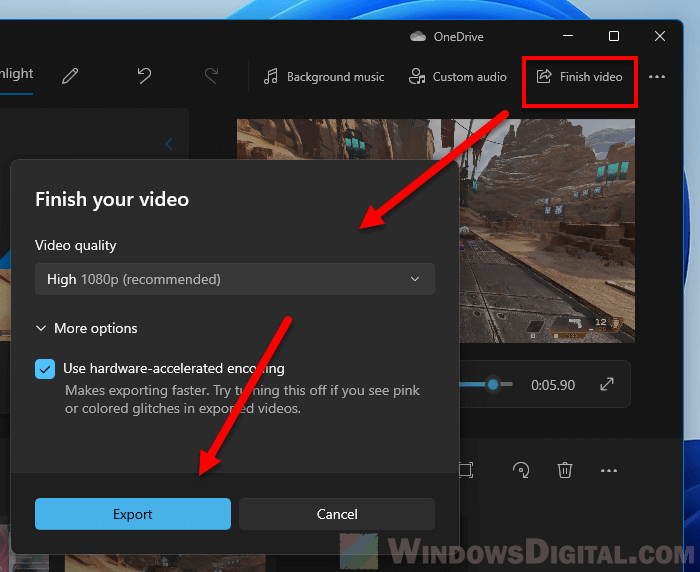
To save the trimmed video, click on Finish video. Choose your preferred video quality for the video that is going to be exported, then click on Export to begin the export process. The process may take awhile depending on the size of the video clip.
How to merge two or more videos together
To combine two or more videos together, first add all the videos you want to merge to the project library, then pull them to the editing section one by one and in the order you want the videos to play once combined.

Then, click on Finish video to export the combined video. Select a video quality you prefer and click on Export.
Before exporting the video, you can perform any other editing you want for any of the added video clips by selecting the video clip you want to edit and then select an action.
How to split a video into multiple parts/clips
To split a long video into multiple video clips, pull the video from the project library to the editing section. Select the video and click on Split.
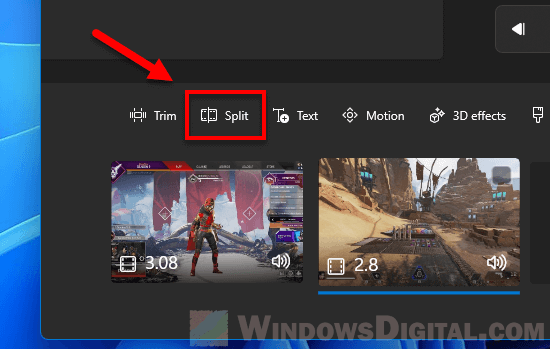
Pull the blue slider to where you want to split the video into two. You can only split a video into two parts for each splitting process. The right pane will show the duration of clip one and two when they are split.

Tip: To split a video into multiple clips, you can repeat the split process. For example, you can split an 8min video into 2min and 6min, then split the 6min video into 2min and 4min, and repeat.
How to add a background music/audio to a video
To add a background music, simply click on the Background music option at the top of the window. Then, select a music track you want to use as the background music for your video. These music tracks are provided by Photos app.
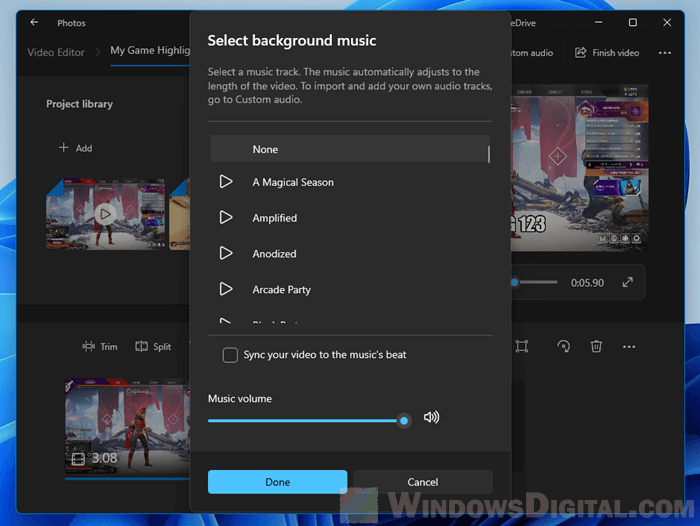
To add your own audio tracks, click on Custom audio next to Background music.
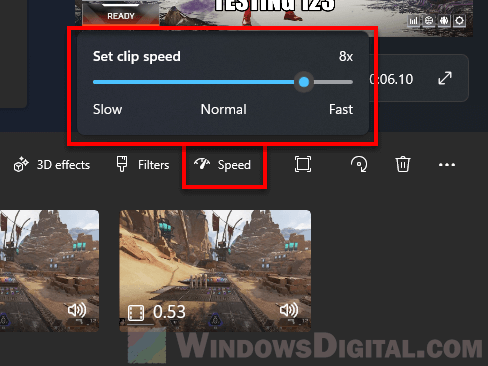
How to change video speed
To speed up or slow down the speed of the video when it’s played, you can change the video speed by clicking on the Speed option, and then select your preferred speed. You can choose a video speed from as slow as 0.02x to up to 64x using the Video Editor.
Adding a caption, motion or 3D effect to a video
Feel free to also try the other editing options in the Video Editor to add effects such as motion, 3D effects or title/caption to the video. You can experience these editing by clicking on each of the available options: Text, Motion, 3D effects, Filters, Etc. in the editing section in Video Editor.
You can also do simple video cropping such as removing the black bars of your video by selecting the “Remove or show black bars” option next to the speed option.
Additionally, you can also rotate your video by clicking on the Rotate option or by pressing CTRL + R keys while a video clip is selected.