There are times when you play a video, it may appear incorrectly rotated (sideways or upside down). This is commonly the case if you record a video using your camera in, for example, portrait mode, while the camera is still in landscape mode, or vice versa. To solve this, you can quickly edit the video to rotate it back to how it’s supposed to be using a video editor. This guide will show you how to rotate a video in Windows 11 using Photos app’s Video Editor or VLC media player.
Related: How to Edit Video (Trim, Merge, Split, Etc.) in Windows 11
Page Contents
Rotate video in Windows 11 using Video Editor
In Windows 11, there is a built-in Video Editor feature that is part of the Photos app, which by default comes preinstalled with Windows 11. You don’t need to install any third party video editor if you only need to do some basic video editing such as rotating a video.
To rotate a video in Windows 11 using Windows built-in Video Editor, follow the steps below.
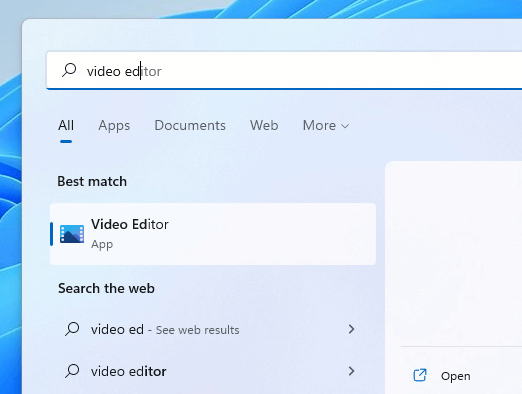
1. Click Start, search for and open “Video Editor“.
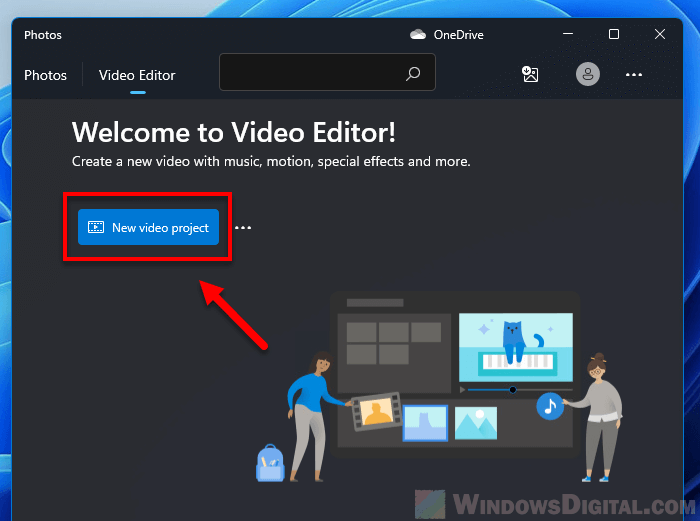
2. In the Video Editor window, click New video project to create a new video project.
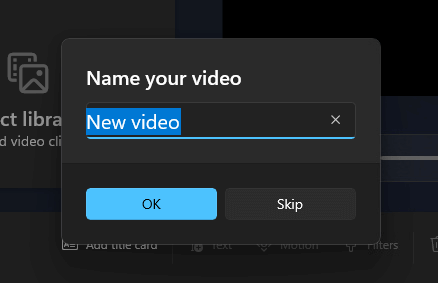
3. When you are asked to name your video, give it any name you like or click Skip if you don’t want to name it now.
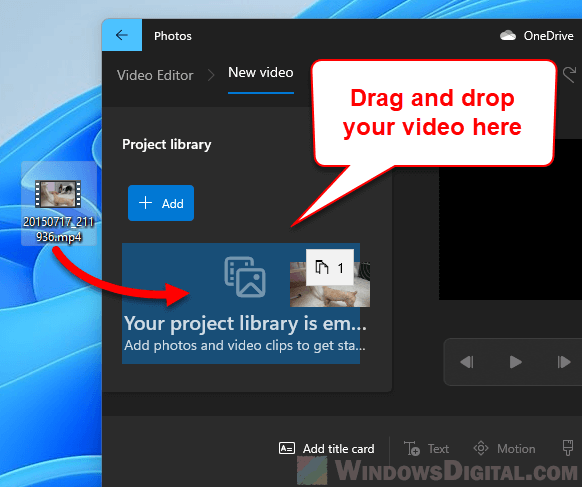
4. Next, drag and drop the video you want to rotate to the Project library section. Alternatively, you can click Add instead and manually browse to the video.
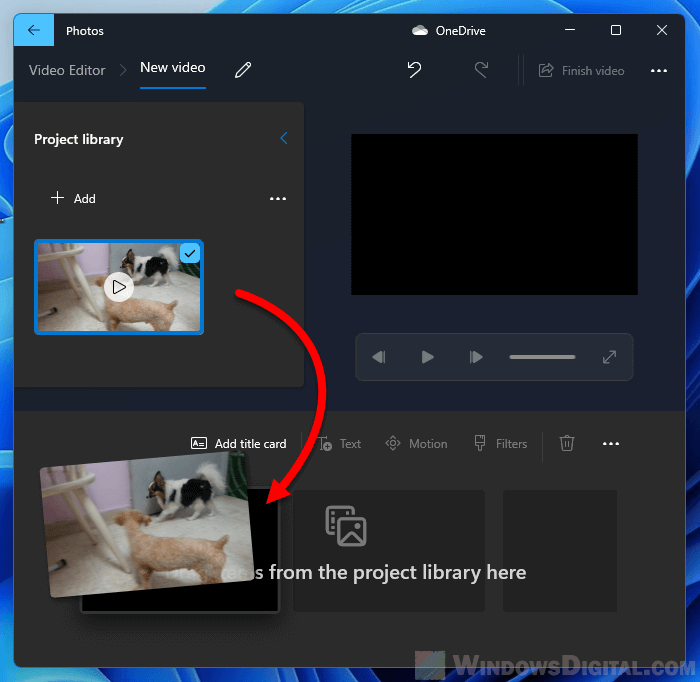
5. Then, drag and drop the video from the Project library to the bottom part of the editor where it says “Drag videos from the project library here“.
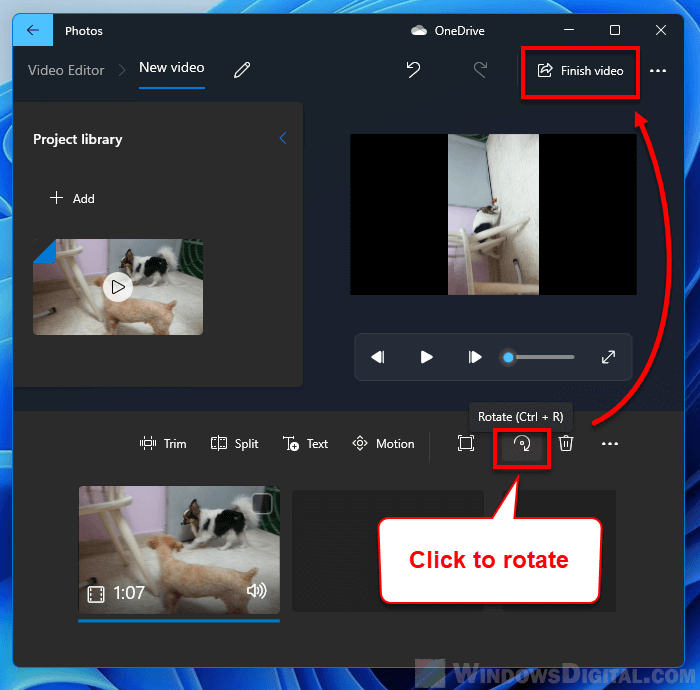
6. Now, you can click the Rotate button (or press Ctrl + R) to rotate your video. Repeat clicking the Rotate button until it is correctly positioned. Then, click Finish video when you are satisfied with the edit.
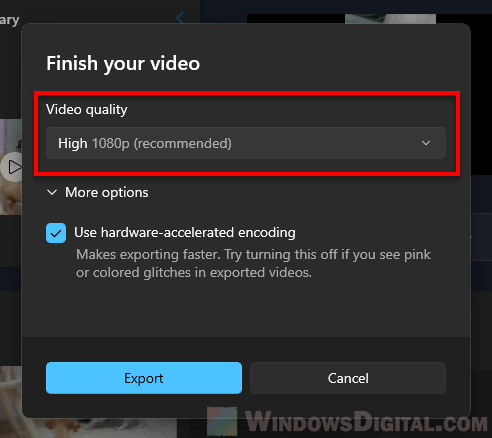
7. In the Finish your video pop up, select a video quality for exporting. Then, click Export to save the video. Tip: Enable the “Use hardware-accelerated encoding” option for faster exporting if you are exporting a rather large video.
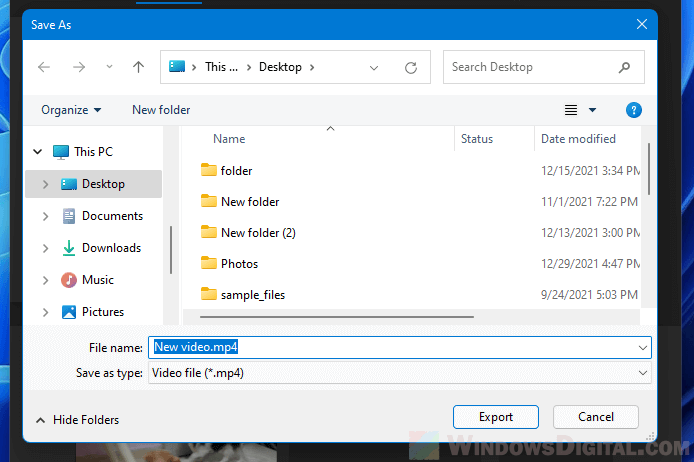
8. In the Save as window, browse to the location where you want to save your edited video. Be careful not to overwrite your original video. Use a different name to avoid overwriting your original video if you are to save the edited video in the same location as your original video.
Tip: How to Compress a Video in Windows 11
Rotate video using VLC media player
Aside from using the built-in Photos app, you can use VLC media player instead to quickly rotate your video and view it right away without saving, or optionally rotate and save your video.
VLC media player is a free and open-source video player that supports pretty much every video format out there. It is one of, if not the most popular cross-platform media player in the world. You can download VLC for Windows from: https://www.videolan.org/vlc/download-windows.html.
To rotate a video using VLC media player, follow the steps below.
1. First, open the video you want to rotate in VLC media player (by selecting File > Open File, or by dragging and dropping the video onto VLC window).
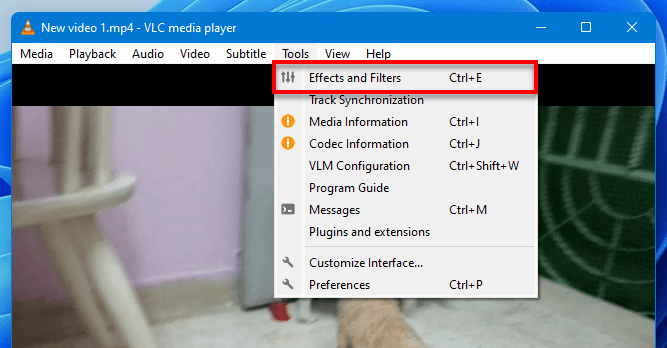
2. Secondly, click Tools on the menu bar and select Effects and filters.
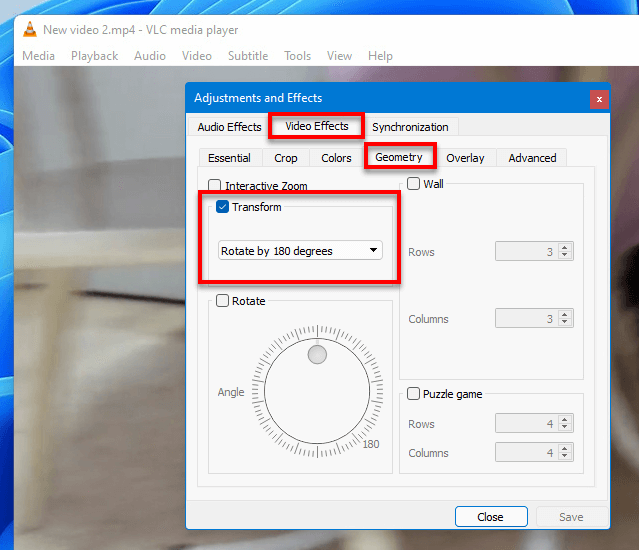
3. In the Adjustments and Effects window, select Video Effects tab and then select Geometry tab. Enable the “Transform” checkbox and select a transformation (rotate by 90 degrees, 180 degrees, 270 degrees, flip horizontally, flip vertically, etc.). Then, click Save.
4. Your video should now be correctly positioned. You can watch the video right away in VLC. But, if you close the video, the next time you open it, it will show the original orientation again. This is because VLC does not save the transformation by just doing the steps above. To also save the rotated video, continue to the next step.
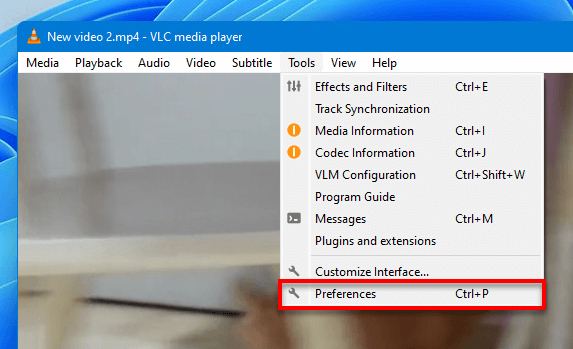
5. To save the transformation and export the video, click Tools and select Preferences.
6. In the Advanced Preferences window, click All for the “Show settings” option at the bottom of the window to show all settings. Then, on the left pane, select Steam output > Sout stream > Transcode. On the right pane, select “Video transformation filter“. Click Save to save the changes.

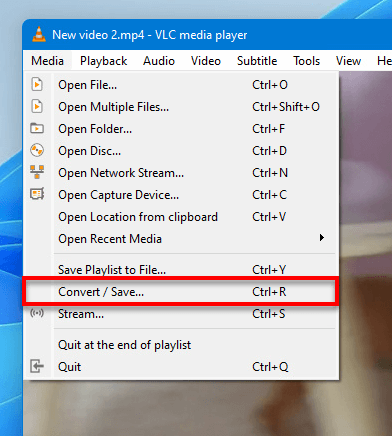
7. Next, click Media and select Convert/Save.
8. In the File tab, click Add and browse to your video to add it to the file selection. Then, click the downward arrow next to Convert/Save and select Convert.
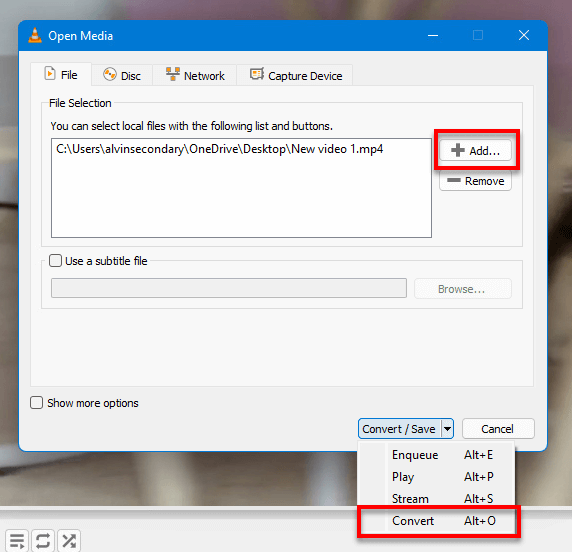
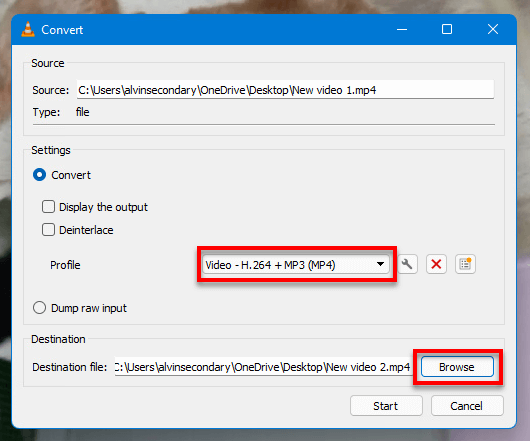
9. Select a profile or leave it as default (Video – H.264 + MP3 (MP4)). Then, click Browse and browse to the location where you want to save the video. Click Start to begin exporting the video.
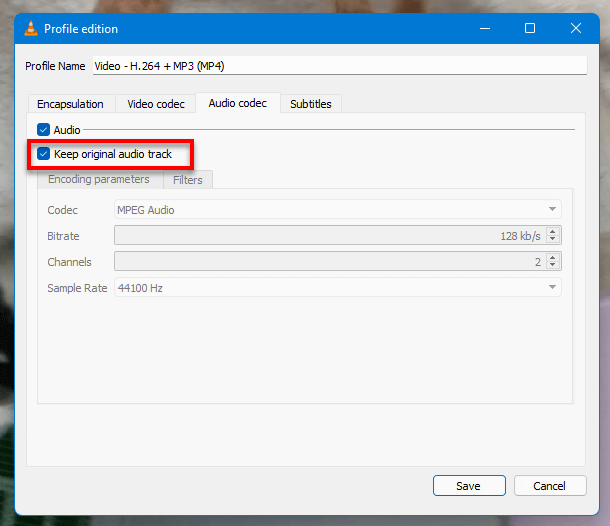
If there is any audio issue with the converted video, repeat the steps again until step 9. After selecting a profile, click on the settings icon next to the profile.
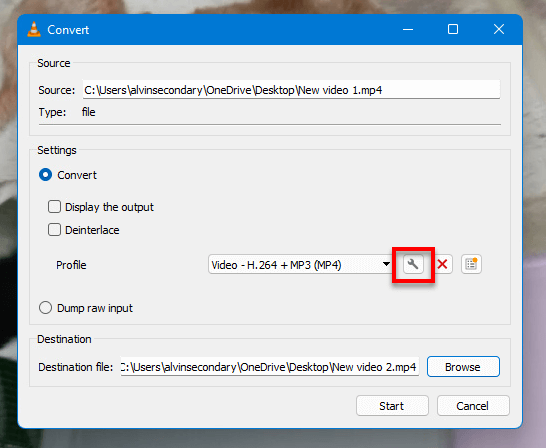
Next, select Audio codec tab and enable the checkbox that reads “Keep original audio track”. This is to force the export process to keep the original audio instead of converting it.