Local Users and Groups Management, also often referred to as lusrmgr.msc, is an administration console that allows you to manage advanced settings for users and groups that you would not normally see in the Settings application. This guide will show you how to access the local users and groups management in Windows 11 Home (requires third-party tool) or Pro (the normal ways) edition.
Also see: How to Create Local Admin Account Without Password on Windows 11
Page Contents
Access Local Users and Groups in Windows 11 Pro
Since the Local Users and Groups Management Snap-in is part of the included features in Windows 11 Pro edition, you can easily open the management console using one of the following methods. If you are using Windows 11 Home edition, please go to the next section of this guide.
Computer Management
You can quickly access the Local Users and Groups management in Windows 11 via the Computer Management application – a collection of Windows administrative tools you can use to manage a local or remote computer.
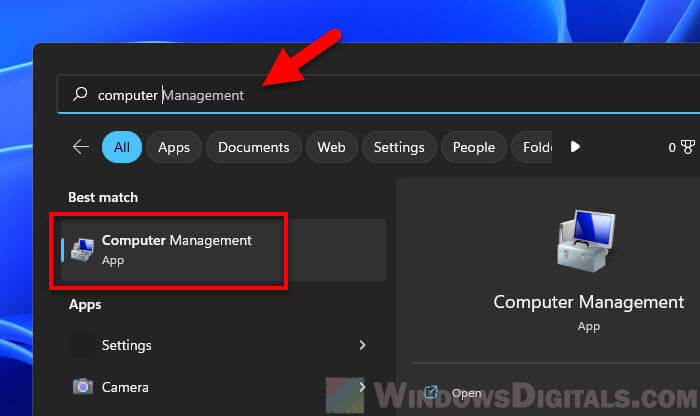
- Open Start menu.
- Search for “Computer Management” and open it.
- In the Computer Management window, select and expand “Local Users and Groups” on the left pane.
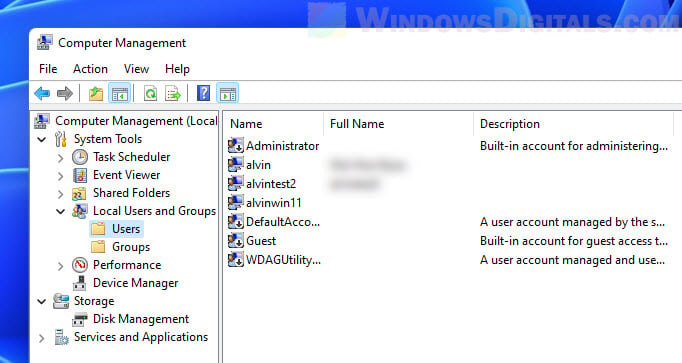
- From there, you can select the Users or Groups folder to view and manage the settings.
Open lusrmgr.msc
Alternatively, you can open the lusrmgr.msc process directly via Start, Run dialog box, Command Prompt or PowerShell.
- Open Start menu.
- Type
lusrmgr.mscand select the first result to open it.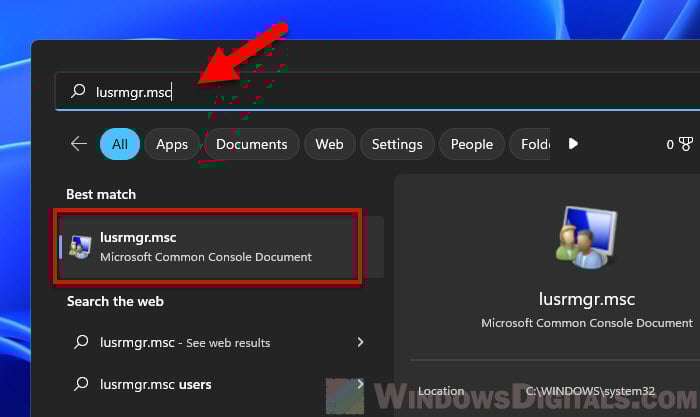
- You will then see two folders on the left pane: Users and Groups. Select the folder you want to manage.
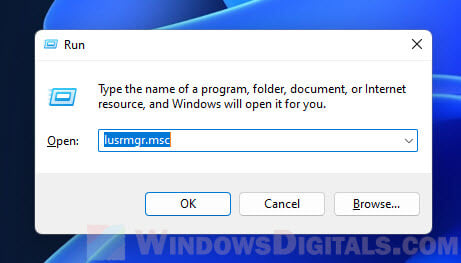
Run dialog box
You can open the Run dialog box by pressing the Win + R key. In the Run window, type lusrmgr.msc in the “Open” text field and press Enter to open it.
Command Prompt
If you do not have access to the Start menu nor the Run dialog box (when you are running into problem where you can only access the CMD), you can open the local users and groups management console by typing lusrmgr.msc as a command line and press Enter to run it.
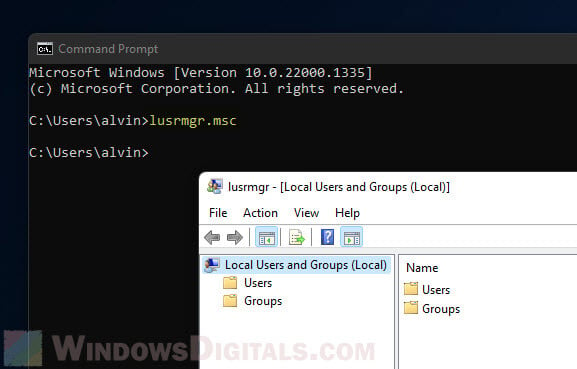
As for PowerShell or Windows Terminal, you can enter lusrmgr without the .msc extension to open the management console.
Why can’t I see local users and groups in Windows 11?
In most cases, if you don’t see Local Users and Groups in the Computer Management window, or if you can’t open the lusrmgr.msc console at all, it is probably because your version of Windows 11 is Home edition, which doesn’t include this feature. To manage local users and groups in Windows 11 Home edition, follow the guide below.
Open Local Users and Groups in Windows 11 Home
Similar to the Group Policy Editor, the Local Users and Groups Management Console is also one of the power features that is not included in Windows 11 Home edition. If you are using Windows 11 Home, you will not be able to access the management console whether you access it through the computer management app, launch lusrmgr.msc directly, or via command prompt.
However, you can use a third-party tool as an alternative to enable the local users and groups management in Windows 11 Home. This third-party tool is open source and can be downloaded for free from GitHub. It has the same functionalities as the built-in lusrmgr.msc snap-in in Windows.
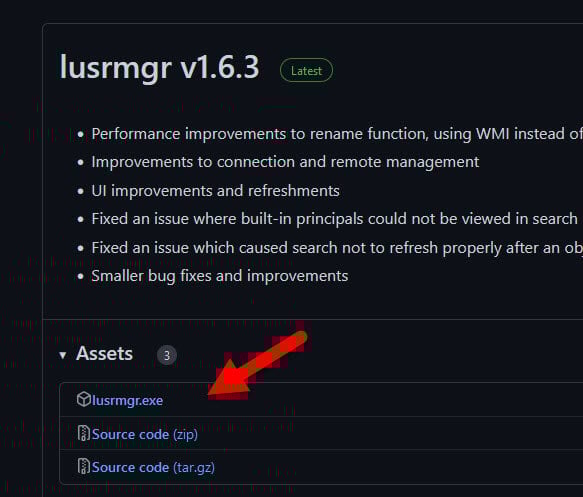
- Go to the lusrmgr releases page on GitHub.
- Click lusrmgr.exe under Assets in the latest release thread to download it.
- Once downloaded, run the executable file to open the app.
- It is normal for UAC to prompt you with a warning when you first run the application. Click Yes to acknowledge it.
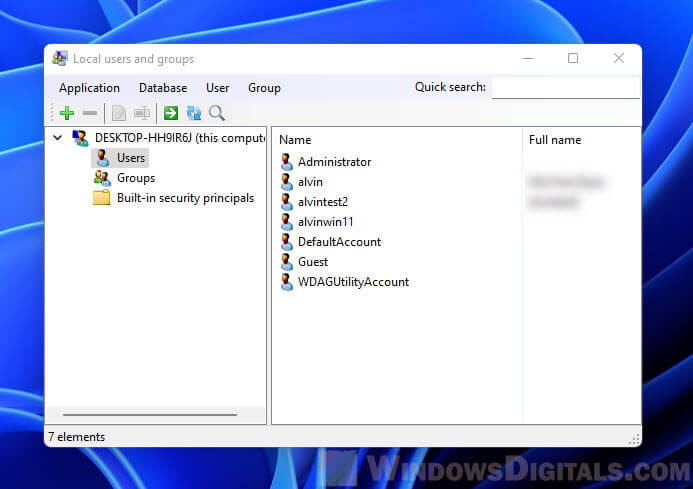
The settings for local users and groups in this third-party tool are essentially the same as the built-in lusrmgr.msc in Windows 11 Pro. You can view and change the settings just like you would on a Windows 11 Pro computer.
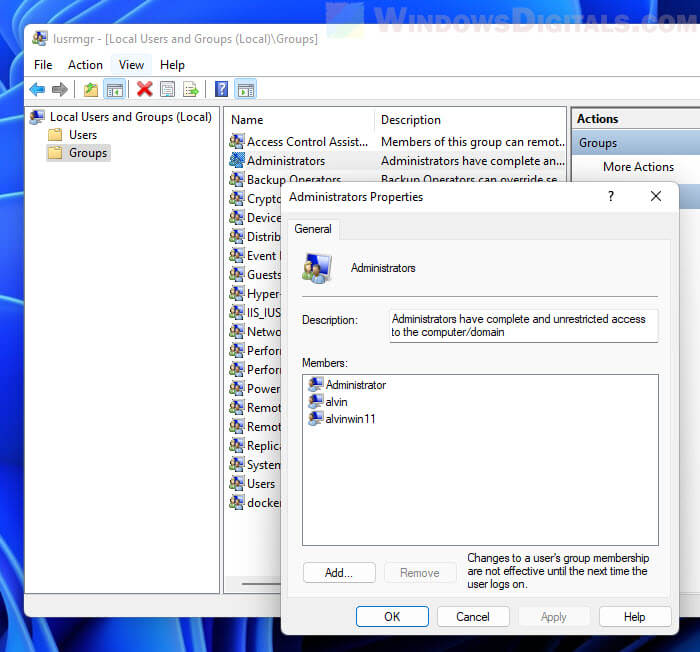
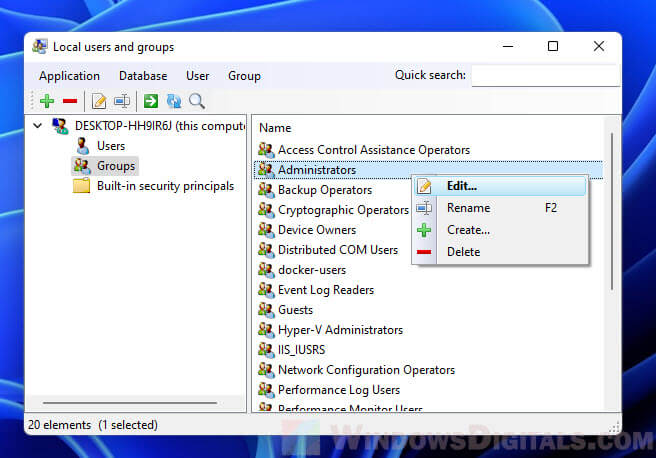
Add or remove a user from the Administrators group
For example, to use the lusrmgr program to add or remove a user from the Administrators group, first open the program by running the executable file you downloaded from GitHub. In the program window, select Groups from the left pane. On the right, right-click Administrator and select Edit.
To add an existing user to the administrators group, click the plus (+) button. Select a user from the list of existing users and then click Select to add it to the group. If the user you want to add hasn’t been created yet, you need to create it via the local Users category instead.
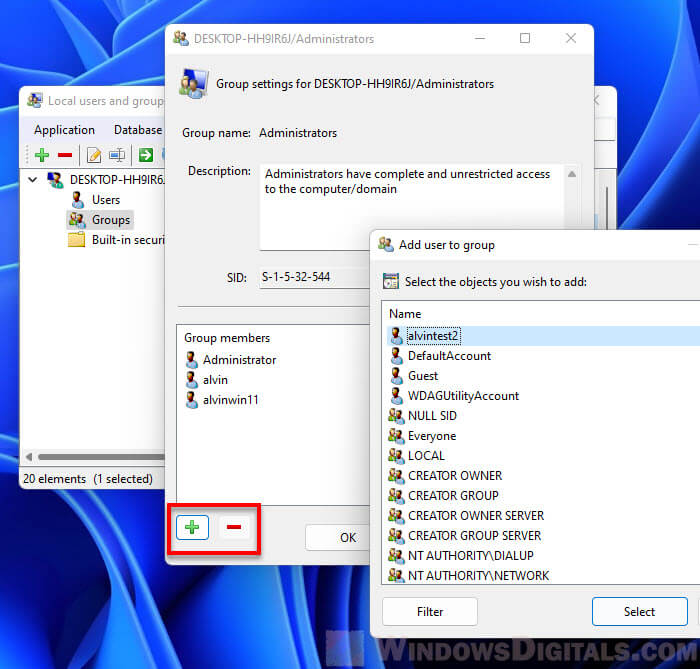
To remove a user from the group, select the user under Group members and click the minus (-) button to remove it from the group.
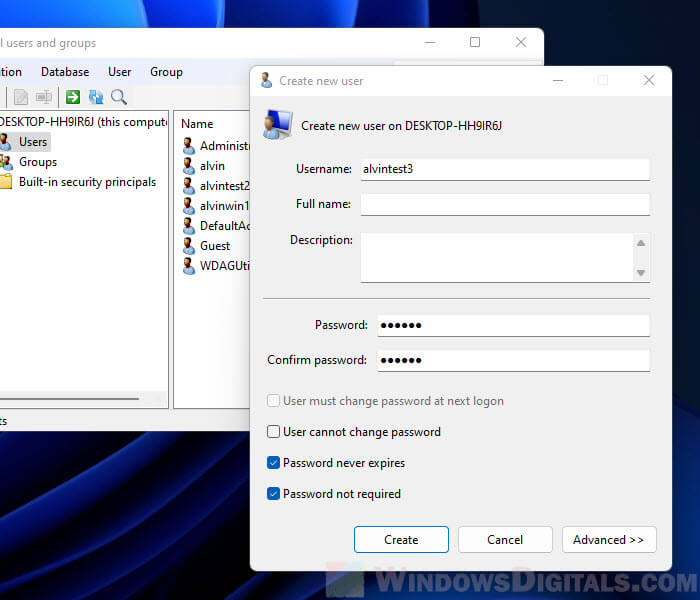
Create a new user using lusrmgr
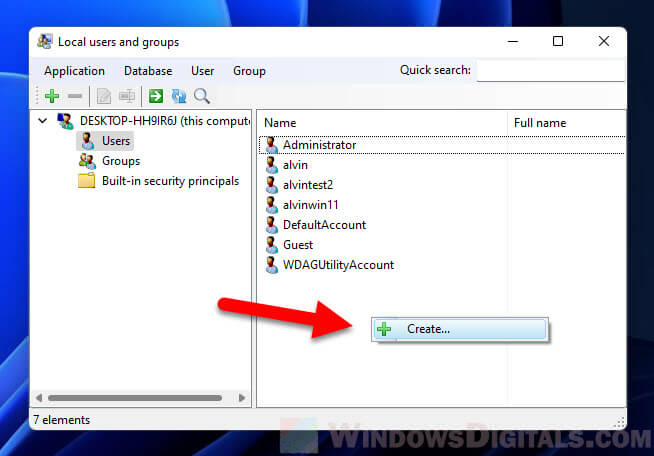
To create a new user using the lusrmgr tool, open the tool and select Users from the left pane. Then, right-click any empty space in the right pane and select Create.
In the “Create new user” window, enter the details for the new user account, such as username and password. Optionally, you may consider enabling some useful settings for the user, such as “password not required”, “password never expires” and “user cannot change password”.