An XPS (XML Paper Specification) formatted file is an electronic digital document file based on XML. Very much similar to PDF, XPS represents a digital document with a paginated fixed-layout that describes how the page should look and feel. The description of an XPS document is consistent across all platforms. It does not change based on printer or OS.
If you share a XPS document file with others who use different operating systems or devices, what you see on the pages in an XPS file will be the same as what they will see on an XPS viewer.
XPS was developed by Microsoft and was once known to have the potential to replace PDF, but that doesn’t seem to be the case. XPS was still not known to many users as a electronic document file type due to its difficulty in creating, editing and even opening one.
This guide explains how to open and view XPS file in Windows 11 using Windows built-in XPS viewer without installing any third party software.
Page Contents
Install XPS Viewer to open XPS file in Windows 11
Though XPS viewer is one of the built-in features in Windows, it is not enabled by default. Users will have to manually install the XPS viewer by adding it via the optional features in Windows 11 settings.
To install XPS viewer in Windows 11, follow the steps below.
First, press Win + i keys to open Settings. Select Apps on the left pane, then select Apps & features on the right.
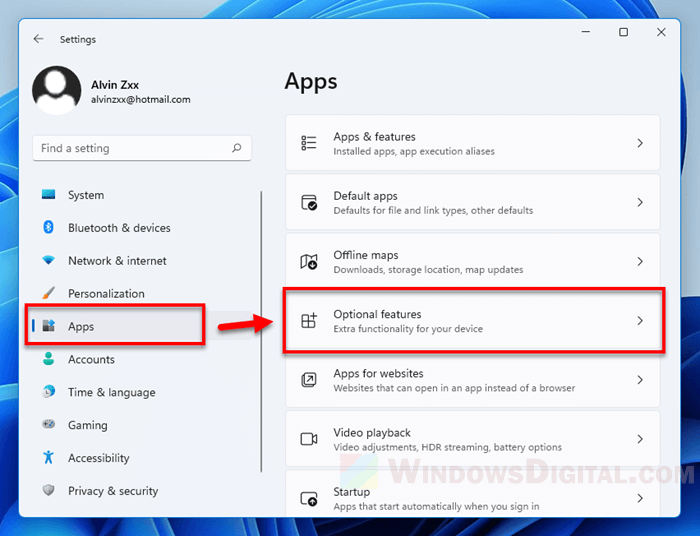
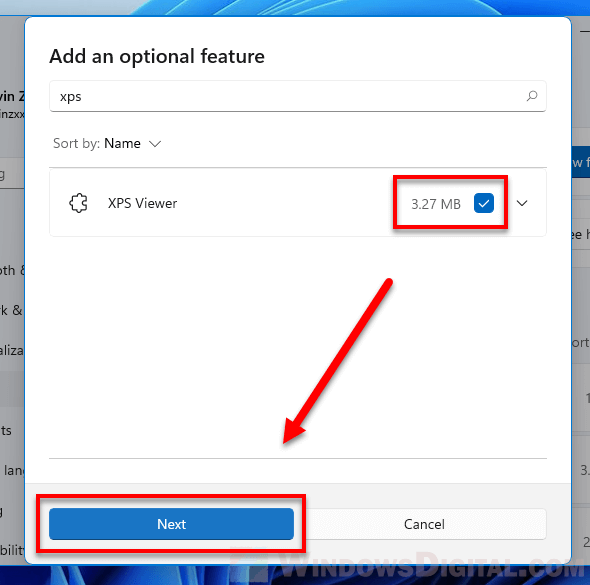
Next, click on the View features button next to “Add an optional feature”.
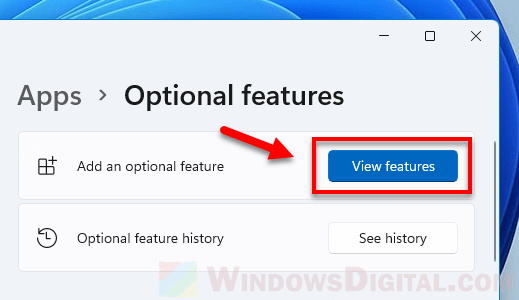
In the add an optional feature window, use the search bar to search for XPS Viewer. Select XPS Viewer from the search result and click Next to install it.
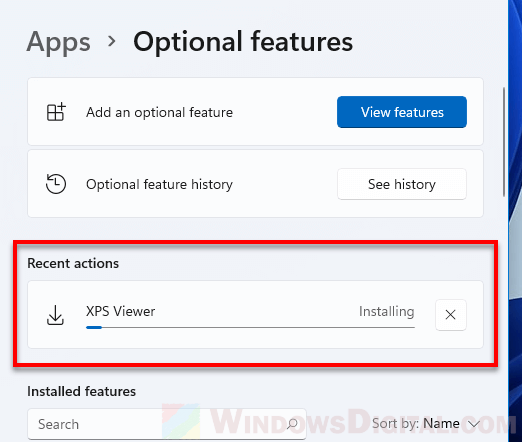
Wait for the installation to complete. It may take awhile depending on your PC. You can see the installation progress in the same Settings > Apps > Optional features window.
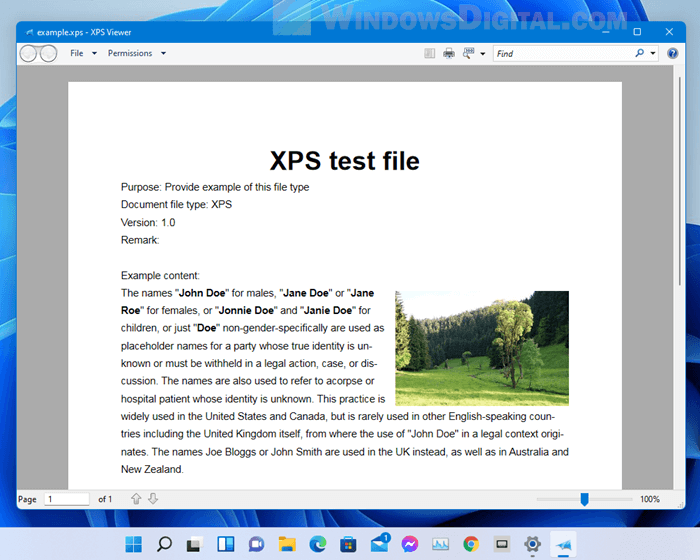
Once installed, restart your PC and you should then be able to open your XPS files.
Install XPS Viewer in Windows 11 via PowerShell or CMD
Alternatively, you can install XPS viewer by entering a command in Windows PowerShell or Command Prompt on Windows 11. Here’s how to do so.
In Windows 11, go to Start and search for Windows PowerShell. Right-click PowerShell in the search result and select Run as administrator. You need administrative privilege to run the command below.
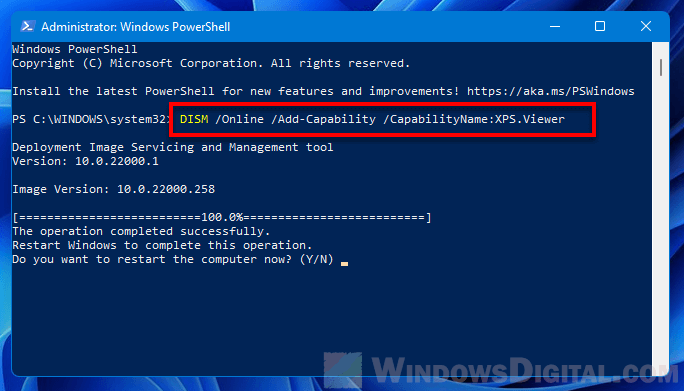
In the elevated PowerShell, to install XPS Viewer, enter the command below.
DISM /Online /Add-Capability /CapabilityName:XPS.Viewer
It may take a while for the installation to complete. PowerShell will show the progress as it installs the app. Once installed, enter “Y” to restart your computer.
The same command can also be used in an elevated (run as admin) Command Prompt or Windows Terminal in Windows 11.
To uninstall/remove XPS viewer from Windows 11, enter the following command instead.
DISM /Online /Remove-Capability /CapabilityName:XPS.Viewer
How to convert XPS to PDF in Windows 11
The easiest way to convert an XPS file to PDF format in Windows 11 is to directly use the Windows built-in XPS Viewer to print the XPS file to PDF. But, this method requires you to first install the XPS viewer on your computer (using one of the methods shown above).
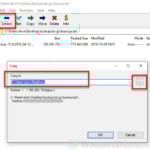
To do so, open the XPS file you want to convert to PDF with XPS Viewer. Next, click on File > Print.
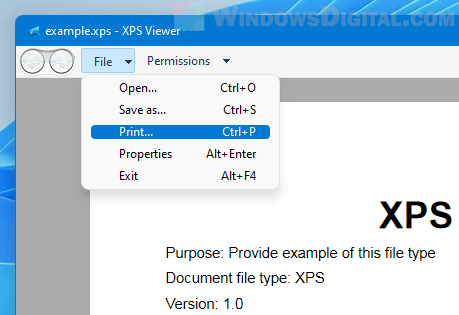
In the Print window, select Microsoft Print to PDF as the printer. Click Print and select a location where you want to save your PDF file.

You should then have a new PDF copy of the XPS file at the location you select.
Tip: You can create or convert any document to XPS or PDF file format in Windows 11 by printing them using “Microsoft XPS Document Writer” or “Microsoft Print to PDF” respectively. For example, when you open a webpage on Google Chrome, you can select File > Print and select “Save to PDF” or “Microsoft XPS Document Writer” as the printer to save the webpage as PDF or XPS file.