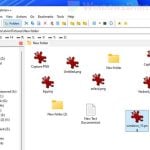
By default, Windows will auto arrange your icons to the left and align them to fixed grid. Newly created or added desktop icon will be automatically placed to the left most available grid on the desktop. If auto arrange feature is turned on, you can’t manually move or arrange desktop icons freely on the desktop in Windows 11 or Windows 10.
This short tutorial will show you how to disable icons auto arrange and align icons to grid (optional) features, so that you can manually arrange or move desktop icons freely in Windows 11/10.
![]()
How to Manually Arrange Desktop Icons in Windows 11/10
Page Contents
How to disable desktop icons auto arrange in Windows 10/11
The “Auto arrange icons” option is enabled by default when you first boot your freshly installed Windows PC. To disable the feature, follow the steps below.
- Right-click any empty area on the desktop in Windows 11/10.
- Hover your mouse over to View.
- If the “Auto arrange icons” option has a tick beside it, it indicates that it’s currently enabled. Click on it to disable it.
![]()
Now, try to move your desktop icons anywhere you want. They won’t get auto arranged to the left anymore. You can now organize and arrange your desktop icons however you want on your Windows desktop.
Turn off align icons to grid (optional)
What does align icons to grid means? It means that each icon will be aligned to a fixed grid – fixed width and height for each icon, on the desktop in Windows 10 or Windows 11.
By turning off “align icons to grid”, desktop icons will no longer be forced into its own grid. Thus, they can be placed onto literally any position the user wants on the Windows desktop.
![]()
Disabling “align icons to grid” allows more flexibility in arranging and organizing your desktop icons on Windows desktop. For example, you can place the icons very near to each other or very far away from each other without the restriction of fixed space for each icon.
If you are unsure if you want to disable the feature, just give it a try. You can always re-enable it if you prefer icons to be align to grid again.
To disable Align icons to grid option, right-click anywhere on Windows desktop. Hover your mouse over to View. If the “Align icons to grid” option has a tick beside it, click on it to disable the feature.
![]()
Now, try to move your desktop icons around. You should notice that they will no longer be forced onto fixed grid.
Do not “Sort by” after arranging your desktop icons
The “sort by” feature allows you to sort all your desktop icons by name, size, item type or date modified. When any of these is clicked, Windows will rearrange all your desktop icons in order of the option you’ve selected to the left most available grid.
![]()
If you’ve manually arranged your desktop icons recently, avoid clicking any of the sorting options as that will mess up your desktop icons again.
![]()
Backup positions of desktop icons after arranging
If you have a massive number of desktop icons which takes a great amount of effort to be organized, it’s recommended that you save a backup of the positions of your arranged desktop icons in Windows just in case if something happens and mess them up again.
To learn how to do so, read: How to Save and Restore Positions of Desktop Icons in Windows 11/10.


