Many users use their laptop computers with an external keyboard as if they are using a desktop computer. Since built-in hardware such as keyboard are hardwired into the laptop, you cannot disconnect the built-in keyboard from your laptop. If you want to disable your laptop’s keyboard permanently in Windows 11 and use only external keyboard, this guide will show you how to do so.
Disable Laptop Keyboard in Windows 11
Listed below are several methods on how to disable laptop’s keyboard permanently in Windows 11. If one doesn’t work, try the other.
Page Contents
Uninstall keyboard driver and stop Windows from reinstalling it
The first thing that comes to mind when we want to disable a hardware is to uninstall the driver of the hardware. However, Windows will automatically re-install the driver for the keyboard on every restart if it finds that a driver is missing for the device.
The workaround to this issue is to stop Windows from automatically installing or updating the driver for your laptop keyboard. You can do so via the Group Policy Editor.
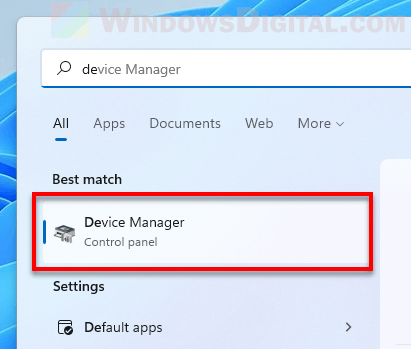
First, we will need the hardware ID of your laptop’s keyboard. To get the ID, go to Start, search for and open Device Manager.
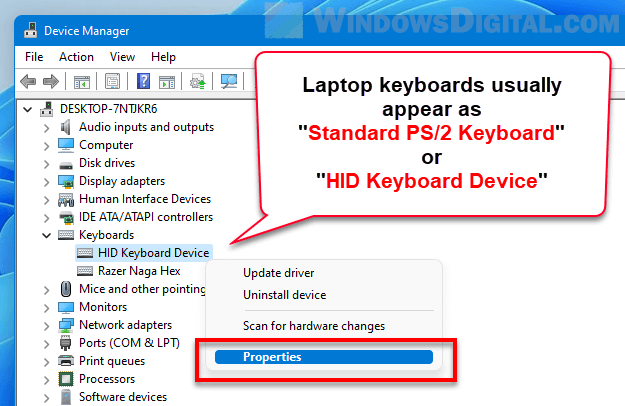
In Device Manager, click on Keyboards to expand the keyboard category which will show all your keyboards currently connected to your laptop PC.
Right-click on your laptop’s keyboard, which usually appears as Standard PS/2 Keyboard or HID Keyboard Device. Then, select Properties.
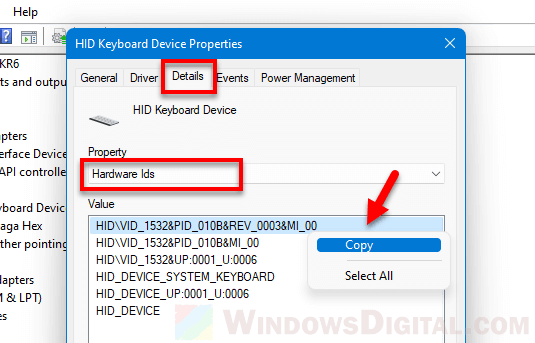
In the Properties window, go to Details tab. Click on the drop-down menu under Property and select Hardware Ids. Right-click on the first value and select Copy. You will need this ID later.
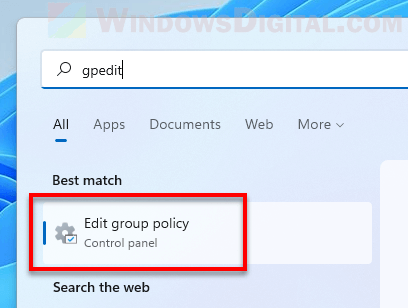
Now, back to Windows desktop, click on Start. Type gpedit and open “Edit group policy“.
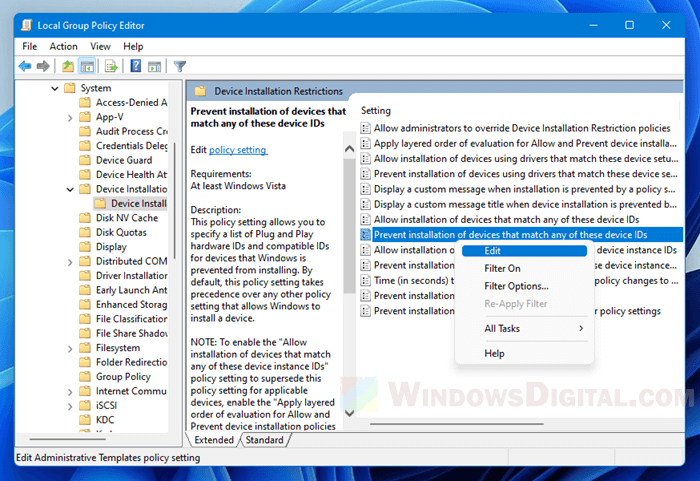
In the Local Group Policy Editor window, navigate to Computer Configuration > Administrative Templates > System > Device Installation > Device Installation Restrictions.
Right-click a policy called “Prevent installation of devices that match any of these device IDs” (not the one with “instance IDs”), and select Edit.
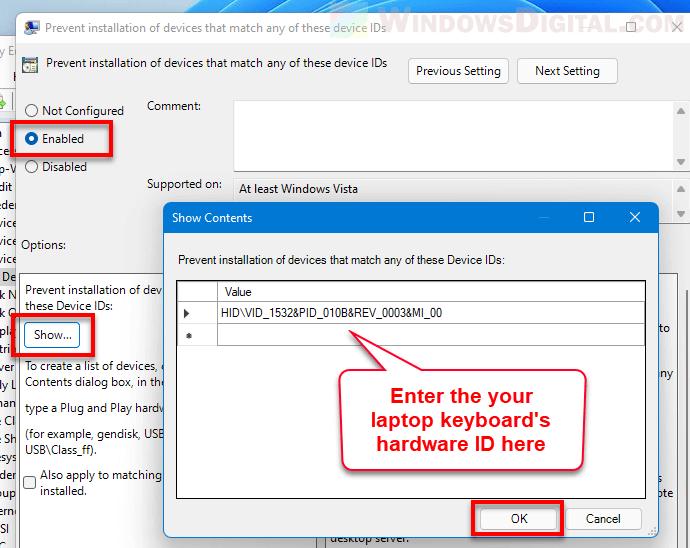
In the policy window, select Enabled, then click on Show in the Options column. Then, paste the Hardware ID (you’ve copied earlier from Device Manager) to the Value field. Click OK to save the changes.
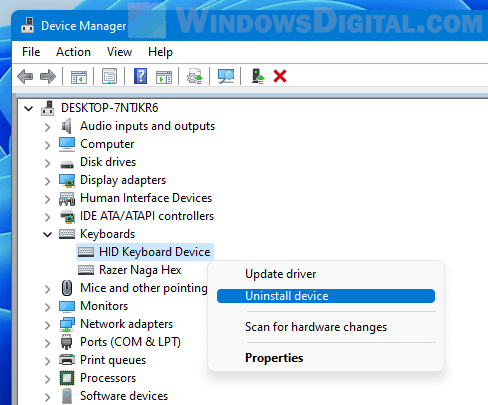
Now, back to device manager, right-click on your laptop keyboard and select Uninstall device to uninstall the keyboard driver.
Since you have configured the policy to tell Windows to not re-install any driver for this specific keyboard, on the next restart, your laptop keyboard driver will remain uninstalled.
Force install a wrong driver for the keyboard to break it
Another method to disable laptop keyboard in Windows 11 is by force installing a wrong or incompatible driver for the laptop keyboard. A driver is a set of files that tells the hardware how to work with Windows. If a wrong driver is installed, the keyboard will not know how to communicate with the operating system and thus stop functioning. To do so, follow the steps below.
Note that if the same keyboard driver also controls other hardware such as your laptop’s touchpad, the touchpad will also stop working after installing a wrong driver for the laptop’s keyboard.
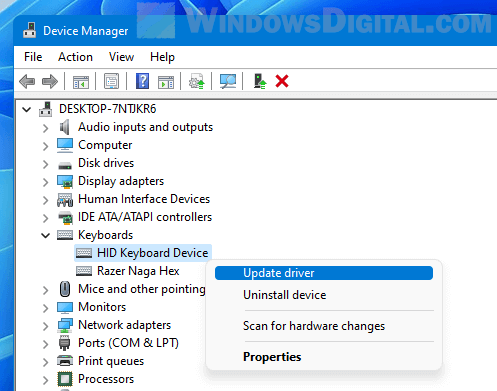
First, go to Start, search for and open Device Manager.
In Device Manager, click on Keyboards to expand it. Next, right-click on your laptop keyboard (usually appears as Standard PS/2 Keyboard or HID Keyboard Device) and select Update driver.
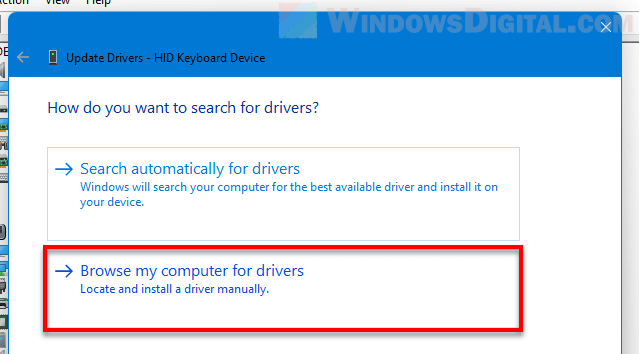
Select Browse my computer for drivers (locate and install a driver manually).
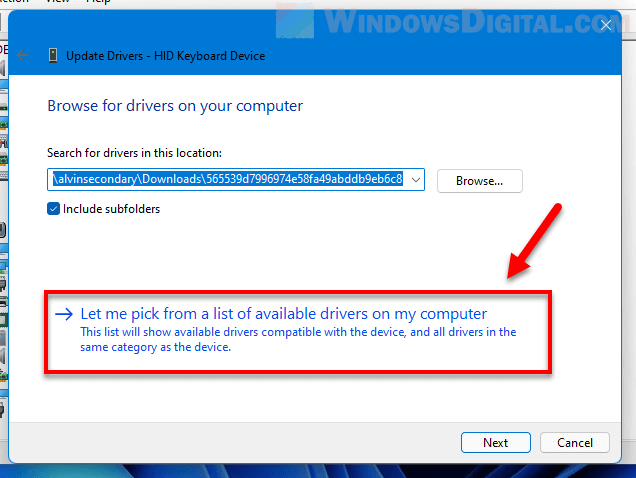
Select “Let me pick from a list of available drivers on my computer“.
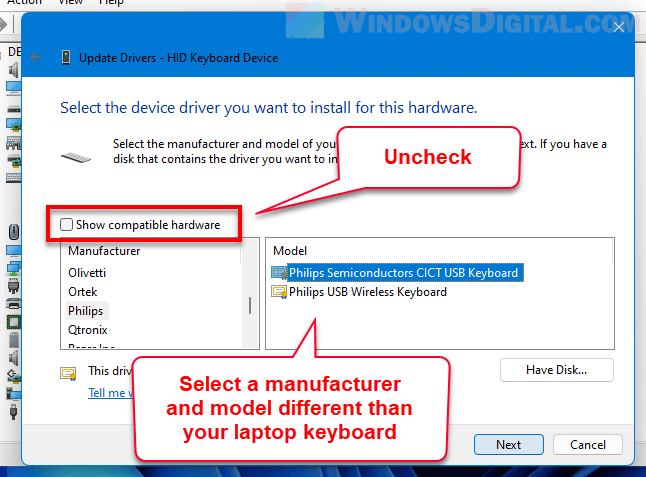
On the next screen, uncheck the checkbox that says “Show compatible hardware“. This will allow Windows to show you a list of all other keyboard drivers even if they are not compatible with your keyboard.
Next, select a manufacturer that is different than your laptop keyboard, and then select a model. Choose Next to continue.
When Windows prompts you for confirmation, click Yes to proceed installing the selected driver.
Once the driver is installed, click Close and restart your computer. Your laptop keyboard should stop functioning on the next restart. If the keyboard is still functioning, repeat the steps above and try a different driver from another manufacturer and model.
Should you want to undo the changes, you can do so by simply allowing Windows to automatically update your laptop’s keyboard driver.
To do so, in Device Manager, right-click on the keyboard again, select Update driver, and then select Search automatically for drivers. Windows will then automatically search for and install the correct and latest driver for the keyboard.
Disable the service that controls PS/2 ports
If none of the above methods work to disable your laptop’s keyboard permanently, you can try to disable the service that controls data communication between the PS/2 ports and your laptop. Once you disable the service, since there won’t be any data communication between the ports and your laptop, the PS/2 keyboard will stop working. In most laptops, the built-in keyboard is the only hardware that uses the PS/2 port.
To disable the service that controls PS/2 ports in Windows 11, follow the steps below.
Go to Start and search for Command Prompt or CMD. Right-click on Command Prompt and select “Run as administrator“. Administrative privilege is required to execute the following command.
In the command prompt, enter the following command.
sc config i8042prt start= disabled
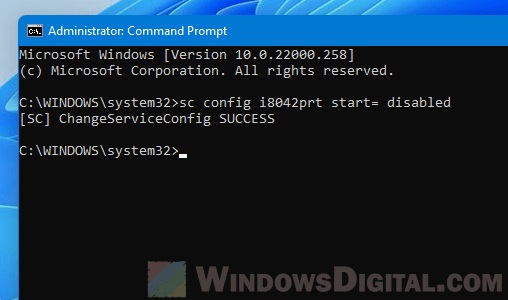
Once executed, restart your computer and your laptop keyboard should stop functioning.
Though extremely rare, there may be other hardware that also uses the PS/2 port. Should something stops working right after you’ve disabled the PS/2 port, or if you simply want to undo the changes and re-enable your laptop’s keyboard, you can re-enable the service using the command below.
sc config i8042prt start= auto