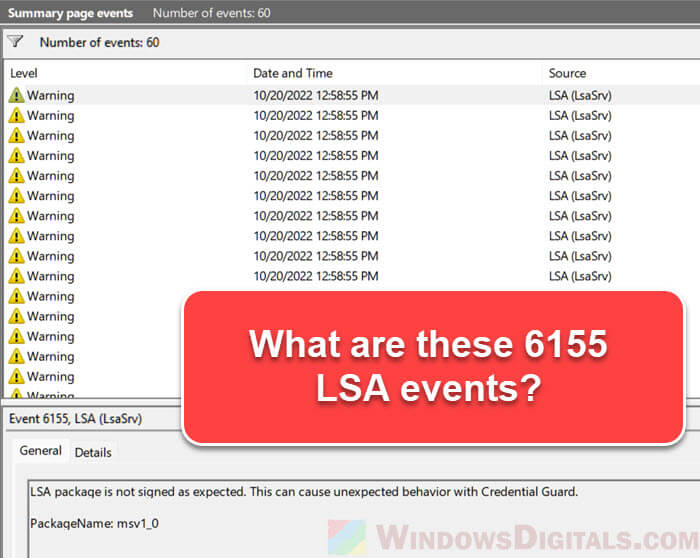
Windows 11 logs events to help users and admins see what’s going on inside the system. Each event has a unique ID that provides details about different things happening within the Windows OS. There has been a common discussion about some users noticing many Event ID 6155 LSA (LsaSrv) warnings in the Event Viewer, with a full message that reads “LSA package is not signed as expected. This can cause unexpected behavior with Credential Guard.” In this guide, we will talk about what this event actually means, why it matters, and what you can do about it.
Also see: Windows 11/10 Computer Blue Screen When Idle
Page Contents
What does the Event ID 6155 LSA (LsaSrv) warning actually mean?
The Local Security Authority (LSA) is just one of many important parts of Windows that checks user IDs, applies security rules, and handles user logins. The LSA service, also called LsaSrv, works with other parts like msv1_0 to make sure user IDs are checked properly.
The warning “LSA package is not signed as expected. This can cause unexpected behavior with Credential Guard.” just means what it says – that there’s a mismatch in the system’s expectations for signed packages versus what it sees. For a little more info, Credential Guard is just a Windows feature that protects password info (we call NTLM password hashes) from being stolen or misused. The warning actually tells you that there could be a threat to this security feature.

It’s not always clear why this warning pops up suddenly, but many do think that a recent Windows 11 update might have caused this bug. A few users have seen this warning without any obvious problems on their PC.
Linked issue: “Please wait for the User Profile Service” Slow or Stuck
How to fix the Event ID 6155 LSA (LsaSrv) warning in Windows 11
There’s no single way to fix this warning since systems and user experiences vary. However, based on what others have found and best practices, here are some possible solutions. Each one has different things to consider, so pick the one that fits your situation best.
Uninstall recent updates
Windows updates usually bring new features and security improvements to keep your system protected and up-to-date. But sometimes, an update might not work well because of the many different types of computers Windows works on. If you started seeing the Event ID 6155 LSA (LsaSrv) warning after a recent update, removing that update might help.
- Click on the Start button and then select Settings.
- In the Settings window, go to Windows Update and then click on Update history.

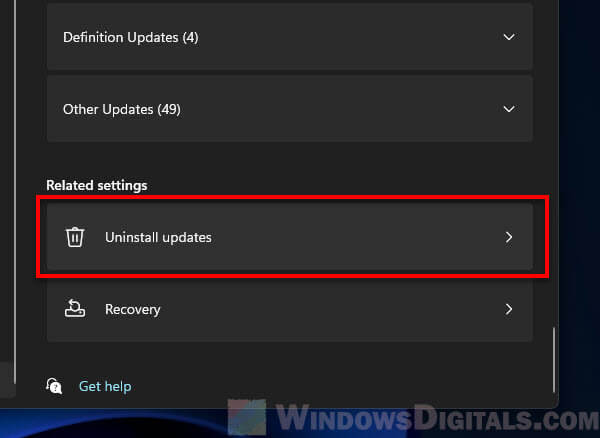
- In the update history window, scroll down to find and select Uninstall updates. A new window will show up with all the recent updates.
- Find updates that were added around when the warning started. Pick them and click on the Uninstall button.
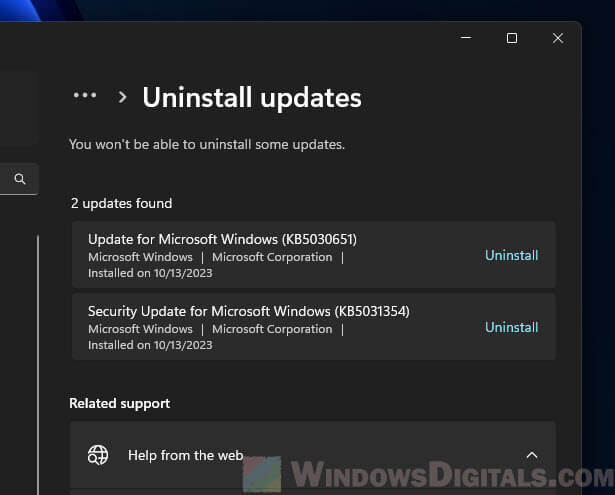
- After you uninstall, restart your computer to make the changes work.
Removing a recent update takes your system back to how it was before the bug. If the warning was really caused by an update, this step should get rid of it. This method directly fixes any changes that might have caused the warning.
But know that, uninstalling updates can also remove important security fixes and new features. Think about the risks and benefits. After taking out the update, you might stop updates for a while until Microsoft fixes the bug. Still, keep checking for important security updates.
Related resource: Disable Network Level Authentication in Windows 11 or 10
Turn on Local Security Authority (LSA) Protection
The Local Security Authority (LSA) is an essential part of Windows that makes sure user logins are secure. Turning on LSA Protection or “RunAsPPL” means only software that is officially approved can talk to the LSA. This reduces the chance of harmful or unwanted software messing with the LSA, which might be causing the warning.
Before you change anything in the Registry Editor, it’s a good idea to create a system restore point. Making mistakes in the Registry Editor can seriously affect how your computer works.
- Press Win + R on your keyboard, type
regedit, and then press Enter.
- Go to the path
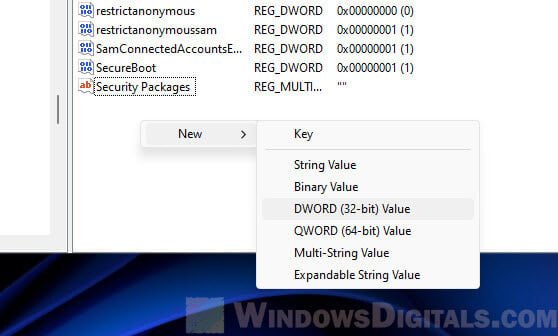
HKEY_LOCAL_MACHINE\SYSTEM\CurrentControlSet\Control\Lsa. - In the Lsa directory, look for the RunAsPPL entry. If it’s not there, right-click on an empty space, choose New, and then pick DWORD (32-bit) Value. Name this new DWORD value RunAsPPL.
- Double-click on the RunAsPPL entry. In the window that opens:
- Set its value data to
1to turn on the feature with a UEFI variable. - For Windows 11 version 22H2 users who want to turn on the feature without a UEFI variable, set the value data to
2.
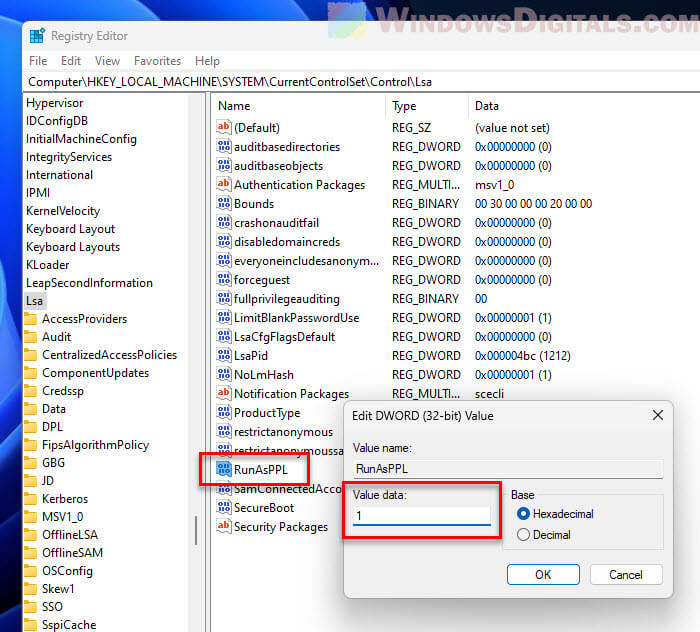
- Set its value data to
- After you make this change, close the Registry Editor and restart your computer to make sure the changes work.
Turning on LSA Protection means only trusted, officially approved software can work with LSA. This extra security can stop problems and warnings caused by unapproved software messing with LSA. If the warning is because of this kind of interference, this step can fix the root of the problem.
Disable Credential Guard (not recommended)
Credential Guard is a Windows feature that keeps some system processes and data safe from the rest of the system by using special security technology. It’s very important for security, but sometimes, it might clash with other parts of the system and cause warnings like the Event ID 6155 LSA (LsaSrv).
- Press Win + R on your keyboard, type
regedit, and then press Enter. - Go to the path
HKEY_LOCAL_MACHINE\SYSTEM\CurrentControlSet\Control\Lsa. - Look for the LsaCfgFlags DWORD value. If it’s not there, right-click on an empty space, choose New, and then pick DWORD (32-bit) Value. Name this new DWORD value LsaCfgFlags.
- Double-click on LsaCfgFlags, and set its value data to
0.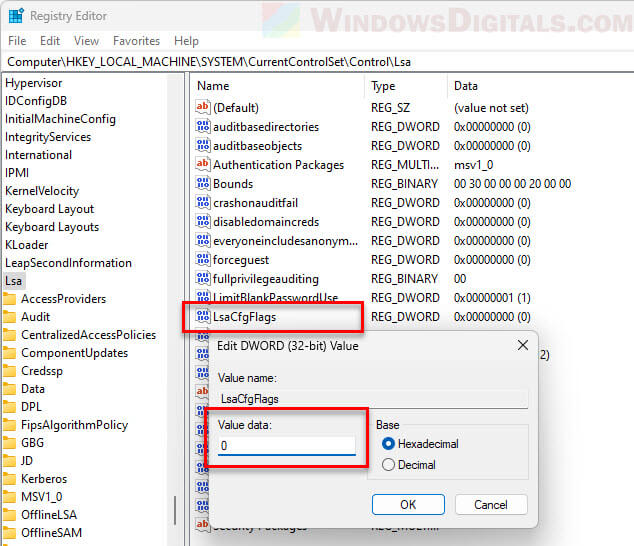
- After you make this change, close the Registry Editor.
- Restart your computer to make the changes work.
By turning off Credential Guard, you might stop conflicts with other system processes that are causing the Event ID 6155 LSA (LsaSrv) warning. If Credential Guard is the cause, stopping it should fix the issue.
Note: Turning off Credential Guard can make your system less secure. Be sure you understand what this means. Turning off Credential Guard should just be a temporary step. Keep looking for updates or fixes from Microsoft that fix the underlying bug, so you can turn Credential Guard back on without the warning.
Check for newer updates that might have fixed the problem
Microsoft often releases updates and patches to fix various bugs reported by users. If the Event ID 6155 LSA (LsaSrv) warning is because of a known bug from a recent update, there’s a good chance Microsoft will fix it in future updates.
- Open Settings: Click on the Start button and then choose Settings.
- Go to Windows Update.
- Click on Check for updates. If there are updates, Windows will start downloading them automatically.
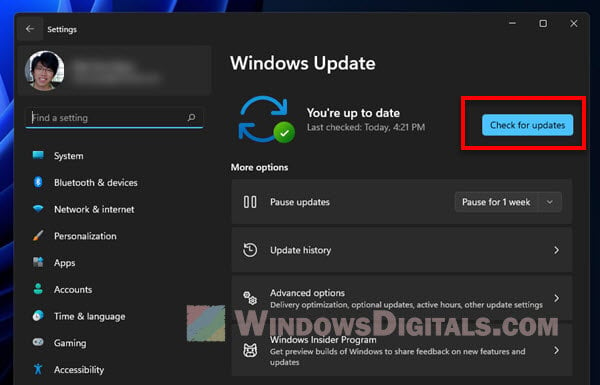
- After the updates are downloaded, follow the instructions on your screen to install them.
- Restart your computer to apply the updates.
If the warning was due to a known problem, the latest updates might get rid of it. Updating your system might solve the problem if it’s related to a known issue.