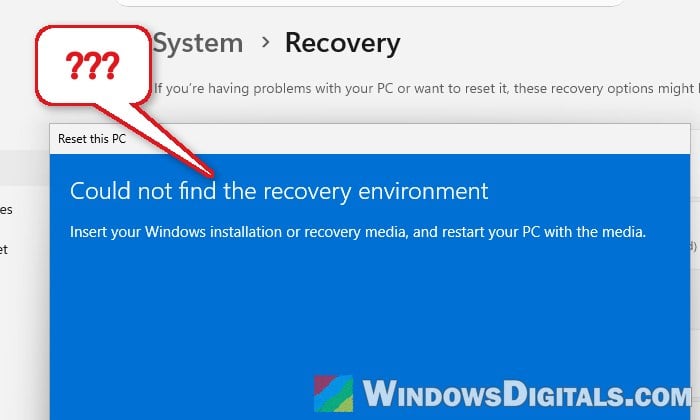
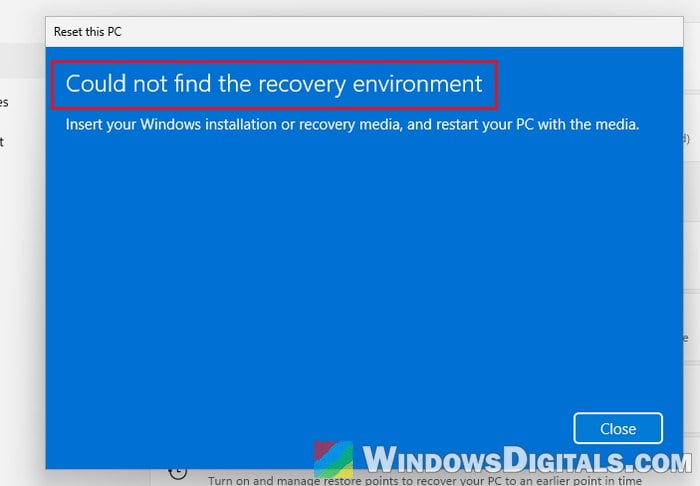
If you try to reset your Windows 11 or 10 PC and it stops with “Could not find the recovery environment” right after you pick Keep my files or Remove everything, asking you to insert your Windows installation or recovery media, it means Windows can’t find the small recovery system it needs to run the reset. This guide will explain why the recovery environment goes missing and how to put it back so the reset can run.
Also see: How to Reset Windows 11/10 to Factory Default
Why can’t Windows find the recovery environment?
Reset this PC relies on the Windows Recovery Environment (Windows RE, or WinRE), a small separate system stored in a file called Winre.wim. If WinRE is turned off, or its Winre.wim file is gone, the reset has nothing to start from and you get this error.
Some common ways this happens are:
- WinRE was turned off and never turned back on, for example while resizing the recovery partition for a Windows update.
- The recovery partition was deleted or moved, for example while extending the C: drive, converting the disk from MBR to GPT, or moving Windows to a new SSD.
- Winre.wim was deleted or lost along the way (the Recovery folder only has ReAgent.xml left), so even turning WinRE back on fails.
It’s a pretty common problem on Reddit and Microsoft’s forums, and which fix you need depends on which of these happened. The first one below is the quickest, so start there.
Check if the recovery environment is turned off
Windows has a built-in tool called reagentc that shows whether WinRE is on and where it’s stored. If WinRE is only switched off and its file is still there, one command turns it back on. Here’s what you should do:
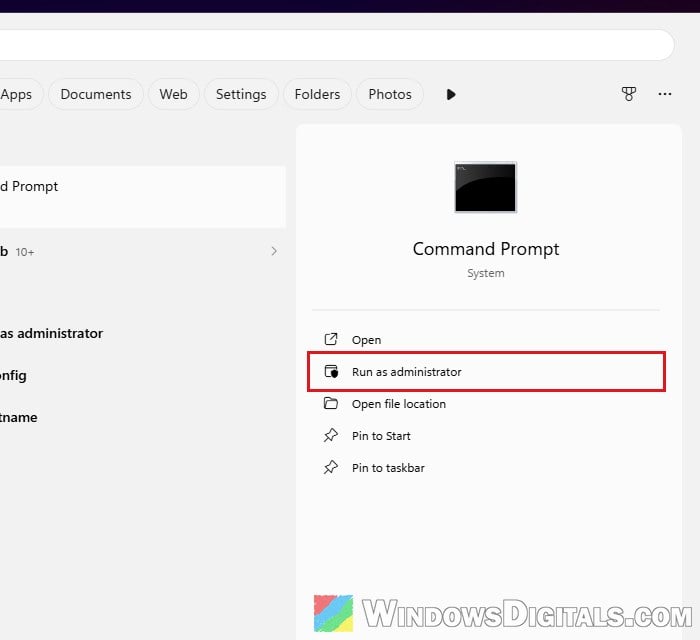
- Search for “cmd” in the Start menu and click Run as administrator under Command Prompt on the right. The command won’t work in a normal Command Prompt.
- Type the following command and press Enter:
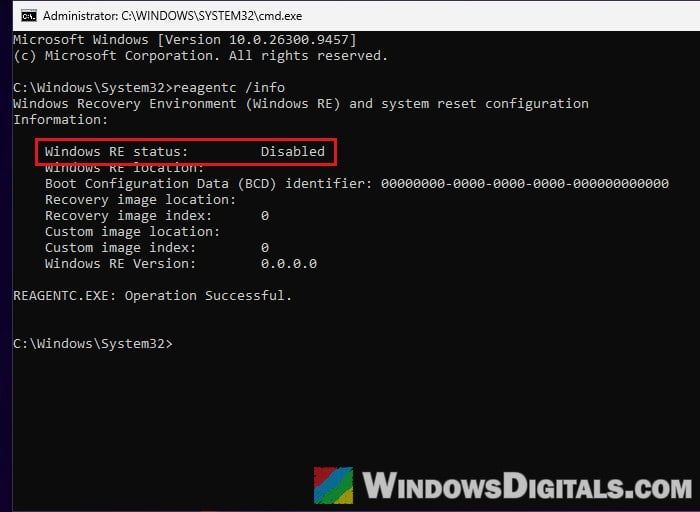
reagentc /info
- Look at the Windows RE status line. If it says Disabled, WinRE is off.
- To turn it back on, run:
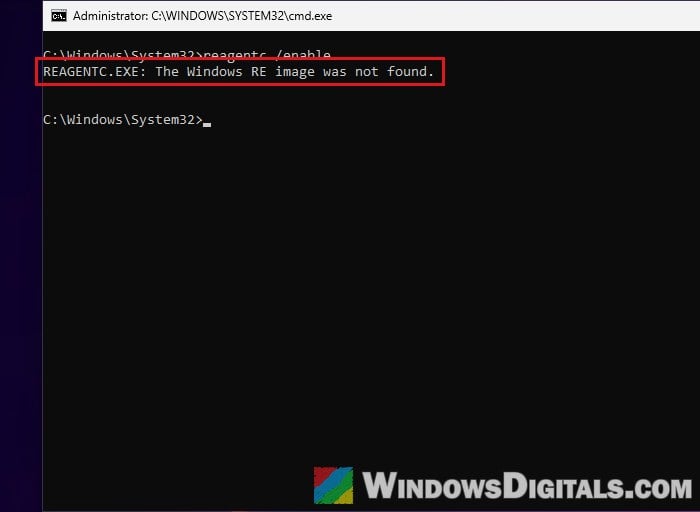
reagentc /enable
- Run
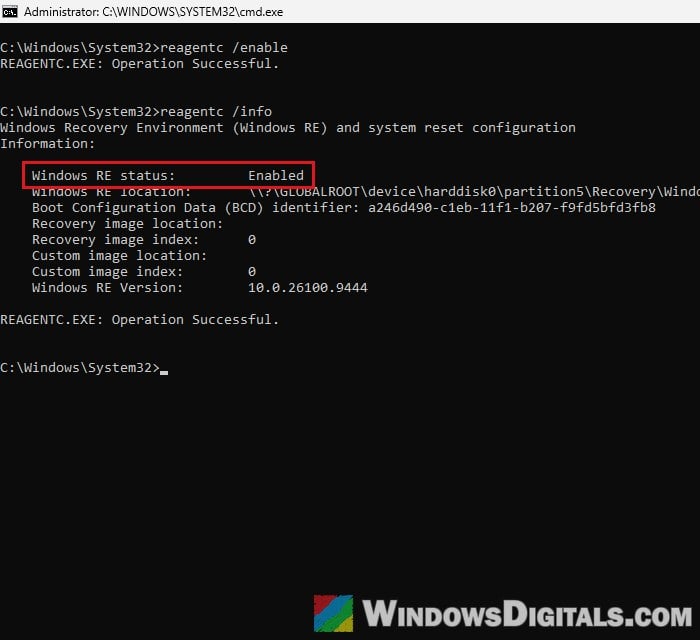
reagentc /infoagain. The status should now say Enabled, and Windows RE location should show a path ending in\Recovery\WindowsRE.
If it’s enabled, go back to Settings > System > Recovery and click Reset PC again. After you pick what to keep, the reset should now go on to ask how you’d like to reinstall Windows (Cloud download or Local reinstall) instead of showing the error.
If reagentc /enable instead says “REAGENTC.EXE: The Windows RE image was not found“, the Winre.wim file itself is missing, so move on to the next fix.
If it says “Operation Successful” but reagentc /info still shows Disabled, try the next fix as well.
Put a fresh Winre.wim back from a Windows ISO
When Winre.wim is gone, you can take a fresh copy from Microsoft’s own Windows ISO. The ISO’s install.wim contains a full Windows image, and Winre.wim sits inside it at Windows\System32\Recovery. Once you copy it to the same folder on your PC, reagentc /enable can find it and turn WinRE back on. Use an ISO of the same Windows version you’re running. The steps below use Microsoft’s Windows 11 ISO.
Here’s what you need to do:
- Go to
https://www.microsoft.com/en-us/software-download/windows11. Under Download Windows 11 Disk Image (ISO) for x64 devices, select Windows 11 (multi-edition ISO for x64 devices) and click Confirm.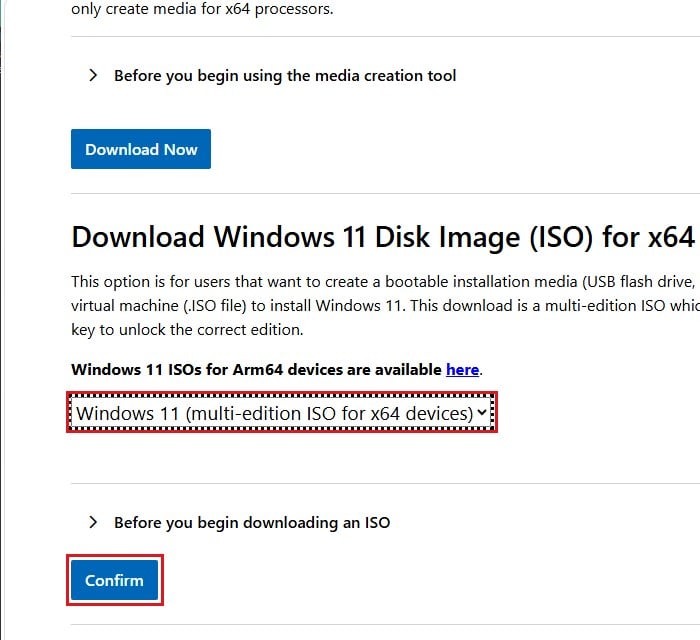
- Choose your language, click Confirm again, then click 64-bit Download. The file is about 9 GB.
- Right-click the downloaded ISO file and select Mount. It opens as a new drive in File Explorer. Note its drive letter (for example E:). Its sources folder has the install.wim file.
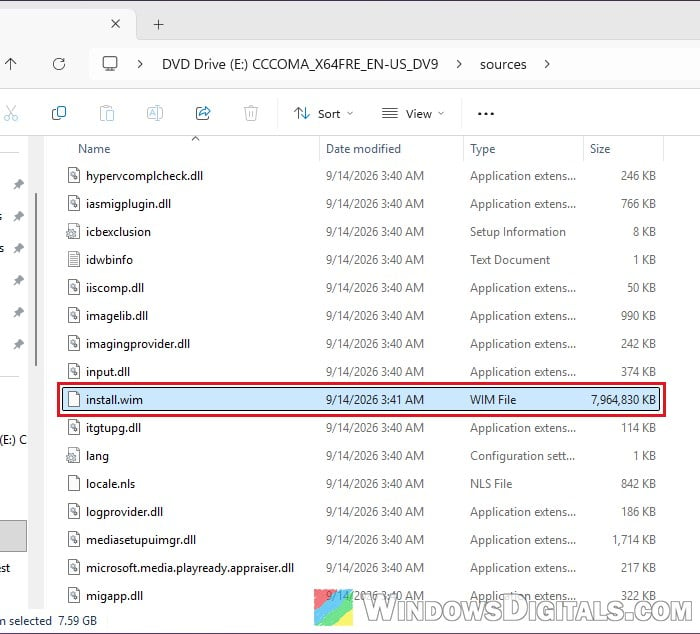
- Open Command Prompt as administrator again and run the following command (replace E: with your ISO’s drive letter):
DISM /Get-ImageInfo /ImageFile:E:\sources\install.wim
Note the Index number of your edition. For example, Windows 11 Pro is index 6 in Microsoft’s current Windows 11 ISO.
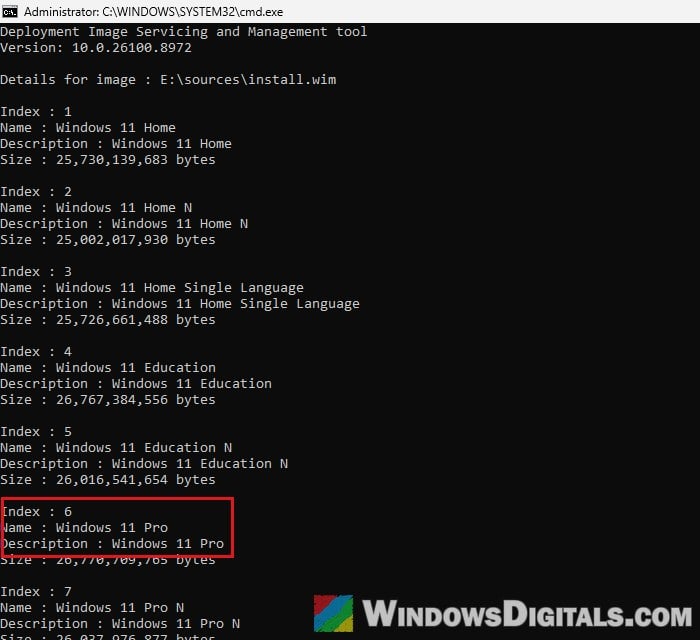
- Create an empty folder to open the image in, then open it read-only (use your own index number instead of 6). Type the following commands one by one, and press Enter after each:
mkdir C:\mount
DISM /Mount-Image /ImageFile:E:\sources\install.wim /Index:6 /MountDir:C:\mount /ReadOnly
It can take several minutes. Wait until it says “The operation completed successfully“.
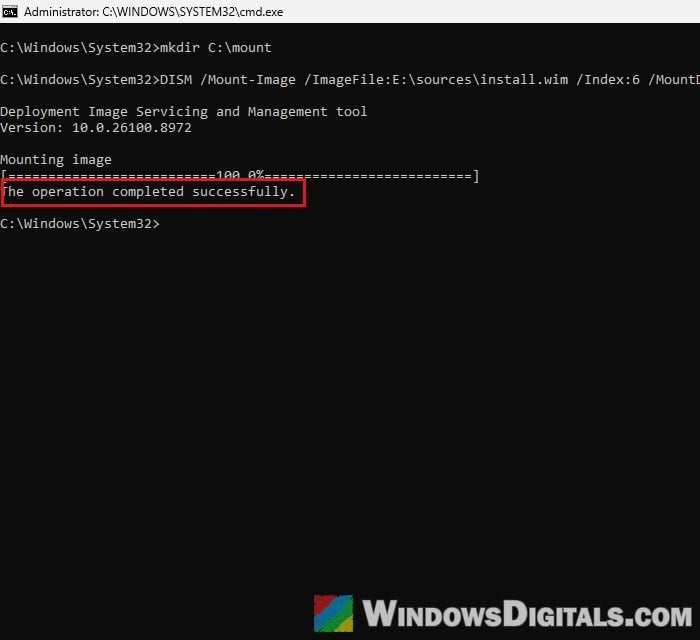
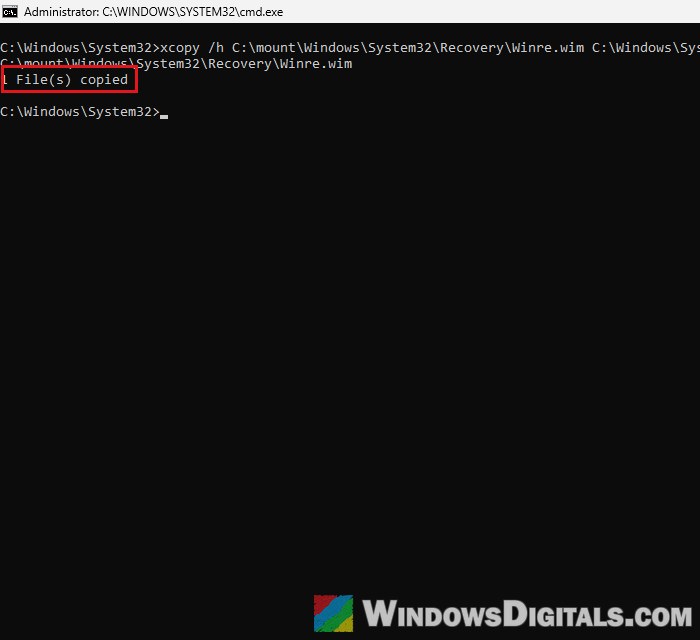
- Copy Winre.wim from the image into your PC’s Recovery folder. The
/hswitch is needed because Winre.wim is a hidden file:xcopy /h C:\mount\Windows\System32\Recovery\Winre.wim C:\Windows\System32\Recovery\
Use this command rather than dragging the file in File Explorer, since File Explorer can refuse with “access denied” on the Recovery folder.
- Close the image without changing it (this also takes a few minutes):
DISM /Unmount-Image /MountDir:C:\mount /Discard
- Turn WinRE back on and check it. Type the following commands one by one, and press Enter after each:
reagentc /enable
reagentc /info
You should see “REAGENTC.EXE: Operation Successful“, and the status should now read Enabled.
Once WinRE shows as enabled, try Reset PC again. You can delete the empty C:\mount folder and unmount the ISO afterwards.
Might be useful: DISM Error 0x800f0915 “The repair content could not be found anywhere”
What if reagentc still says the image wasn’t found?
The Recovery folder also has a small settings file called ReAgent.xml. When reagentc still can’t find the image, renaming that file and turning WinRE on again has worked for some people. In the admin Command Prompt, run:
ren C:\Windows\System32\Recovery\ReAgent.xml ReAgent.old
reagentc /enable
Then check reagentc /info again. If you’re not comfortable with any of these commands, it’s better to get someone who knows to help you instead.
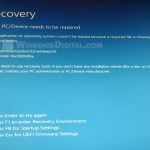
Linked issue: Windows 11: Recovery “Your PC needs to be repaired”
Reinstall Windows and keep your files instead
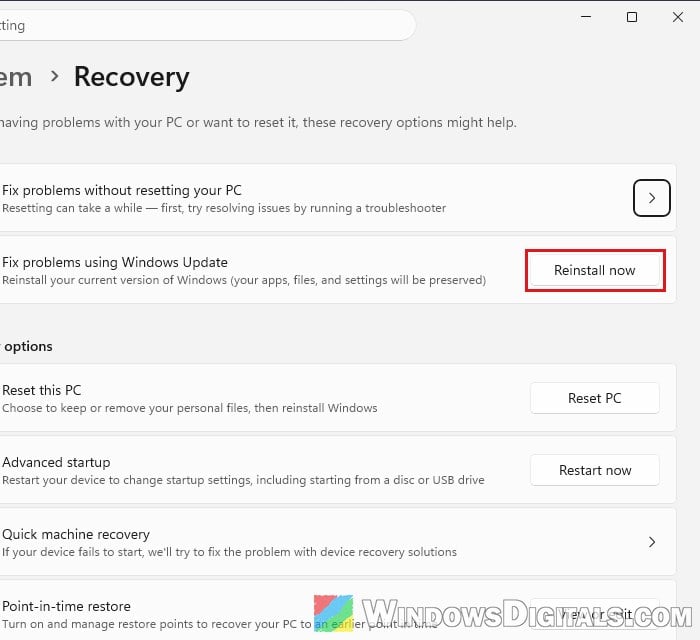
If you wanted to reset your PC only to fix a problem, not to wipe it, there’s another option on Windows 11 that doesn’t need the reset at all. Windows can reinstall its current version through Windows Update, and according to Microsoft, it keeps your files, apps and settings. Here’s how to do it:
- Go to Settings > System > Recovery.
- Next to Fix problems using Windows Update, click Reinstall now and follow the prompts.
This downloads a fresh copy of Windows and can take a while. Since it removes nothing, it’s not the way to clean the PC for a new owner.
Clean install Windows from a USB drive
If nothing above brings the recovery environment back, or you want a completely clean PC anyway, install Windows from a bootable USB drive, which is also what Microsoft suggests. It doesn’t need WinRE at all.
Be warned: A clean install removes everything on the drive you install to, including your files and apps. Back up anything you want to keep to another drive or the cloud first.
To make the USB drive, you can use Microsoft’s Media Creation Tool or burn the same Windows ISO from the second fix to it. For detailed instructions, read: How to Burn Windows 11 ISO to USB. Then start the PC from the USB drive and follow the setup.