Knowing how to add static Domain Name System (DNS) entries on your computer can be very helpful in many situations. This action helps you manage network settings, test websites while creating them, or block certain sites. In Windows 11, when you set up a static DNS entry, you link a specific IP address to a domain name. This skips the normal DNS lookup process and can make accessing some servers faster.
This guide will show you an easy, step-by-step instruction on how to add a static DNS entry in Windows 11 and cover more complex topics about DNS and the hosts file.
Page Contents
Before you start
Here’s what you need to know before proceeding:
- DNS: This is how your computer turns names like www.example.com into numbers (IP addresses) so it knows where to go on the internet.
- Static DNS entry: This is when you manually tell your computer to always use a specific IP address for a certain domain name, skipping the usual lookup process.
- Administrator rights: You’ll need to be the boss of your computer (have administrator rights) to do this because it involves changing system settings.
Linked issue: Access Denied When Editing Hosts File in Windows 11/10
How to add a static DNS entry
The steps below are how you add a static DNS entry in Windows 11:
- Start File Explorer by clicking its icon or pressing Win + E.
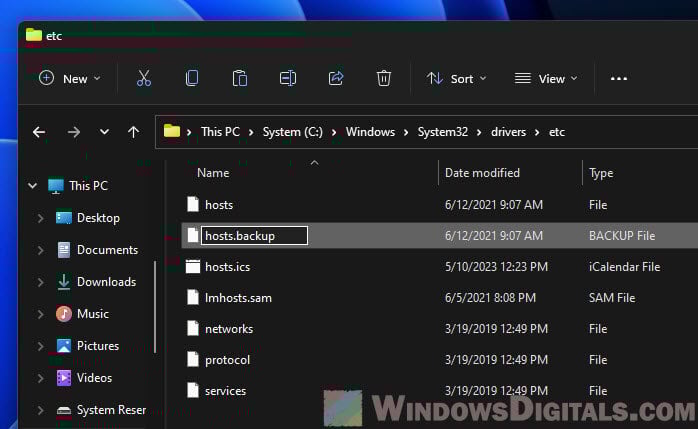
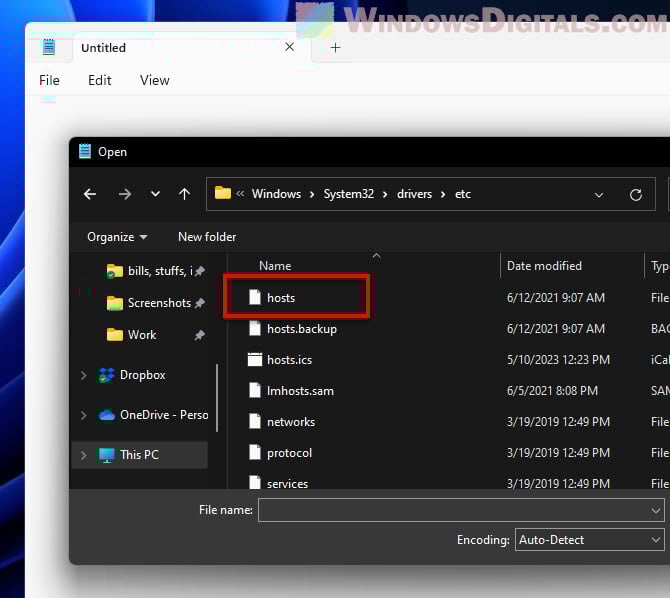
- Go to
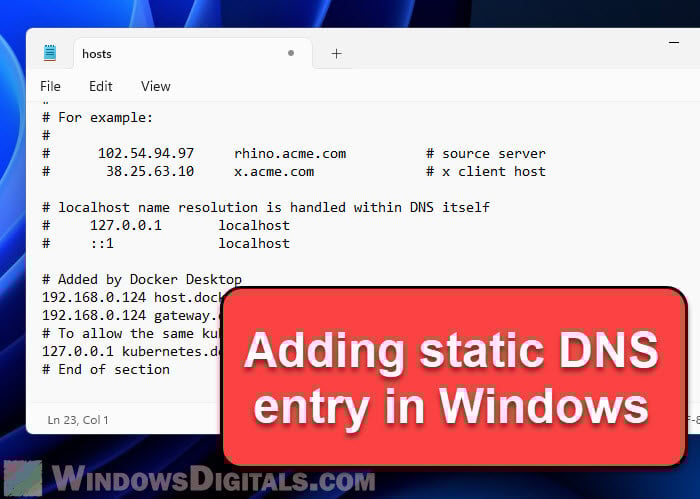
C:\Windows\System32\drivers\etcand look for a file namedhosts. This file is where your static DNS entries live. - Make a copy of the hosts file just in case you need to undo your changes. Just right-click, copy, and paste it somewhere safe.
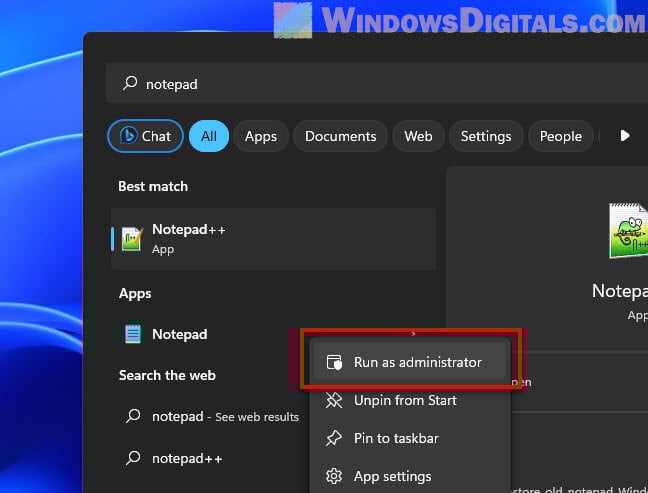
- Open Notepad or another text editor as an administrator by searching for it and right-clicking to run as admin.
- In the text editor, go to File > Open.

- Find the hosts file again and open it. If you can’t see it, choose to show “All files” to make it appear.
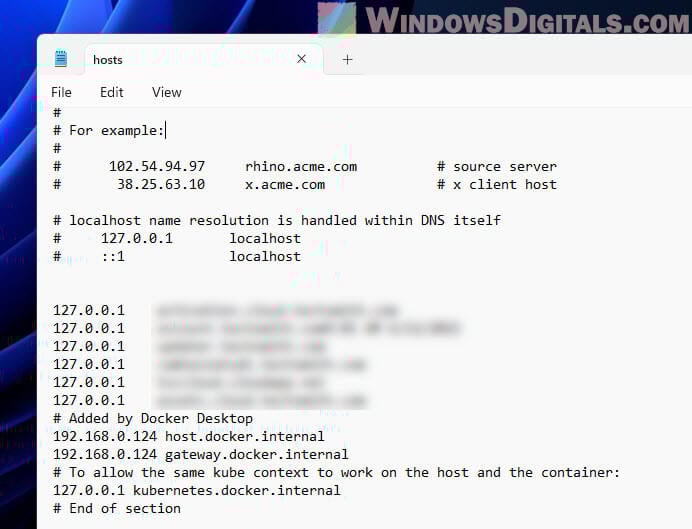
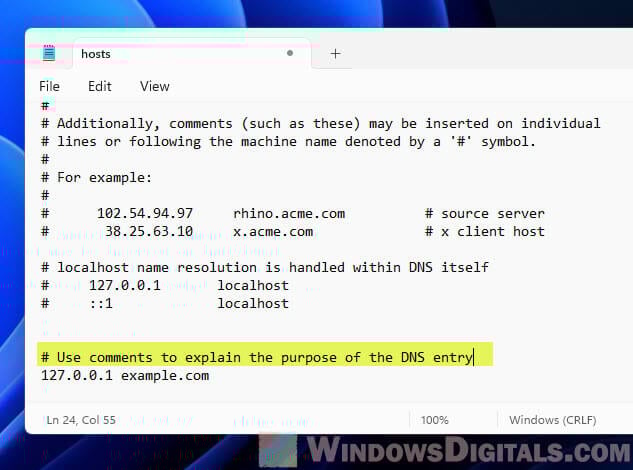
- To add a static DNS entry, go to the end of the file and type the IP address, a space, and the domain name. For example:
192.168.1.1 example.com
You can also leave comments for yourself by starting a line with a
#.
- Save your changes and restart your computer to make them take effect.
Handy tip: How to Use Netsh Interface IP Set Address or DNS in CMD
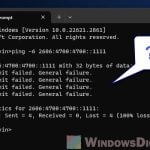
Check if it worked
To make sure your static DNS entry is doing its job, you can:
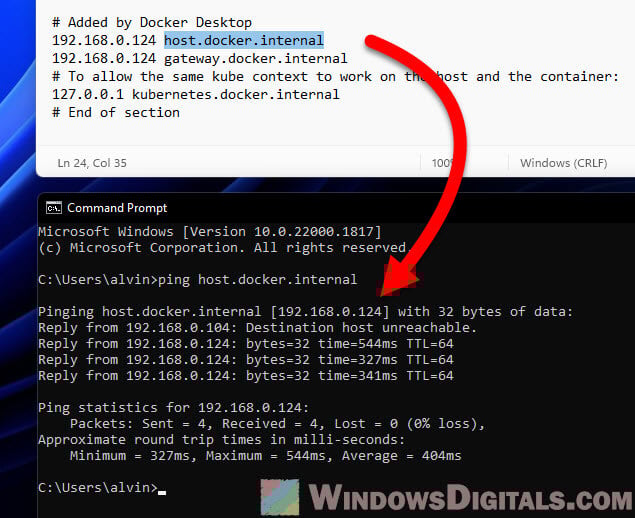
- Open Command Prompt by searching for it and hitting Enter.
- Test it by typing
pingand the domain name. Like this:ping example.com
If things are set up right, you’ll see the IP address you chose.
Related problem: Some Websites Not Loading in Windows 11 (Fix)
Fixing common problems
If you’re having trouble, here are some things to check:
- Make sure the IP address and domain name are correct in the hosts file.
- Check that you saved the changes before restarting your computer.
- Confirm you have administrator rights since you need them to change the hosts file.
- Look out for typos or extra spaces that could mess things up.
- If all else fails, go back to your backup of the hosts file and try again.
Knowing the hosts file
The hosts file is a simple text file located at C:\Windows\System32\drivers\etc. It lets you set up custom DNS entries on your computer. These entries can ignore what the DNS server says, which is handy for testing websites, blocking websites, or speeding up access to certain sites.
Here’s how the hosts file works:
127.0.0.1 localhost
192.168.1.1 example.com www.example.com
203.0.113.10 test.example.org
# This is a comment explaining the entry below
198.51.100.42 blocked-site.com
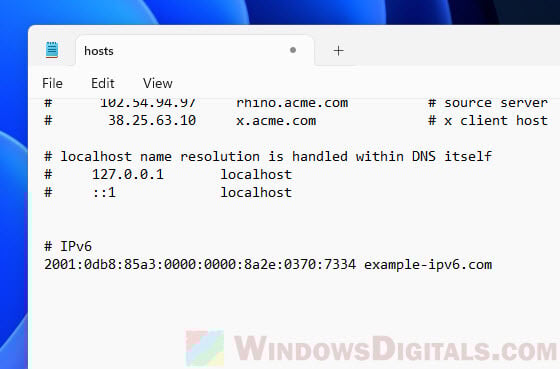
IPv6 support in the hosts file
You can also use IPv6 addresses in the hosts file, just like IPv4. Here’s how to do it with an IPv6 address:
2001:0db8:85a3:0000:0000:8a2e:0370:7334 example-ipv6.com
Some clever ways to use static DNS entries
The following are a few things you can do with static DNS entries:
- If you’re building a website on your computer, you can point the domain name to your IP address (127.0.0.1 for IPv4 or ::1 for IPv6). This lets you test your site with its real name before it’s out in the wild.
- To block a website, simply link its domain name to a dead-end IP address, like 0.0.0.0. This is a neat trick for keeping distractions or harmful sites at bay. More on this: Blocking access to websites.
- When moving your site to a new place or tweaking DNS settings, you can preview the changes in your hosts file before making them live. This helps avoid surprises and downtime.
- Sometimes, to troubleshoot network issues or access a server in a specific way, adding a static DNS entry can be a big help.
Make sure your hosts file is tidy and free of errors
To keep your hosts file tidy, check the following steps:
- Always back up the file before making changes. It’s your safety net.
- Use comments to note why you added each entry. It’ll save you headaches later.
- Organize entries by grouping related ones together. It makes things easier to find and manage.
- Get rid of old entries you don’t need anymore to keep the file clean.
- Test your changes to make sure everything works as expected.
- Limit who can change the file to just those with administrator rights, to avoid mishaps.
- If you find yourself changing the hosts file a lot, maybe look into other ways to manage DNS, like using a local DNS server or a different tool for the job.
To wrap things up
Adding a static DNS entry in Windows 11 gives you more control over how your computer connects to the internet and deals with domain names. The steps in this guide will help you set up, change, or remove static DNS entries on your system.
Just don’t forget to always back up your hosts file before making any changes and keep your entries clear and well-documented.