KB5132061, the Windows 11 security update Microsoft released on November 10, 2026, should download and install like any other monthly update, but on some PCs it fails with “Install error – 0x800f0993“, 0x800f0989 or 0x80070306, or sits at “Installing” for over an hour without finishing. This guide will show you which fixes have worked so far and which ones to try first.
Also see: Windows 11 Update Fails With Error 0x80070306 (KB5127648)
Why won’t KB5132061 install?
KB5132061 is the required monthly security update for Windows 11 version 26H2 (build 26300.9974), 25H2 (build 26200.9974) and the Enterprise and Education editions of 24H2 (build 26100.9974). In Windows Update, it shows up as “2026-11 Security Update (KB5132061)“. It also brings the changes from October’s optional preview update.
Since the day it came out, people have reported it failing in a few different ways:
- Install error – 0x800f0993 or 0x800f0989 on the Windows Update page.
- 0x80070306, shown as “Windows failed to install the following update with error 0x80070306”.
- The progress getting stuck at around 20% or 99%, then failing or starting the download all over again.
Microsoft has since added failed installs with these exact error codes to the known issues on its KB5132061 page, but only for Windows 11 version 24H2, Enterprise and Education editions. It says the fix reaches those PCs through Windows Update by itself, within 24 to 48 hours from 10am PT on November 11, so there’s nothing you need to do.
Microsoft hasn’t said anything about the same errors on 25H2 or 26H2, or what causes them. Oddly, the same update can install fine on one PC and fail on another that’s almost identical. On some PCs, Windows Sandbox seems to be involved (more on that below).
Linked issue: Windows Update “Install error – 0x800f0993” in Windows 11
Restart and try again a bit later
Before you run any commands, give the update another chance. Several people on Reddit found that it went through on a later try with nothing else changed, sometimes the next morning. Whatever was wrong may have been on Microsoft’s end. On a 24H2 Enterprise or Education PC, keep it connected to the internet. Microsoft says its automatic repair should reach every affected PC by November 13, 48 hours after it started. If it still fails after that, Microsoft says to contact support.
Here’s what you should do:
- If you’re on a laptop, plug in the charger and keep it plugged in until the update is done.
- Restart your PC.
- Press Win + I, select Windows Update, and click Retry (or Download & install) next to KB5132061.
- Leave the PC alone until it asks you to restart.
If it keeps failing and you’d rather wait for Microsoft to sort it out, you can pause updates for a few days from the same page: click Pick a date next to Pause updates and choose a date.
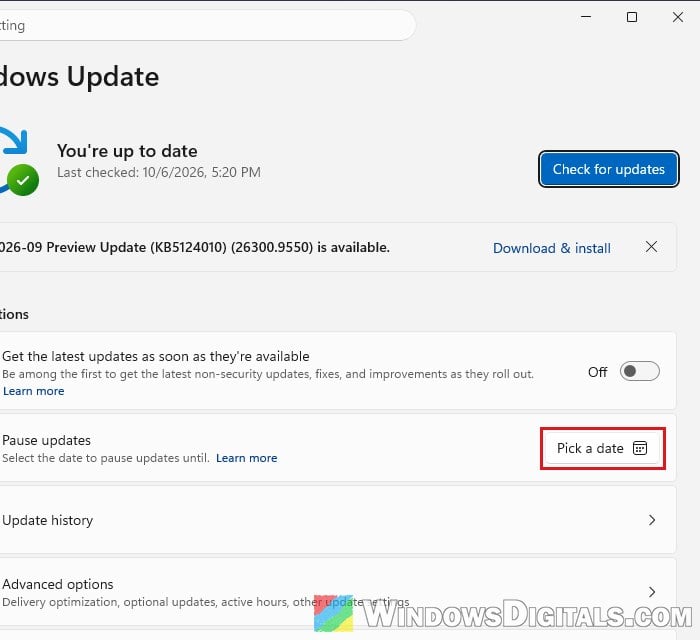
Don’t put it off too long, since this one carries security fixes. If you need it installed now, move on to the next fix.
Turn off Windows Sandbox for the install
This only applies if you’ve turned on Windows Sandbox, the built-in feature that runs apps in a throwaway copy of Windows. It’s off unless you or someone else turned it on, and it’s only in the Pro, Enterprise and Education editions.
On some PCs with Sandbox turned on, the update seems to look for a file Sandbox uses to build its own copy of Windows, can’t find it, and fails. Turning Sandbox off, installing the update, and then turning it back on has worked for people with KB5132061 and with October’s updates before it. Microsoft hasn’t confirmed this yet, though.
Follow the steps below:
- Press Win + R, type “optionalfeatures“, and press Enter.
- In the Windows Features window, uncheck “Windows Sandbox” and click OK.
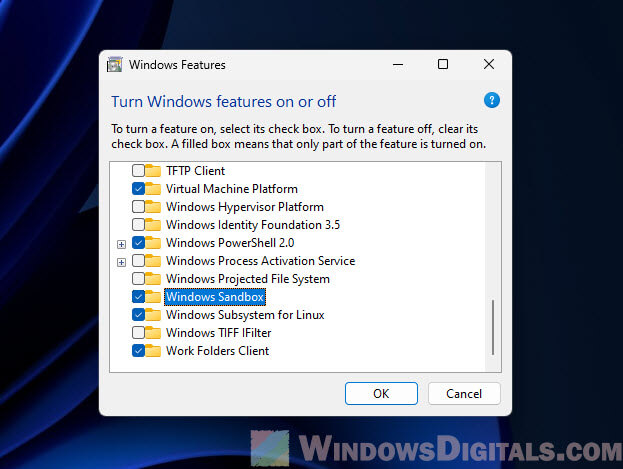
- Restart your PC when it asks you to.
- Go to Settings > Windows Update and install KB5132061.
- Once it’s installed and you’ve restarted, open “optionalfeatures” again, check “Windows Sandbox“, click OK and restart.
If Windows Sandbox was already unchecked, skip to the next fix.
Related concern: Windows Sandbox Keeps Closing With Error 0x80370106 on Windows 11
Clear the Windows Update download cache
Windows keeps the files it downloads for updates in a folder called SoftwareDistribution. If something in there is broken, every retry uses the same broken files. Renaming the folder makes Windows download everything again. This got KB5132061 installed for some people, though not for everyone.
Here’s how to do it:
- Click Start, type “cmd“, and select Run as administrator for Command Prompt, then click Yes.
- Type the following commands one by one, and press Enter after each:
net stop dosvc
net stop usosvc
net stop bits
net stop wuauserv
ren C:\Windows\SoftwareDistribution SoftwareDistribution.old
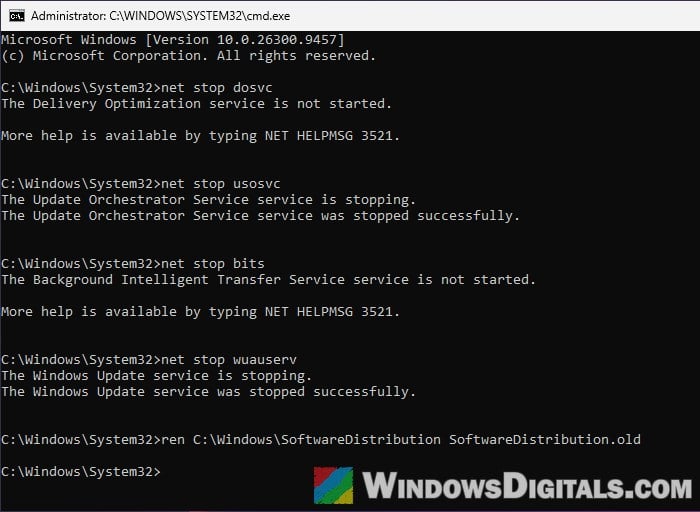
- A message saying a service “is not started” is fine.
- If the
rencommand says “Access is denied“, one of these services started itself again in the background. Run all fournet stopcommands again, and therencommand right after the last one.
- Restart your PC. Windows starts the services again by itself.
- Go to Settings > Windows Update, click Check for updates, and let it download KB5132061 again.
Repair update files with DISM and SFC
If the update still fails, some of the files Windows uses to install updates may be damaged. According to Microsoft, DISM repairs those files, and SFC then checks the system files themselves. They’re safe to run, and you can do both from the same Command Prompt.
Follow the steps below:
- Open Command Prompt as administrator, as in the fix above.
- Type the following command and press Enter:
DISM.exe /Online /Cleanup-Image /RestoreHealth
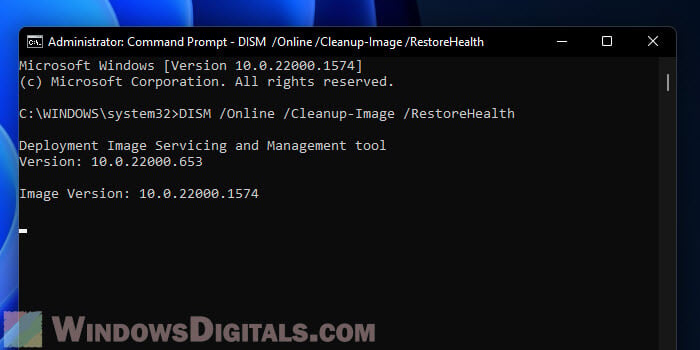
- When it’s done, type the following command and press Enter:
sfc /scannow
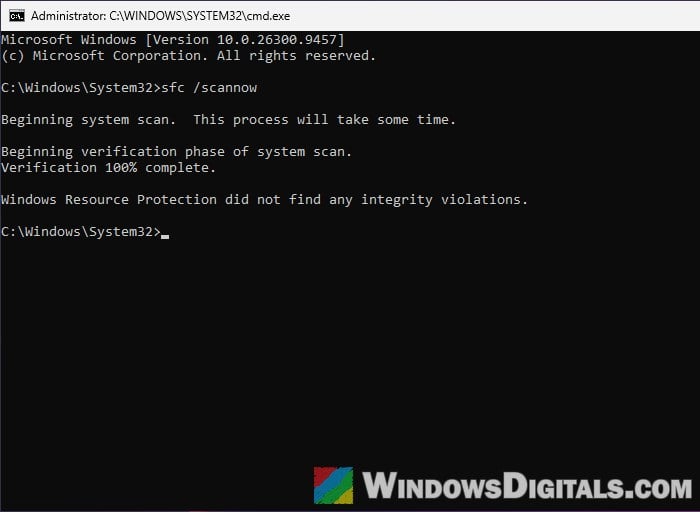
- Restart your PC, then try installing KB5132061 again.
Related problem: DISM Error 0x800f0915 “The repair content could not be found anywhere”
Install KB5132061 manually from the Microsoft Update Catalog
You can also download the update straight from Microsoft and install it yourself. It’s about 5 GB, and there are no reports yet of it working where Windows Update failed, but it’s worth a try before the repair install below.
Please note that according to Microsoft, another update, KB5043080, has to be installed first. On 26H2, your PC also needs an update from September 22, 2026 or later (such as KB5124010), which you can check in Update history.
Here’s what you should do:
- Go to
https://www.catalog.update.microsoft.com/and search for “KB5132061“. If the page stays blank, refresh it. - Find the line for your version of Windows 11, such as “2026-11 Cumulative Update for Windows 11, version 26H2 for x64-based Systems (KB5132061) (26300.9974)“. For 25H2, pick the “version 25H2” line ending in (26200.9974).
- Pick the x64 line for most PCs, and arm64 only for ARM-based laptops.
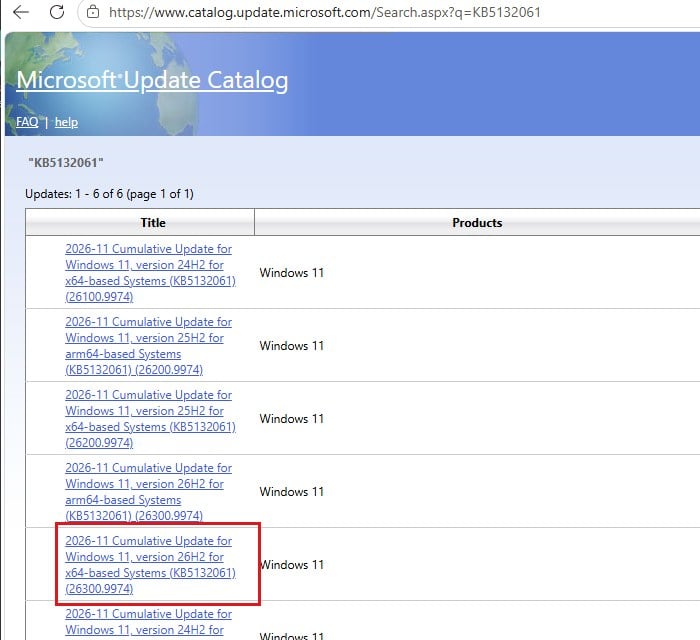
- Click Download on that line.
- In the window that opens, click each .msu file (one for kb5132061 and one for kb5043080) to download it, and save both into the same folder.
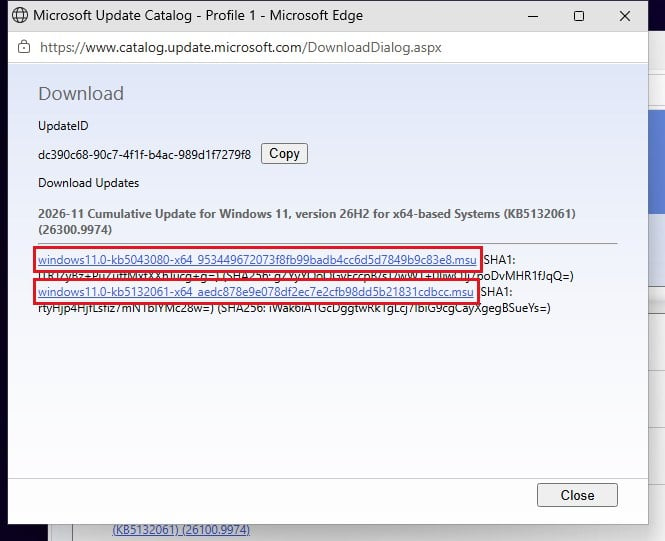
- Double-click the windows11.0-kb5043080 file first and let it install, then do the same with the windows11.0-kb5132061 file.
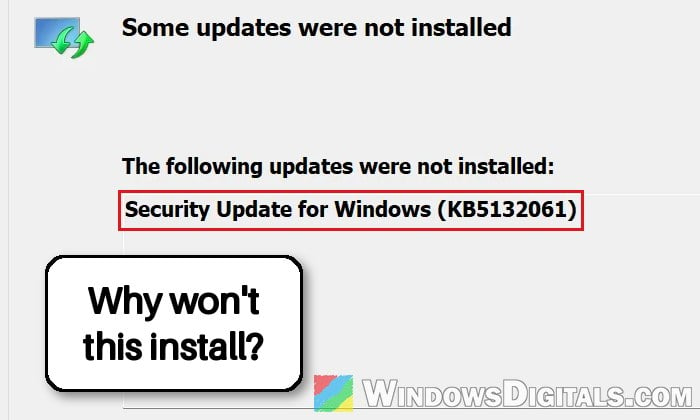
If the install fails this way too, Windows shows a “Some updates were not installed” window naming the update. Otherwise, restart your PC when it’s done, then go to Settings > Windows Update > Update history to see if KB5132061 is listed as installed.
Use “Fix problems using Windows Update”
If nothing else works, Windows 11 can reinstall your current version of Windows through Windows Update, which replaces damaged system files along the way. It keeps your apps, files and settings. For 0x800f0989 in particular, it may be the only thing that works.
Learn more: “Reinstall your current version of Windows” Message
It takes a while, so back up anything important, then keep your PC plugged in and connected to the internet. Microsoft says this option may not be available on some PCs managed by a work or school.
Here’s how to start it:
- Press Win + I and go to System > Recovery.
- Under “Fix problems using Windows Update“, click Reinstall now.
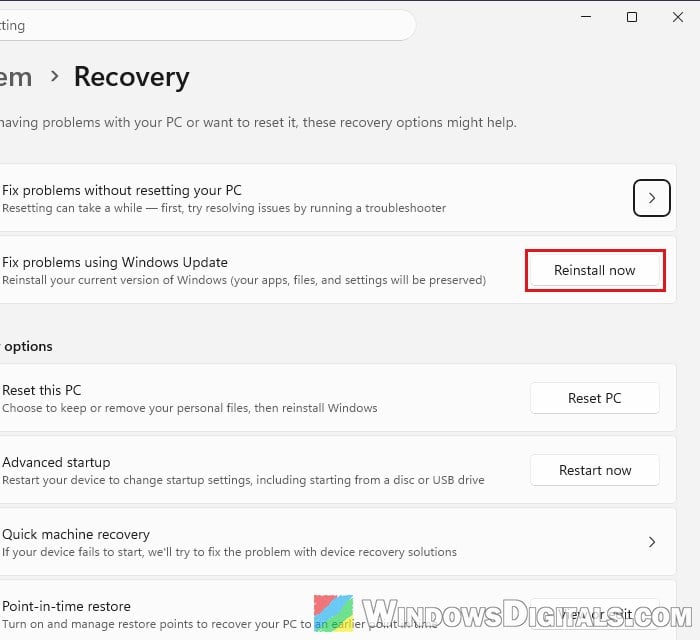
- Let Windows download and install the files. Don’t turn off the PC while it works.
- When it’s done, go back to Settings > Windows Update and check for updates again.