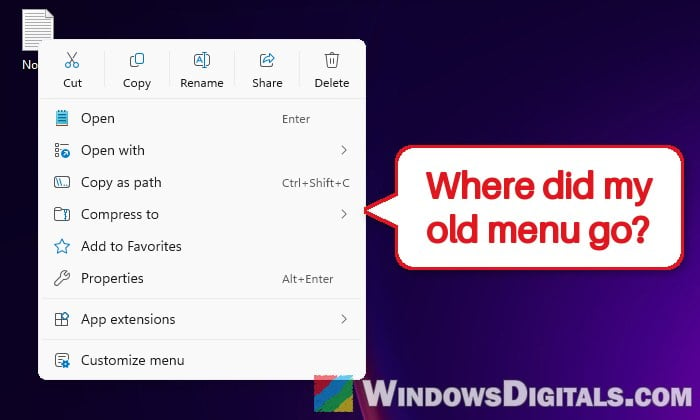
If you used the well-known registry tweak to make Windows 11 always show the old right-click menu, and now right-clicking a file shows a new Windows 11 menu with Customize menu at the bottom, the tweak has most likely stopped working because of the new context menu that came with a recent update. This guide will explain what changed and show you the ways you can still get the classic menu back.
Also see: How to Customize Right-Click Menu in Windows 11
Why did the old right-click menu tweak stop working?
The tweak that most guides share adds an empty registry key for the Windows 11 context menu, so File Explorer can’t load it and falls back to the old menu instead. It’s a single command:
reg.exe add "HKCU\Software\Classes\CLSID\{86ca1aa0-34aa-4e8b-a509-50c905bae2a2}\InprocServer32" /f /ve
On October 28, 2026, Microsoft released KB5127936, an optional preview update for Windows 11 version 26H2 (build 26300.9818) and 25H2 (build 26200.9818). It brings a redesigned File Explorer context menu that opens faster, shows fewer items, and can be customized from Settings. According to Windows Latest, the same menu also comes with the regular November 2026 update. Insider builds have had it since the summer.
The new menu simply ignores the old registry key. We tested it on Windows 11 26H2 with the new menu turned on: the key was in place and File Explorer was restarted, but right-clicking a file still showed the new menu, with App extensions and Customize menu at the bottom and no Show more options entry at all.
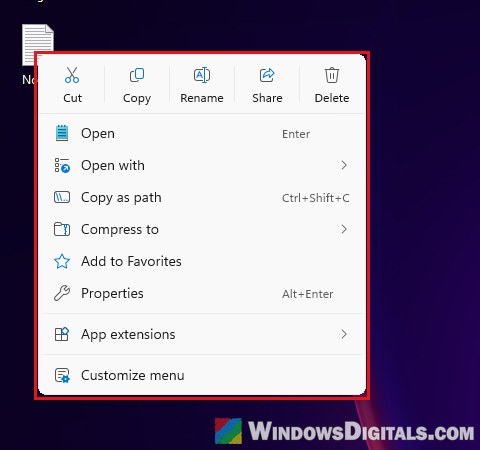
Note that Microsoft is rolling the new menu out gradually, so some PCs with KB5127936 installed still have the old Windows 11 menu, and the tweak still works on those.
Pro tip: Restart Explorer.exe with CMD or PowerShell in Windows 11
Hold Shift while you right-click
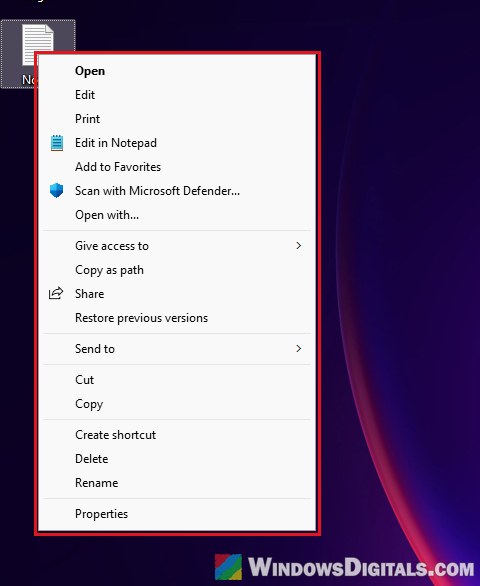
The quickest way to get the full classic menu still works, and Microsoft even mentions it in the update’s notes. Hold down the Shift key while you right-click a file or the desktop, and Windows opens the old menu with everything in it (Send to, Give access to, Restore previous versions, your apps’ entries and so on).
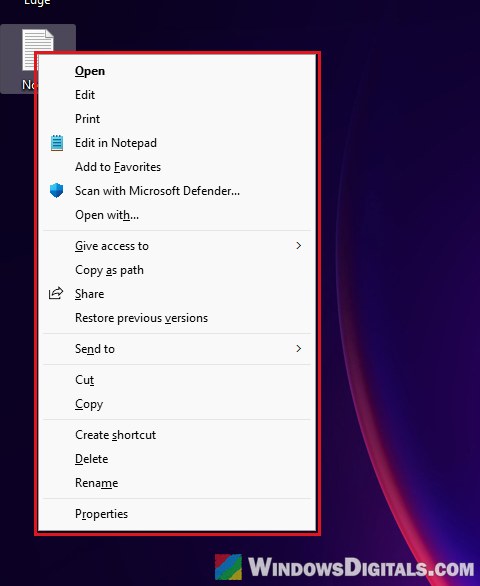
It’s not the same as having the old menu by default, but it works on every PC, with or without the new menu, and it doesn’t change anything in Windows.
Turn on “Show more options” in the new menu’s settings
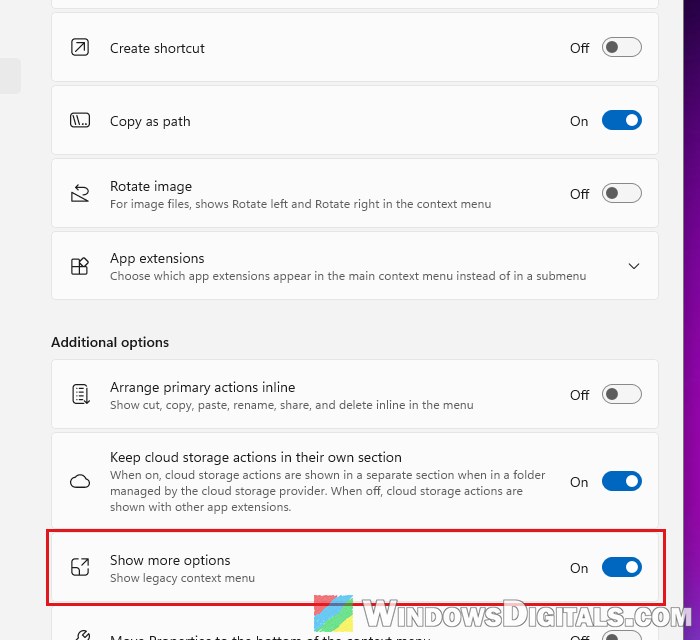
If you’d rather click your way to the old menu, the new menu has its own setting for it. It’s called Show more options (described as “Show legacy context menu”) and it’s off by default, which is why the entry seems to be gone. Microsoft says it’s there for people who still need their apps’ older menu entries.
Here’s how to turn it on:
- Right-click any file and select Customize menu at the bottom of the menu. You can also go to Settings > Personalization > Context menu.
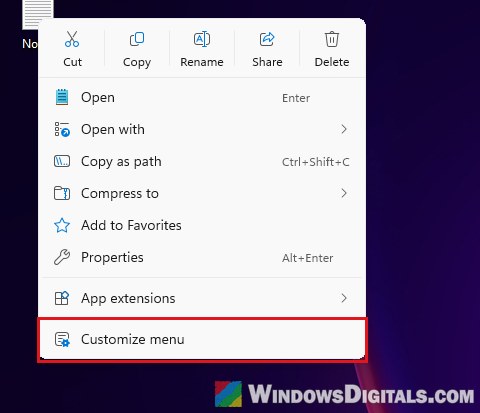
- Scroll down to Additional options.
- Turn on the Show more options switch.
- Right-click a file again. Show more options now shows at the very bottom of the menu, under Customize menu.
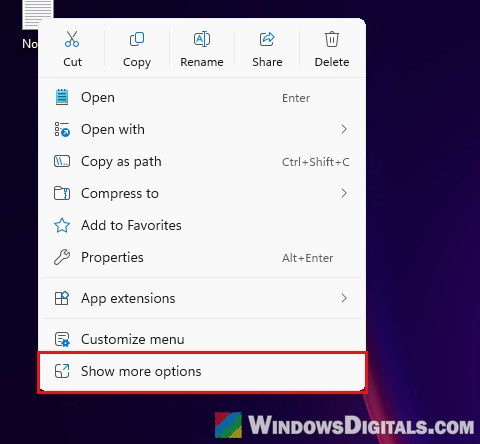
- Click Show more options to open the full classic menu, the same one you get with Shift + right-click.
It’s one extra click, but at least you don’t have to remember to hold Shift.
Make the new menu look more like the old one
While you’re on the Context menu page, you can also set up the new menu the way you’re used to. A lot of what people missed in the Windows 11 menu can now be turned back on without any registry tweak:
- Under File actions, turn on Send to, Print, Create shortcut or Rotate image to put them back in the main menu. Copy as path is on by default.
- Under App extensions, choose which of your apps’ entries show in the main menu instead of in a submenu.
- Turn on “Arrange primary actions inline” to show Cut, Copy, Paste, Rename, Share and Delete as normal text entries instead of the row of icons at the top.
- Turn on “Move Properties to the bottom of the context menu” so Properties sits where it was in Windows 10.
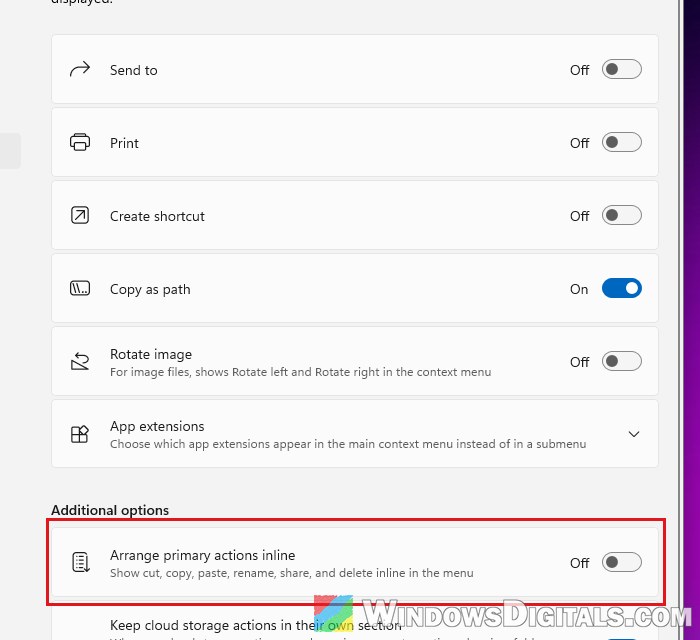
With inline actions and Properties at the bottom, the new menu ends up closer to the Windows 10 layout, and it opens faster than the old one.
Related guide: How to Remove Items from Right-Click Menu in Windows 11
Turn the new menu off with ViVeTool (advanced)
If you really want the classic menu as the default again, you can turn the new menu off with ViVeTool, a free, open-source tool that switches hidden Windows features on or off. Once the new menu is off, the old registry tweak works again. We tested this on Windows 11 26H2, and after turning off the new menu’s feature and restarting, a normal right-click opened the full classic menu. On a PC that got the new menu through the update, it should work the same way.
Please be warned that this isn’t supported by Microsoft. A later Windows update can turn the new menu back on, or remove the old menu altogether, so treat it as a temporary fix. Please at least create a system restore point first, and if you’re not sure what you’re doing, it’s better to just stick with Shift + right-click or Show more options instead.
Follow the steps below:
- Go to the ViVeTool releases page on GitHub,
https://github.com/thebookisclosed/ViVe/releases, and download ViVeTool-v0.3.4-IntelAmd.zip (or ViVeTool-v0.3.4-SnapdragonArm64.zip if your PC has a Snapdragon processor).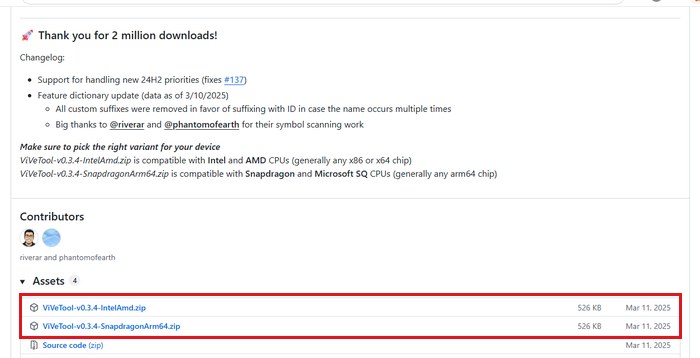
- Extract the zip file to a folder called
C:\ViVeTool. - Right-click the Start button and select Terminal (Admin). Click Yes if a UAC prompt appears.
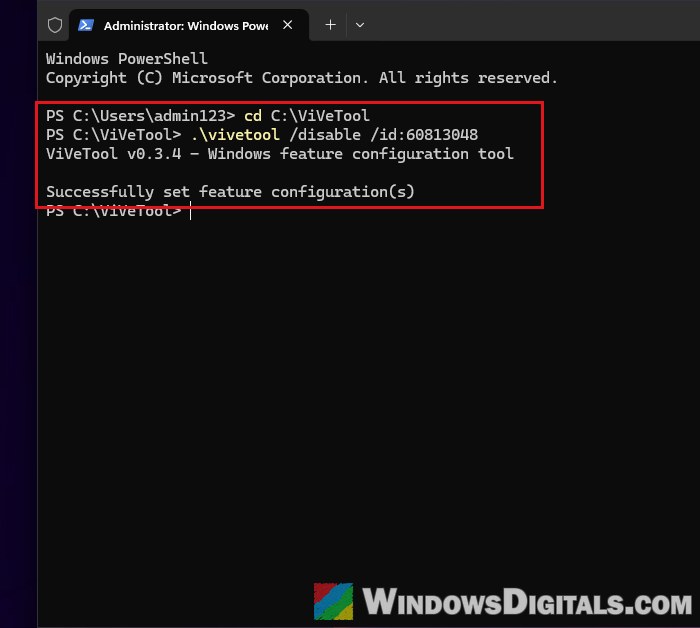
- Type the following commands one by one, and press Enter after each:
cd C:\ViVeTool
.\vivetool /disable /id:60813048
You should see “Successfully set feature configuration(s)“. Don’t leave out the
.\at the start: Terminal opens PowerShell, which won’t run a program from the current folder without it.
- If you removed the old registry tweak at some point, add it again with this command:
reg.exe add "HKCU\Software\Classes\CLSID\{86ca1aa0-34aa-4e8b-a509-50c905bae2a2}\InprocServer32" /f /ve - Restart your PC.
After the restart, right-click a file. The classic menu should now open straight away, like it did before the update.
To undo it, run .\vivetool /reset /id:60813048 the same way and restart. This removes your change, so the new menu should come back once Microsoft’s rollout has reached your PC. If you also want to remove the registry tweak, run the following command, then restart File Explorer or your PC:
reg.exe delete "HKCU\Software\Classes\CLSID\{86ca1aa0-34aa-4e8b-a509-50c905bae2a2}" /f
What if the new menu comes back on its own?
That most likely means a Windows update has switched the feature back on, which can happen with any change made through ViVeTool. You can try running the same command again, but there’s no guarantee it will keep working as Microsoft moves everyone to the new menu. Shift + right-click and Show more options are the safer bets, since they’re built into Windows and don’t depend on a hidden feature setting.