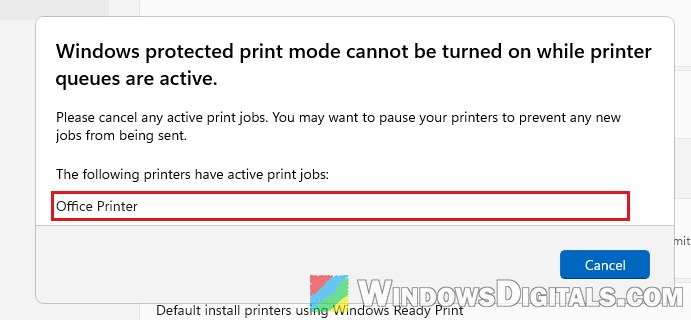
If you’re trying to turn on Windows protected print mode in Settings and Windows 11 stops you with “Windows protected print mode cannot be turned on while printer queues are active“, one or more of your printers still have documents waiting in their print queue. This guide will explain what the message means, how to clear those queues so you can finish the setup, and what to know before you turn the mode on.
Also see: How to Reinstall Printer Driver on Windows 11
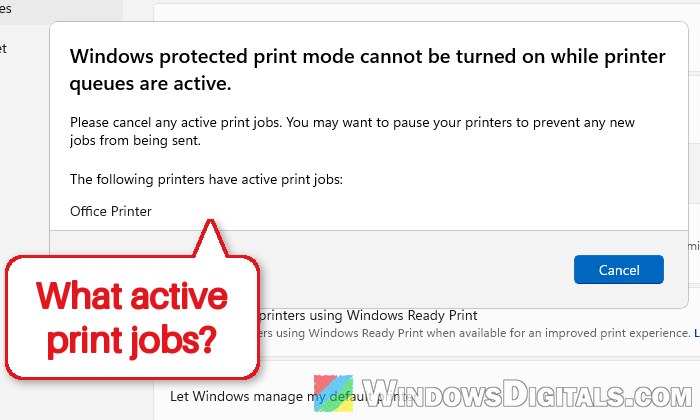
What does “cannot be turned on while printer queues are active” mean?
Every printer you’ve installed in Windows has its own print queue, the list of documents waiting to be printed. A queue is “active” when it still has something in it, even a single test page from weeks ago that never came out.
Turning on protected print mode does a lot more than flip a switch. According to Microsoft, it uninstalls every printer that uses a third-party driver and deletes that driver from Windows. It also removes the Microsoft XPS Document Writer, fax and unsupported software printers such as OneNote (Desktop). Windows won’t change your printers while documents are still waiting to print, so it stops and asks you to cancel any active print jobs first.
The message also lists, under “The following printers have active print jobs“, every printer whose queue isn’t empty, so you know exactly which ones to clear. It suggests pausing your printers so no new jobs come in, but pausing alone doesn’t help: a paused printer with a document still in its queue blocks the setup just the same.
Jobs usually get stuck in a queue when:
- The printer is offline, switched off or no longer connected, so the job has nowhere to go.
- The printer was added on the wrong port (LPT1, USB001 or an old IP address) while you were trying to get it to work, and its test page never printed.
- The printer was paused, so the job is held in its queue.
This can happen after you’ve spent a while trying to get a printer to connect. Each printer you add by hand while troubleshooting can leave its own stuck test page behind, and each one blocks the setup until it’s cleared.
Cancel the documents in each printer’s queue
The simplest fix is to empty each printer’s queue from Settings, then try the setup again. Here’s what you should do:
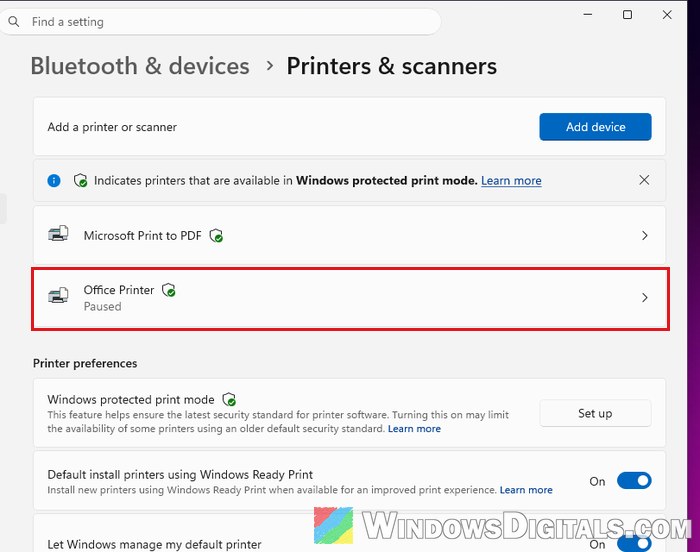
- Press Win + I to open Settings, then go to Bluetooth & devices > Printers & scanners.
- Select the first printer the message listed.
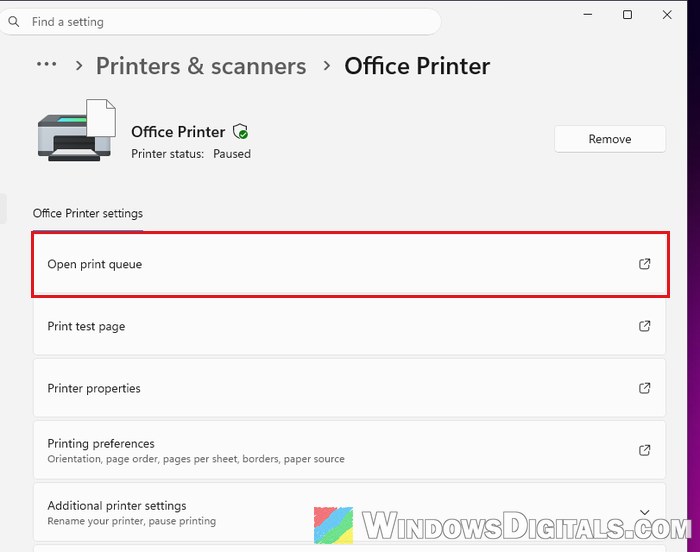
- Click Open print queue.
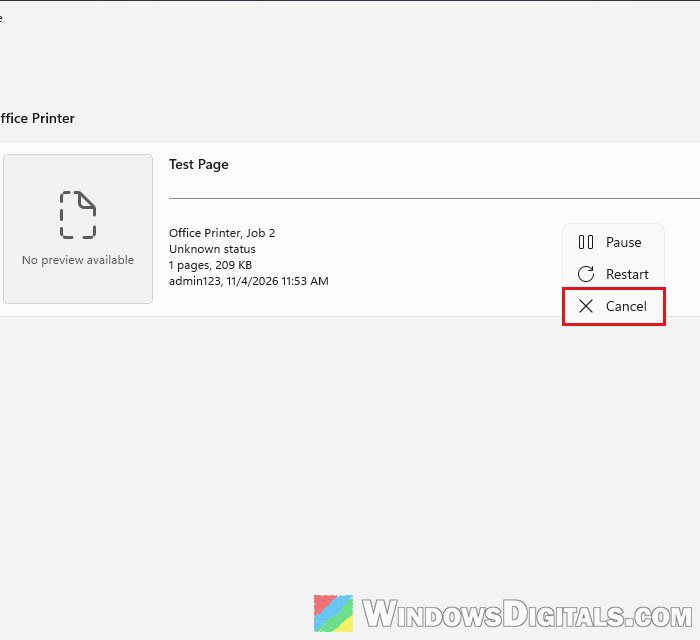
- In the Print Queue window, right-click each document and select Cancel. To clear the whole queue at once, click the “…” (Printer options) button next to the printer’s name instead and select Cancel all.
- Repeat steps 2 to 4 for every printer the message listed, including printers you don’t use anymore.
Once every queue is empty, go back to Printers & scanners and select Set up next to Windows protected print mode again. If a document still won’t go away, restarting both your PC and your printer may clear it.
Related guide: How to Check Print History in Windows 11
Restart the Print Spooler and clear stuck jobs
Sometimes a job refuses to cancel and just sits in the queue. Restarting the Print Spooler, the Windows service that handles everything you print, and if needed deleting the files it keeps for waiting jobs, usually clears it. Here’s how to do it:
- Press Win + R, type “services.msc” and press Enter.
- Find Print Spooler in the list, right-click it and select Restart.
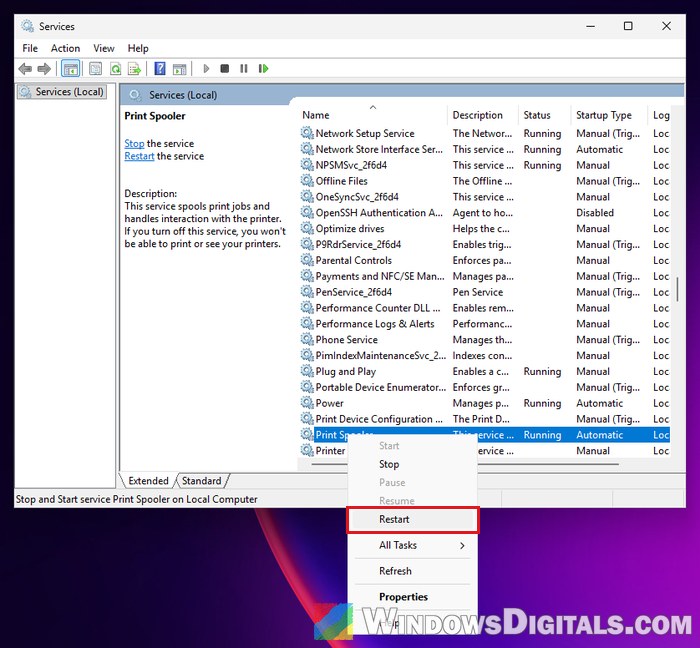
- Check the print queues again. If the jobs are still there, right-click Print Spooler and select Stop.
- Open File Explorer and go to the following folder:
C:\Windows\System32\spool\PRINTERS
If Windows says you don’t have permission to open it, click Continue.
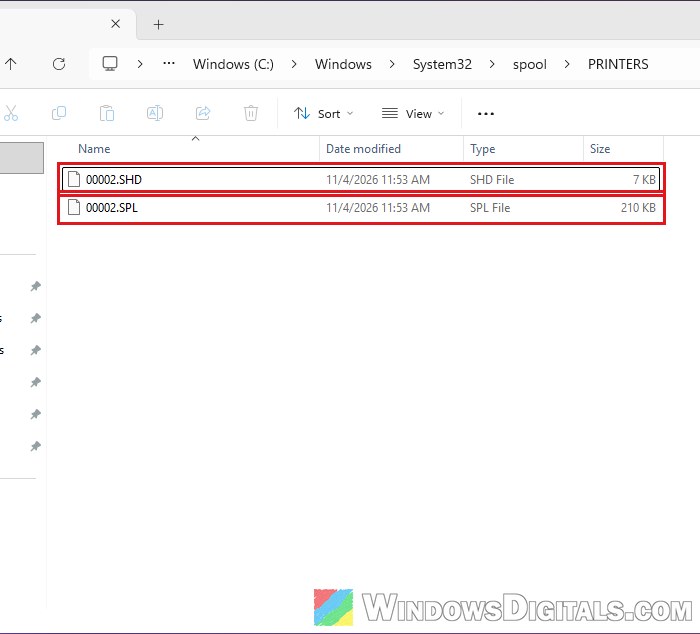
- Delete all the files inside this folder (not the folder itself). Each waiting document usually has two, an .SHD and an .SPL file.
- Go back to Services, right-click Print Spooler and select Start.
The files in that folder are the documents waiting to print, so deleting them while the service is stopped empties every queue at once. After the spooler starts again, try setting up protected print mode once more.
Clear every queue with one PowerShell command
If you’d rather not click through each printer, PowerShell can remove every waiting job on every printer in one go. Open Windows PowerShell as administrator and run:
Get-Printer | Get-PrintJob | Remove-PrintJob
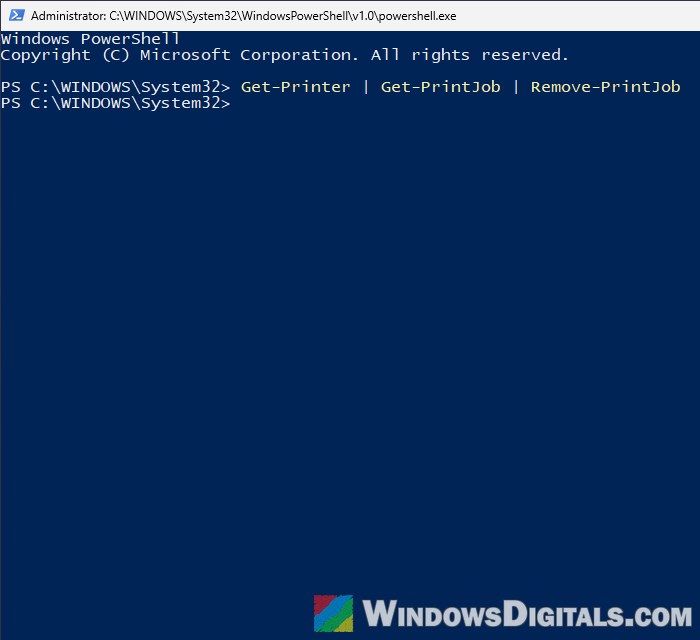
This lists all your printers, gets the jobs in each of their queues, and removes them. It shows no output when it works, so open Printers & scanners afterward and try the setup again.
Pro tip: Using a PowerShell Script to Add a Printer Driver by IP
Remove printers you don’t use anymore
If your list is full of printers that never worked (the ones added on LPT1 or USB001 during troubleshooting, or an old printer you no longer own), just remove them. Their queues go with them, and if they use a third-party driver, protected print mode would have uninstalled them anyway. Here’s how to remove a printer:
- Go to Settings > Bluetooth & devices > Printers & scanners and select the printer.
- Click Remove. The printer is removed at once, without asking you to confirm, so make sure it’s the right one.
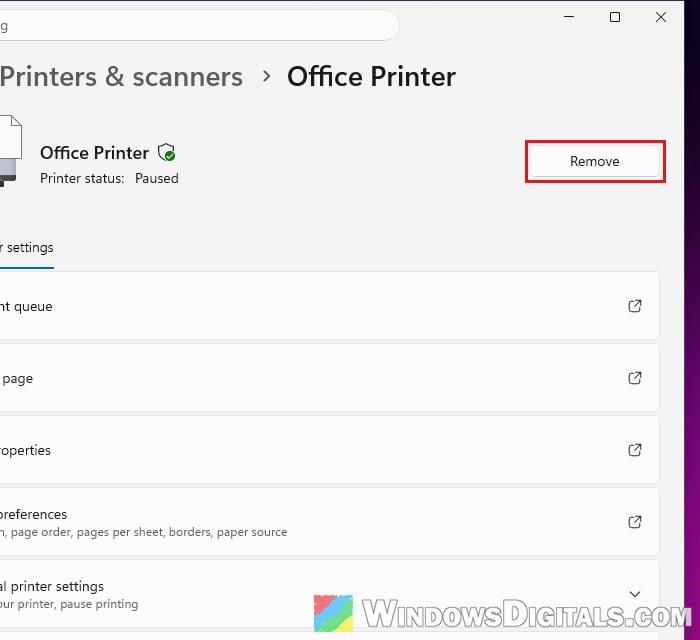
- Repeat for each printer you don’t need.
Once they’re gone, their queues no longer block the setup.
Might be useful: How to Uninstall Drivers in Windows 11
Turn on protected print mode once the queues are empty
Windows protected print mode makes your PC print only through Microsoft’s own driverless printing (Windows Ready Print), with no third-party printer drivers, which Microsoft says is more secure. It’s designed for Mopria certified printers, and most new printers are. In Printers & scanners, printers that work with the mode show a small shield icon.
Before you turn it on, keep these in mind:
- Printers that use a third-party driver are uninstalled, and printers that aren’t compatible can’t be added back while the mode is on.
- A Mopria certified printer that was installed with the maker’s own driver is removed too, but you can add it back afterward.
- Some scanners stop working in protected print mode, even on compatible printers. If you scan a lot, check your exact model on Mopria’s certified products list first.
- Turning the mode off later doesn’t bring removed printers back. You’ll have to reinstall them yourself.
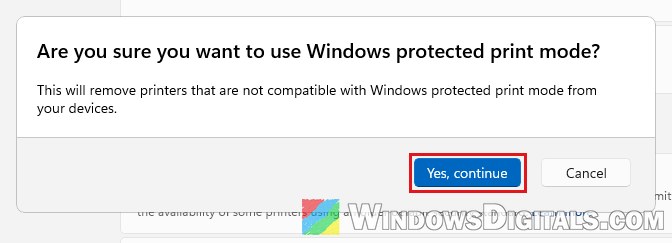
When you’re ready, sign in with an administrator account, go to Printers & scanners and select Set up under Windows protected print mode. With every queue empty, Windows now asks “Are you sure you want to use Windows protected print mode?” instead of showing the message. Choose Yes, continue for each prompt. If any of your printers need to be removed or reinstalled, Windows lists them in the setup dialog before it goes ahead.
If you change your mind, go back to Printers & scanners, select Turn Off under Windows protected print mode, and click Yes. On a work or school PC where the mode was turned on by your organization through Group Policy, that button won’t work, and you’ll need to ask your IT admin instead.