In Windows 11, you can easily do a split screen by simply moving and snapping a window to the left or right side of the screen. However, to do a split screen vertically, moving the window to the top or bottom will not trigger the snapping layout.
This guide will show you two methods on how to split screen vertically (snapping windows to the top and bottom of the screen) in Windows 11, regardless of whether your monitor is in landscape or portrait mode.
Also see: How to Use Snap Layouts to Snap Apps in Windows 11
Page Contents
Windows 11: Split screen vertically (top and bottom)
Use snapping keyboard shortcuts
In Windows 11, there is already a built-in snapping feature that allows you to snap windows on the desktop however you want. To snap two windows to the top and bottom separately, splitting the screen vertically, you can use the Win + Arrow keys keyboard shortcuts to achieve that. Below is a step-by-step guide on how to do so.
- First, make sure both windows you want to snap are opened.
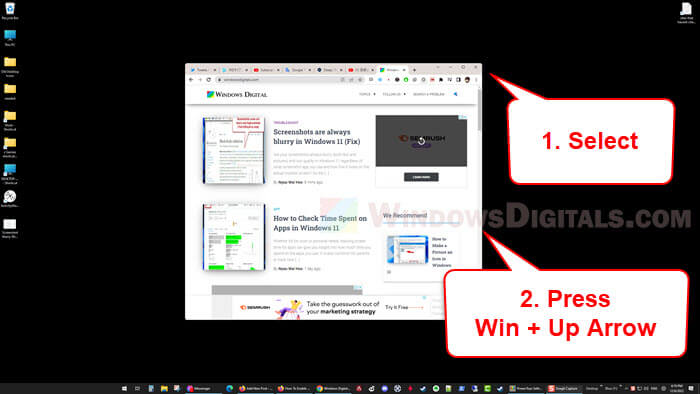
- Select the window that you want to snap to the top.
- While the window is selected, press Win + Up Arrow keys repeatedly until it snap fully to the top side of the screen.
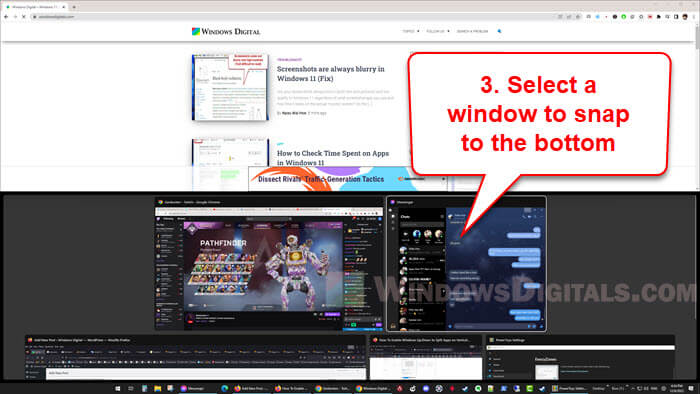
- Once the window is successfully snapped to the top, the bottom part of the screen will show you other windows that you can snap to the remaining part (bottom) of the screen. Select the window you want to snap to the bottom.
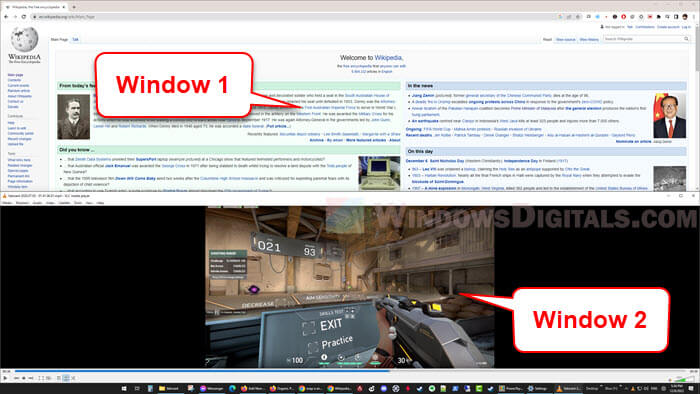
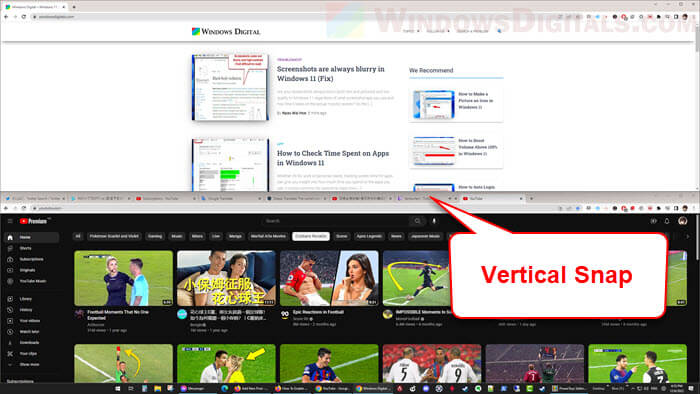
- That’s it! This is how you can quickly split screen vertically in Windows 11.
Related: How to Minimize All Windows on Windows 11 (Shortcut Key)
Use PowerToys FancyZones feature
If the method above doesn’t work or if the version of your Windows does not support the snapping keyboard shortcuts, you can use a tool called Microsoft PowerToys to achieve splitting screen vertically. PowerToys is a multipurpose utility tool developed by Microsoft for power users. FancyZones is one of its many features that offers the ability to split your screen however you want.
With FanzyZones, you can create your own snap layout to snap as many windows as you want and however you want (e.g. split screen vertically, horizontally, 2×2, 3×3, etc.).
To learn how to use PowerToys to split screen vertically in Windows 11, follow the steps below.
- Download Microsoft PowerToys and install it (Look for “PowerToysSetup-version.exe” in the Assets section).
- After installing the app, open it.
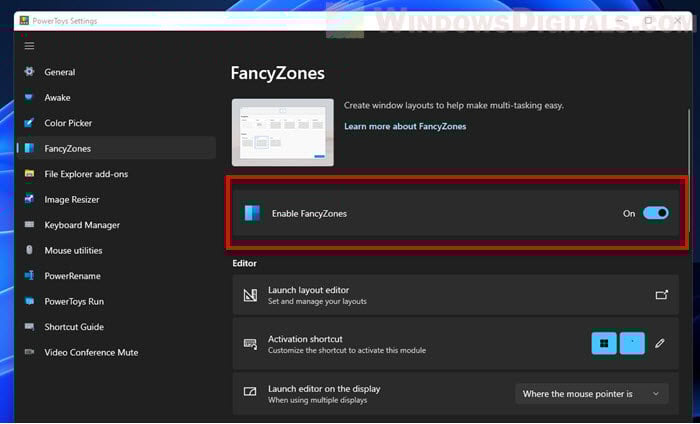
- Select FancyZones from the left pane and make sure the “Enable FancyZones” option is turned on.
- Next, click the Launch layout editor.
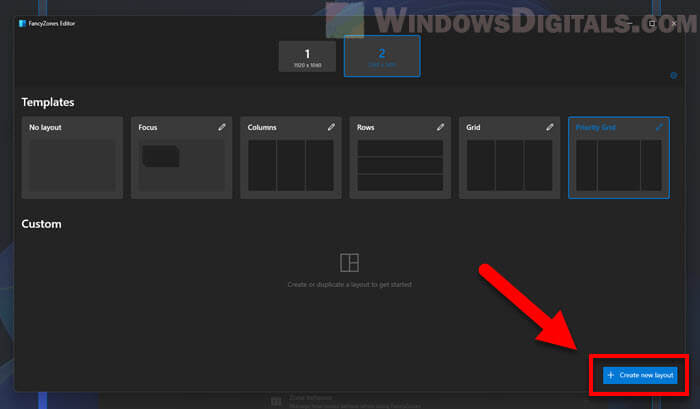
- From here, you can see all the templates you can use to snap your windows. To create a new snap layout, select “Create new layout“.
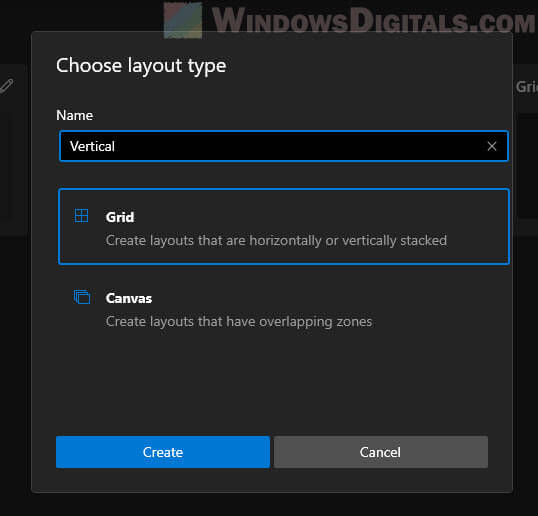
- When prompted to choose a layout type, select “Grid” and give the custom layout a name.
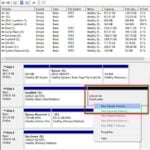
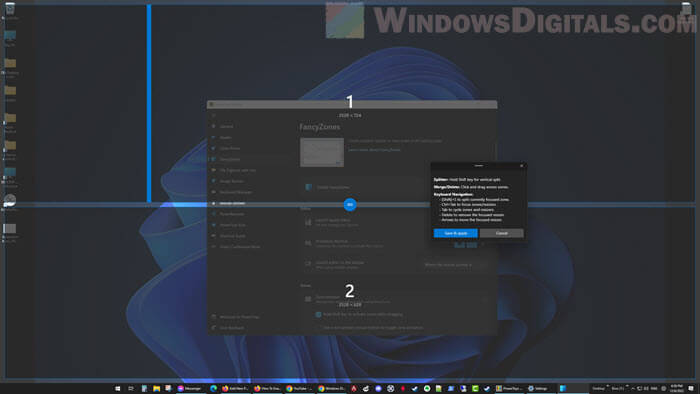
- Create a new layout however you want. To create a top and bottom split screen layout, click and hold the blue splitter icon and then press the Delete key to delete it. Repeat until all split icons are deleted. When there is only 1 screen left, hold Shift to change the splitter to vertical split. Move the splitter where you want it to be to split the screen into the top and bottom.
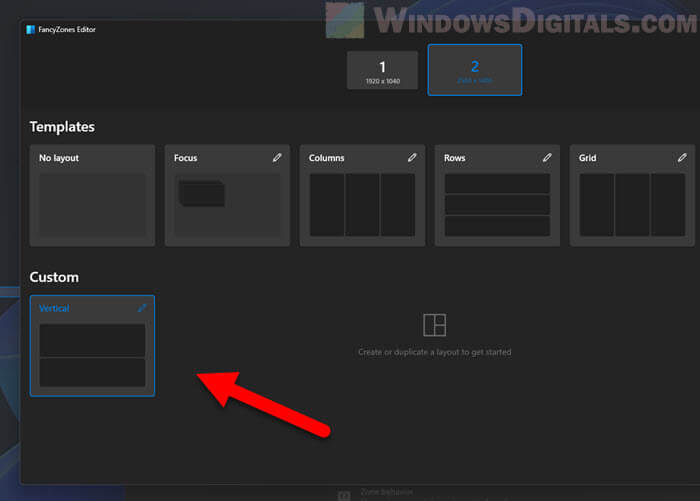
- Once the new layout is created, select the custom layout you have created. You can press the default Win + ` hotkey to open the FancyZones layout editor. You can change this shortcut key via the FancyZones settings.
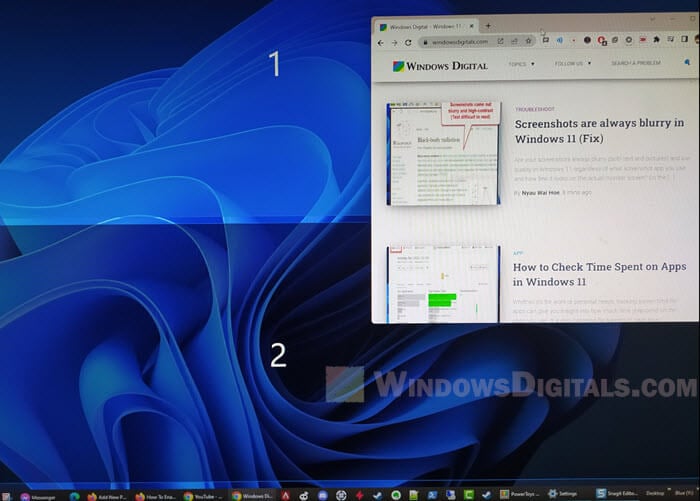
- Once the custom layout is selected, while left-clicking and holding an opened window, press and hold the Shift key and move the window to snap it according to the layout.
Use Windows 11 default snap layout
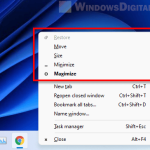
Windows 11 already has a snap layout feature that allows you to snap windows using one of its provided layouts. To do this, you only need to hover your mouse cursor over the maximize (or minimize) button of a window. The snap layout preview will appear.
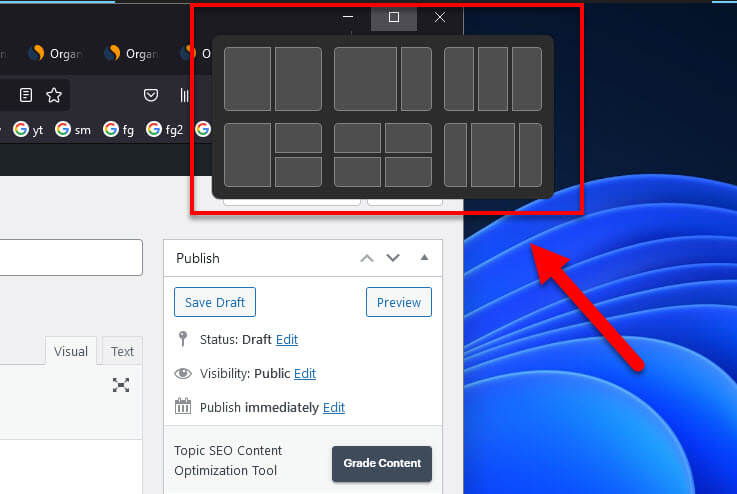
From there, you can select a snap layout and a side that you want to snap the current window to instantly snap the window. After that, you can select the windows you want to snap on the remaining spaces according to the layout.